


9
Assembly and Installation
Tools needed for assembly:
8.5mm drill bit
M10 x 1.5P tap
17mm wrench
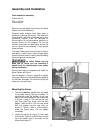
Remove the clear plastic from around the Stock
Feeder and Fence Assembly.
Exposed metal surfaces have been given a
protective coating at the factory. This should be
removed with a soft cloth moistened with a good
commercial solvent, such as kerosene or
mineral spirits. Do not use acetone, gasoline, or
lacquer thinner for this purpose. Do not get
solvents near plastic or rubber parts, and do not
use an abrasive pad because it may scratch
metal surfaces.
The Stock Feeder should be mounted to a band
saw table in a well-lit area. Leave enough space
around the work area for loading and off-loading
stock and general maintenance.
The Stock Feeder and the
band saw to which you are mounting it
should both be disconnected from power
during installation.
Follow these steps to assemble and install the
Stock Feeder and Fence:
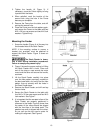
Use the diagram in Figure 1 (page 8) to identify
the proper location for marking the hole patterns
on the band saw table. Do not drill and tap the
holes yet, only mark them.
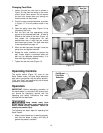
Mounting the Fence
1. The fence must be parallel with the blade
for accurate cuts as well as for safety. To
achieve this, mark the location of the near
hole for the Fence based on the dimensions
in Figure 1, page 8. Drill and tap the near
hole then place the fence over the hole
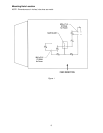
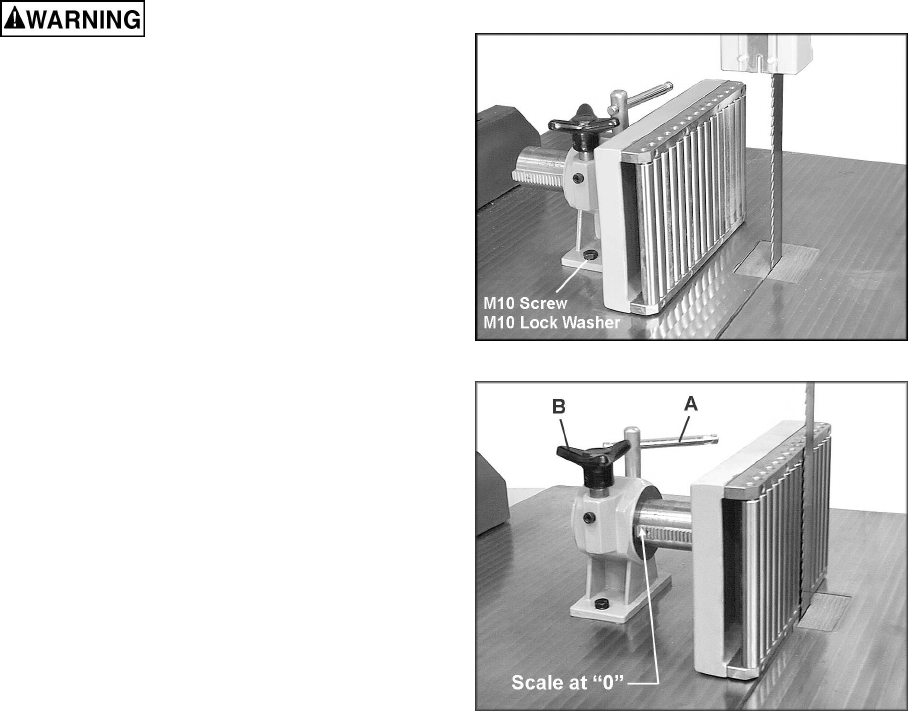
pattern. Insert an M10 x 30 hex cap screw
with lock washer into the near hole, as
shown in Figure 2. With a 17mm wrench,
make the screw snug. Do not tighten
completely.
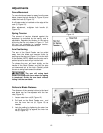
2. Loosen the handle (A, Figure 3) and rotate
the knob (B, Figure 3) until the fence is right
up to the blade; that is, the scale on the
fence should be at “0”.
Figure 2
Figure 3