


11
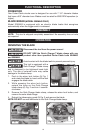
INSTALLING THE BLADE
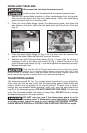
Disconnect the tool from the power source!
Avoid contact with the blade teeth to prevent personal injury.
1. Remove any accumulated sawdust or other contaminates from the guards,
from around the arbor and from the blade clamp.
Check the telescoping
guard to ensure that it is in working order.
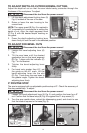
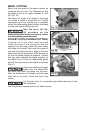
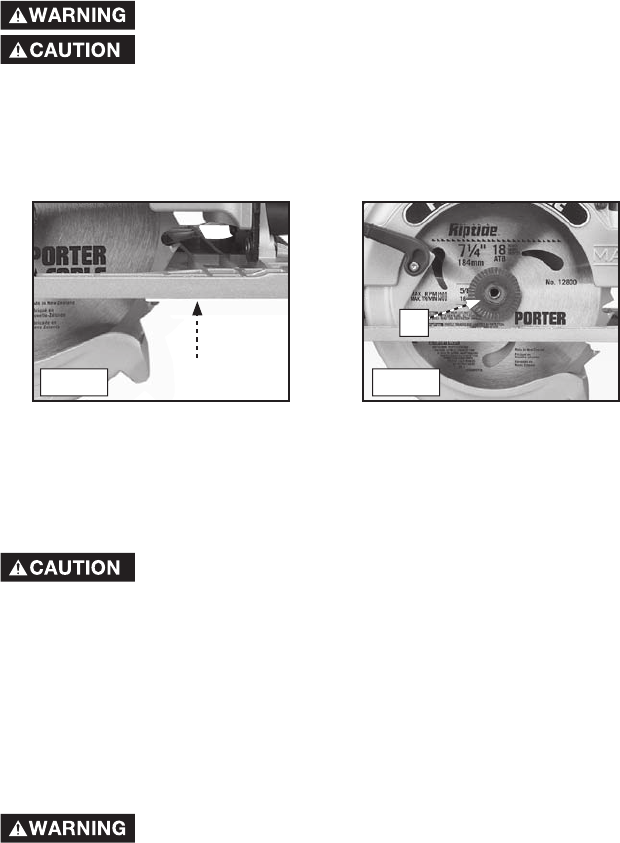
2. Clean the inner blade flange, retract the telescoping guard, and place the
new blade on the arbor. Verify that the teeth point up at the front of the saw
(Fig. 4).
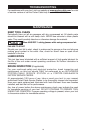
3. Place the outer blade flange (A) Fig. 5 on the arbor with the smooth side
against the blade. Mate the flats with those on the arbor.
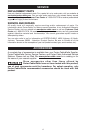
4. Replace the Quik-Change blade clamp (A) Fig. 2 finger tight by turning it
clockwise. Push in the arbor lock button (A) Fig.1, extend the lever on the
Quik-Change blade clamp (A) Fig. 2, and hand-tighten the assembly securely.
Release the arbor lock.
Verify that the Quick Change blade clamp lever is tight and quickly
returns to its closed position before connecting the tool to the
power source. If it doesn’t return, clear the debris from the clamp. Visually inspect the
blade clamp lever regularly to ensure that it is not extended during use.
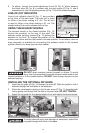
TELESCOPING GUARD
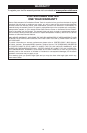
The telescoping guard (A) Fig. 3 is a safety device important for your protection.
Every time you use the saw, verify that the telescoping guard rotates freely and
returns quickly and completely to its closed position. At least once a month,
remove any accumulated debris (sawdust, pitch, etc.) from the area around the
hub (B) of the telescoping guard. DO NOT LUBRICATE THIS AREA. The hub has
a dry film lubricated surface that does not need oiling. DO NOT block or wedge
the telescoping guard in the open position.
DO NOT use your saw if the telescoping guard is not in
working order. If telescoping guard movement is sluggish
or binding exists, return the saw to your nearest AUTHORIZED PORTER-
CABLE SERVICE STATION or PORTER-CABLE SERVICE CENTER for repair.
Fig. 4 Fig. 5
A