


Ridge Tool Company • Elyria, Ohio • U.S.A.
11
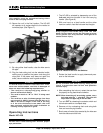
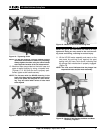
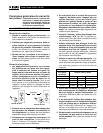
NOTE! The HC-300 features a spring loaded hooking
mechanism that allows for easier tool pre-setting.
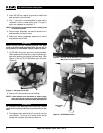
Always tighten the chain using the swivel handle
when the exact location of the cut is determined.
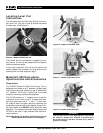
10. Machined flats are provided on the tool’s base and
posts to assist leveling by using a torpedo level.
(Figures 17 & 18) Once the tool is properly posi-
tioned, tighten crank handle securely.
NOTE! The flat area with the RIDGID lettering in the
back of the base and the machined areas on the
side of the posts are designed for level mount-
ing. They are useful when series of holes need
to be aligned.
WARNING
Never let go of the tool until the chain is fully
tightened. Doing so may result in the tool becom-
ing loose and falling, resulting in serious injury.
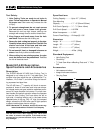
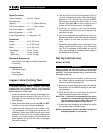
11. Lift the HC-300 motor assembly and mount on the
two posts by pushing firmly against the post
springs until you hear a click sound, indicating that
the plunger latch mechanism is properly engaged.
(Figure 19)
NOTE! The click sound indicates that the plunger has
captured the base and the motor assembly.
HC-450/HC-300 Hole Cutting Tools
Figure 16 – Tightening Chain
Figure 17 – Model HC-300 Level Mounting Area
Figure 18 – Model HC-300 Level Mounting Area
Figure 19 – Model HC-300 Putting the Motor and Base
Assembly Together