


14
MAINTENANCE
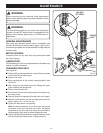
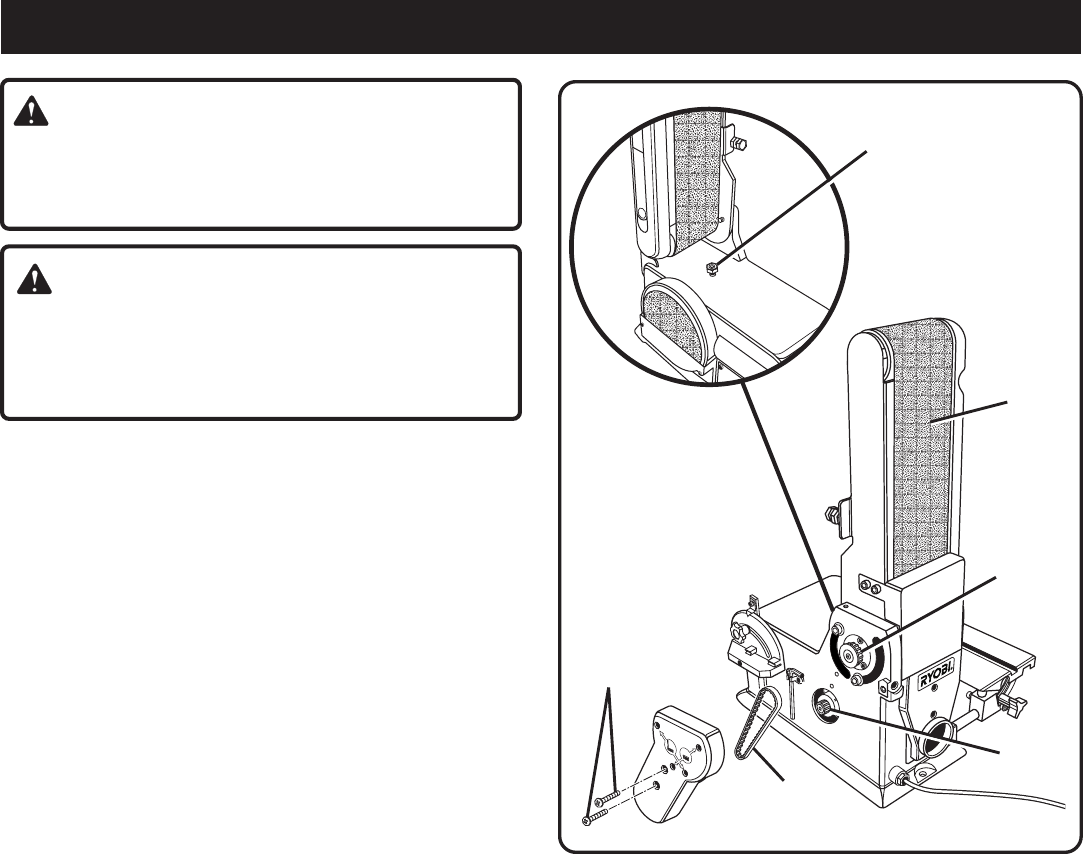
Fig. 20
WARNING:
When servicing use only identical Ryobi replacement
parts. Use of any other parts may create a hazard or cause
product damage.
WARNING:
To avoid serious personal injury make sure the belt/disc
sander is turned OFF and the cord is unplugged from the
power source before performing any maintenance or
adjustment.
GENERAL MAINTENANCE
After using your belt/disc sander, clean it completely and
lubricate all sliding and moving parts. Apply a light coat of
automotive type paste wax to the worktable to help keep the
surfaces clean.
MOTOR HOUSING
Frequently blow out any dust that may accumulate inside
the motor housing.
LUBRICATION
The ball bearings in this tool are permanently lubricated; they
require no further lubrication.
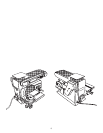
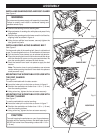
CHANGING DRIVE BELT
See Figure 20.
■ Using a phillips head screwdriver, remove the two screws
in the center of the pulley cover.
■ Remove the cover.
■ Raise sanding belt to the vertical sanding position (see
Figure 20).
■ Next, loosen the hex head set screw. Raising the motor
pulley releases the belt tension.
■ Remove the old drive belt.
■ Fit the new drive belt on the drive pulley first and then on
the motor pulley.
■ Test belt tension by squeezing the belt with your fingers.
■ Adjust the belt tension with the hex head set screw until
there is about 1/4 in. (6 mm) of give.
■ Tighten the belt tension nut securely.
Note: Excessive tightness on the drive belt may cause
increased noise and overload the motor. Excessive
looseness on the drive belt may cause the drive belt to
fail prematurely and make a severe chattering noise.
■ Using a phillips head screwdriver, reinstall the pulley cover
and the two phillips head screws. Tighten securely.
PHILLIPS HEAD
SCREWS
SANDING
BELT
HEX HEAD
SET SCREW
DRIVE
BELT
DRIVE
PULLEY
MOTOR
PULLEY