


Page 16
ASSEMBLY
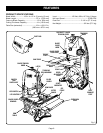
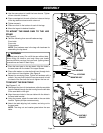
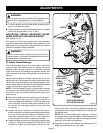
BLADE TENSION KNOB
TO INCREASE
TENSION
TO DECREASE
TENSION
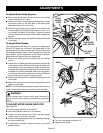
TO ADJUST BLADE TENSION
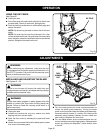
See Figures 13 - 14.
n Unplug the saw and remove the switch key.
n Make sure RapidSet™ Blade Tension Lever is in the
locked position. See Figure 14.
n Before using the band saw, turn the blade tension knob
on the top of the saw clockwise to engage tension.
Check blade tension by the sound the blade makes (similar
to plucking a guitar string).
n Pluck the back straight edge on the coasting side
opposite the blade guides while turning the tension knob.
Sound should be a musical note. Sound becomes higher
pitched as tension increases.
n Never increase blade tension so tight as to completely
compress the spring. When completely compressed, the
spring can no longer act as a shock absorber.
NOTE: Too much tension may cause the blade to break.
Too little tension may cause the blade to slip on the wheels
or not track properly. The wider the blade, the more tension
must be used.
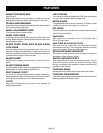
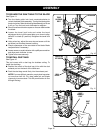
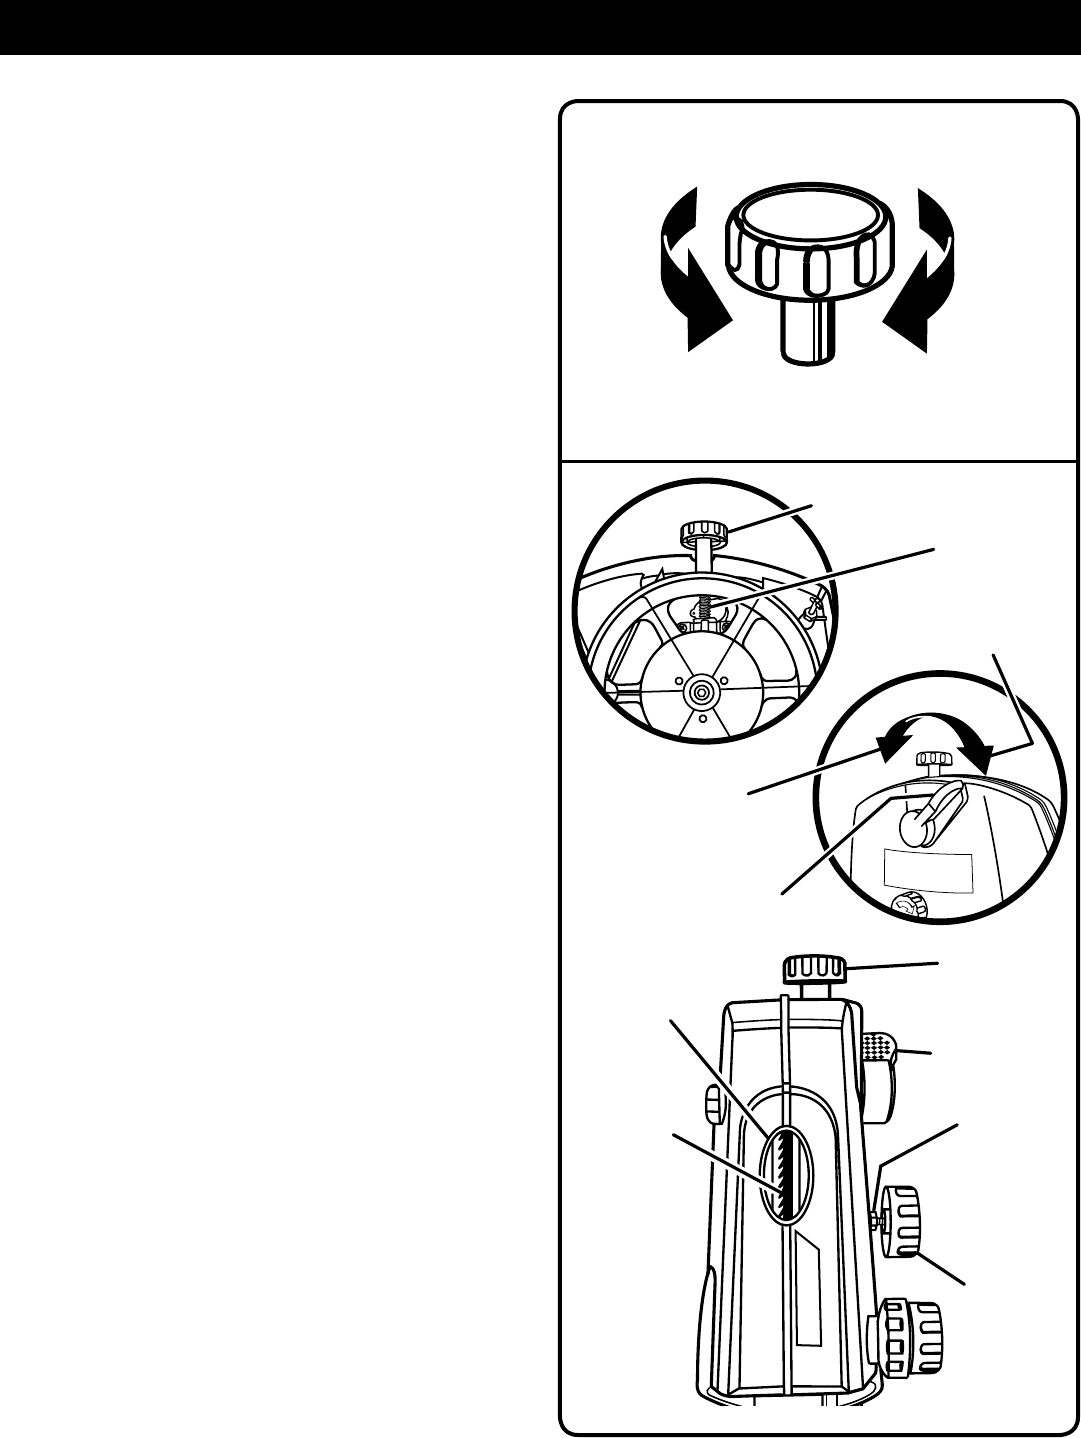
TO TRACK THE BLADE
See Figure 14.
NOTE: Adjust blade tension properly before making tracking
adjustments. Check that the blade guides are not interfering
with the blade.
To Adjust:
n Open the front cover by releasing the upper and lower
latches. Watch the blade’s position on the upper tire as
you slowly turn the upper wheel clockwise by hand. If the
blade moves away from the center of the tire, the tracking
must be adjusted.
If the blade has moved left or right of center:
NOTE: It may be necessary to loosen the hex nut for a larger
range of adjustments. Be sure to retighten after adjusting.
n Loosen hex nut. Turn the tracking knob (clockwise if blade
has moved left and counterclockwise if blade has moved
right) while turning the wheel by hand until the blade
moves back and rides in the center of the tire. Retighten
hex nut.
n Check the position of the blade on the lower tire. The
blade should be completely on the tire. If not, adjust the
tracking until the blade is on both tires.
n Rotate the upper wheel by hand in a clockwise direction
for a few more turns. Make sure the blade stays in the
same location on the tires. Readjust, if necessary, until
blade is tracking properly.
n Close front cover and relatch.
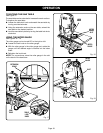
Fig. 13
Fig. 14
SPRING
RAPIDSET™
BLADE TENSION
LEVER
TO UNLOCK BLADE
TENSION
TO LOCK BLADE
TENSION
BLADE
TENSION
KNOB
BLADE ON
WHEEL
TRACKING
VIEW
WINDOW
BLADE
TENSION
KNOB
RAPID SET™
BLADE TENSION
LEVER
HEX NUT
TRACKING
KNOB