


12
13
OPERATION
objects such as pipes, 2x4s, 2x6s, or metal
grates.
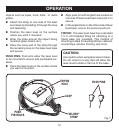
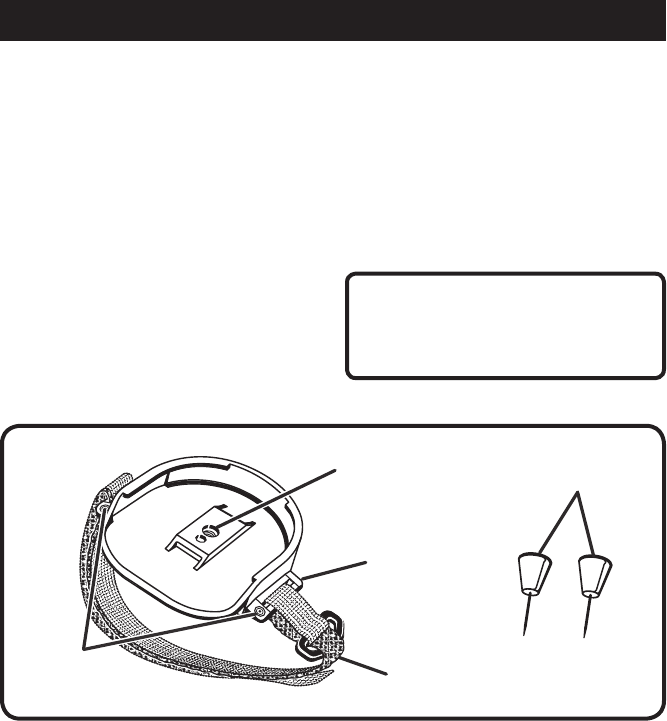
n Attach the strap to one side of the laser
level base by threading it through the loop
and fastening.
n Position the laser level on the surface
where you want it mounted.
n Wrap the strap around the object being
mounted (pipe, board, etc.).
n Place the loose end of the strap through
the remaining loop on the laser level base
and secure.
PUSH PINS: Push pins allow the laser level
to be mounted to stucco and permeable sur-
faces.
n Place the laser level on the surface where
you want it mounted.
n Align push pin with angled hole located on
one side of laser level base and push in to
secure.
n In the angled hole on the other side of laser
level base, secure the second push pin.
TRIPOD: The laser level base has a standard
1/4 in.-20 threaded fitting for attaching to a
tripod base (not included). This method of
mounting is ideal for leveling kitchen cabinets,
countertops, window framing, and more.
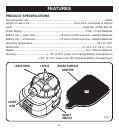
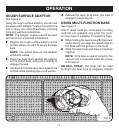
Fig. 7
CAUTION:
Use caution when using laser level in base.
Do not orient in a way that will allow the
laser level to slide or fall out of the base.
PUSH PINS
TRIPOD
HOLE
VELCRO
®
STRAP
PUSH
PIN HOLES
LOOP