


7
OPERATING INSTRUCTIONS
IMPORTANT: Follow all safety instructions and precautions when charging your bat-
tery. Wear complete eye protection and clothing protection. Charge your battery in a
well-ventilated area.
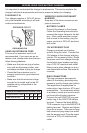
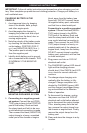
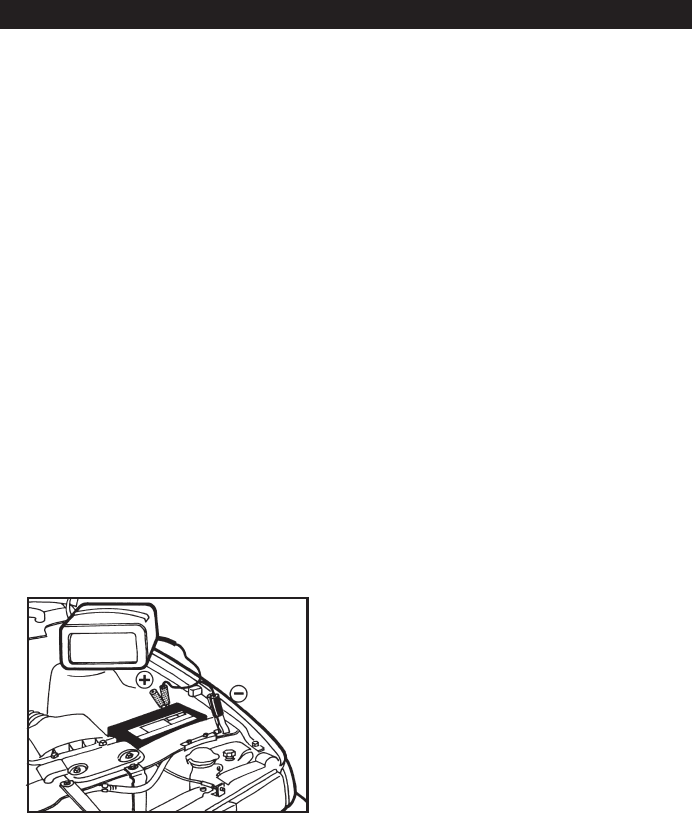
block, away from the battery (see
gure left). DO NOT connect clamp
to negative battery post, carburetor,
and fuel line or sheet metal part.
Connecting to a positive-grounded
system: Connect the black (NEGA-
TIVE) output clamp to the NEGA-
TIVE post of the battery. Rock and
twist the clamp back and forth to be
sure a solid electrical connection is
made. Then connect the red (POSI-
TIVE) output clamp to a heavy, un-
painted metal part of the chassis or
engine block, away from the battery.
DO NOT connect clamp to positive
battery post, carburetor, and fuel line
or sheet metal part.
6. Plug power cord into an 120V AC
electrical wall outlet.
7. The CHARGING (yellow) LED should
light and the charging process
should start. If the CHECK (red) LED
is on, check for correct cable con-
nections.
8. The charger stops charging auto-
matically after the battery is fully
charged. Charge completion is in-
dicated by CHARGED (green) LED
and the charger has stopped charg-
ing and switched to the Maintain
Mode of operation.
9. To disconnect the charger, unplug
the power cord from the 120V AC
electrical wall outlet before attempt-
ing to disconnect the output clamps.
Then, standing away from the bat-
tery, remove the output clamp from
the chassis or engine block. Finally,
remove the output clamp from the
battery post.
10. Clean and store the charger in a dry
location.
NEGATIVE GROUNDED SYSTEM
CHARGING BATTERY IN THE
VEHICLE:
1. Avoid personal injury by keeping
clear of fan blades, belts, pulleys
and other engine parts.
2. Avoid damaging the charger by
keeping the power cord and output
cords away from the hood, door or
moving engine parts.
3. Note the polarity of the battery posts
by checking the identication marks
on the battery: POSITIVE (POS, P
or +) and NEGATIVE (NEG, N or -).
The positive post is usually larger
than the negative post.
4. Identify which battery post is ground-
ed or connected to the chassis. THIS
IS NORMALLY THE NEGATIVE
POST.
5. Connecting to a negative-ground-
ed system: Connect the red (POSI-
TIVE) output clamp to the POSITIVE
post of the battery. Rock and twist
the clamp back and forth to be sure
a solid electrical connection is made.
Then connect the black (NEGATIVE)
output clamp to a heavy, unpainted
metal part of the chassis or engine