


• 5 •
The charger will automatically go into maintain mode and maintain the battery at full 4.
charge without damaging it.
Charge the jump starter as soon as possible after use.5.
Do not use the jump starter while charging the internal battery.
You may also charge the internal battery while driving, using a male-to-male charger
cable (part number 94500109 – not included). Insert one end of the accessory cable into
the 12V DC power outlet and the other end into the vehicle’s accessory outlet (lighter
socket). Completely disconnect the charger cable when the engine is not running.
Using this method to charge the battery overrides the maintain mode
and the battery can be overcharged. Monitor the progress of the battery and when it
reaches a full (100%) charge, disconnect the charger. Do not charge it for more than
four hours or leave the battery unattended. It could explode, causing property damage
or personal injury.
OPERATING INSTRUCTIONS8.
Digital Display Functions8.1
To check the jump starter’s internal battery status, push the Display Button. The display
will show the percent of charge of the internal battery.
When connected to the vehicle with the Jump Start On/Off switch in the OFF position, the
display shows the vehicle’s battery voltage. When connected and in the ON position, the
display shows the equalized voltage between the vehicle’s battery and internal battery.
When the inverter is turned on and being used, the display will show the total wattage
used by the device being powered by the inverter.
Jump Starting a Vehicle Engine8.2
Do not use the jump starter while charging the internal battery.
Turn the vehicle’s ignition OFF before making cable connections.1.
Connect the jump starter to the battery following the precautions listed in section 3.2.
Risk of Explosion.
If you have connected the clips backward, an audio alarm will sound. DO NOT
turn the On/Off switch to the ON position. This could cause serious damage to the
jump starter or the vehicle. Reverse the connections and the audio alarm will stop.
Crank the engine. If the engine does not start within 5-8 seconds, stop 3.
cranking and wait at least 1 minute before attempting to start the vehicle again.
(This permits the battery to cool down.)
After the engine starts, disconnect the black clip (-) and then the red clip (+), in that order.4.
Recharge the jump starter as soon as possible after use.5.
Risk of Explosion.
To prevent sparking, NEVER allow the clips to touch together or to contact the
same piece of metal. Never attempt to jump start a frozen battery.
Powering a 12V DC Device:8.3
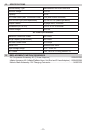
The jump starter is a power source for all 12V DC accessories that are
equipped with a 12V accessory plug. Use it for power outages and shing or
camping trips. Estimated usage time is listed in the chart below.
Make sure the device to be powered is OFF before inserting the 12V DC accessory plug
into the 12V DC accessory outlet.
Ensure that the battery clips are securely clipped on the storage holders.1.
Open the protective cover of the DC power outlet on the front of the jump starter.2.
Plug the 12V DC device into the DC power outlet, and turn the 12V DC device on 3.
(if required).
If the 12V DC device draws more than 15A or has a short circuit, the internal circuit 4.
breaker of the jump starter will trip and disconnect the power to the device. Disconnect
the 12V DC device. The breaker will automatically reset after an overload occurs.