


-9-
W1681 Buffing Assembly
SETUP
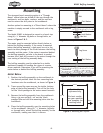
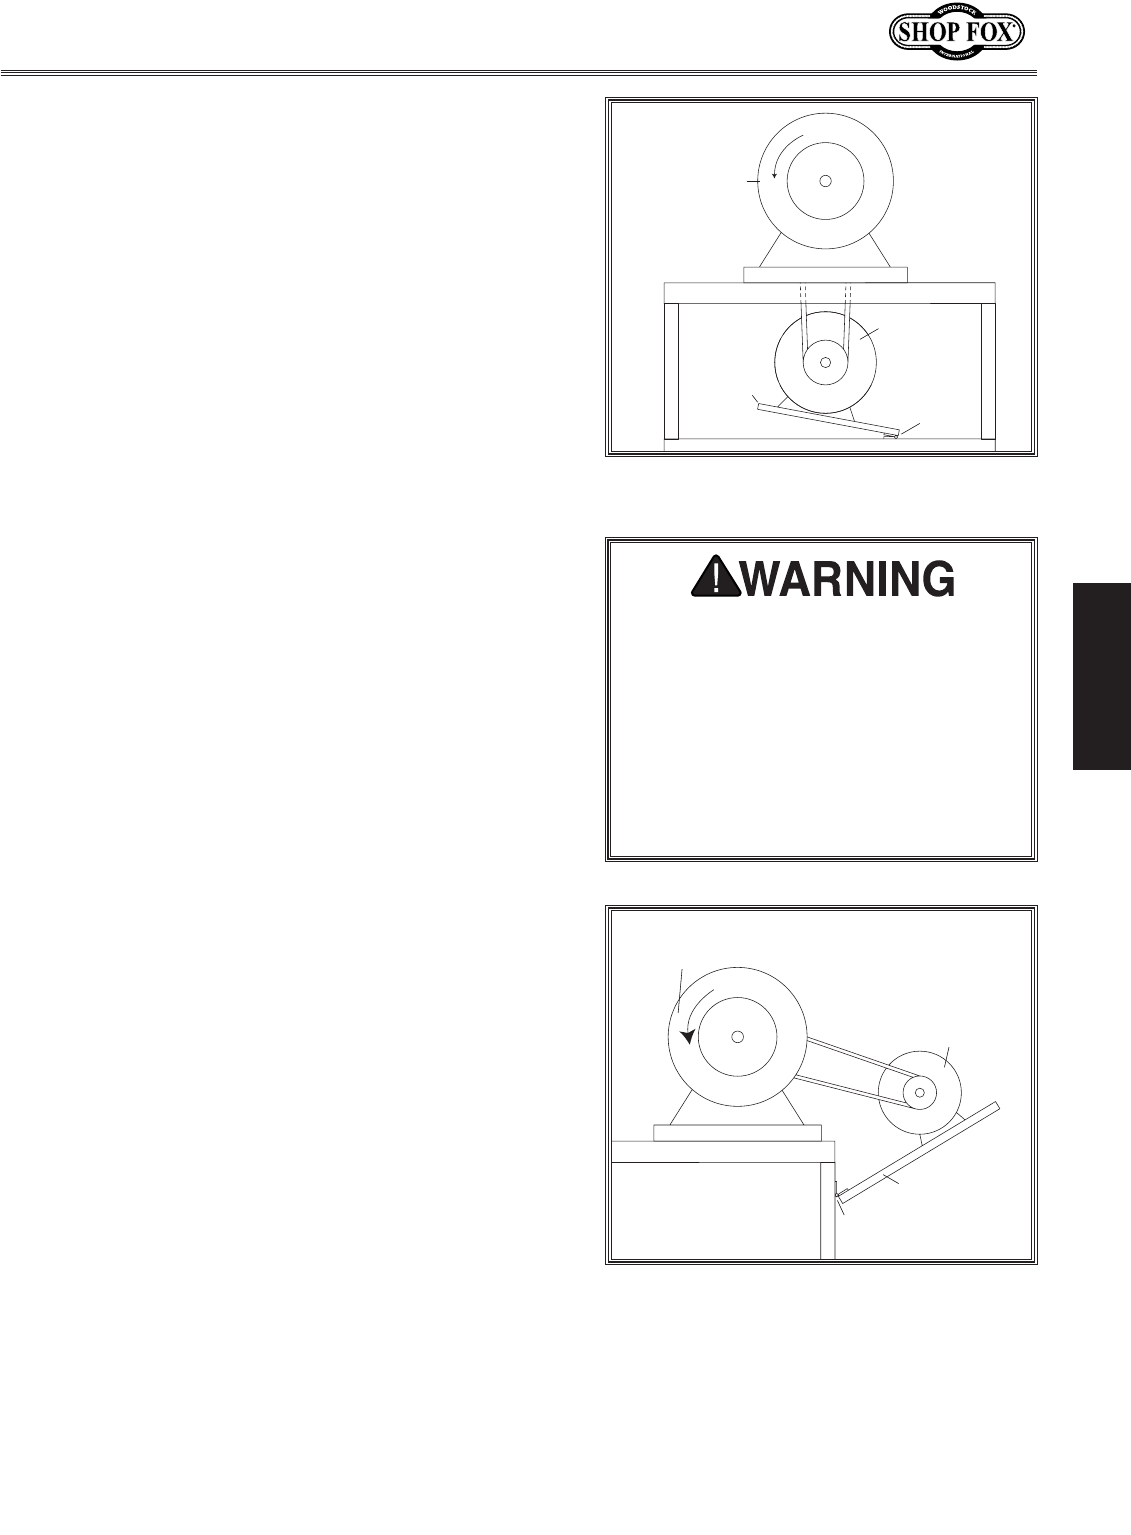
5. Mount the motor on a
1
⁄2" plywood platform below
the buffing assembly so that the motor pulley
is directly beneath the arbor pulley. Be sure to
orient the motor rotation so the buffing wheels
will be rotating downward on the working side of
the buffing assembly. Attach the platform to the
workbench using a piano hinge, as shown in Figure
5.
6. Install the V-belt on the desired pulleys.
Motor Behind
1. Position the buffing assembly on the workbench in
the desired position. Mark the four mounting hole
locations onto the workbench.
2. Remove the buffing assembly from the workbench
and set aside.
3. Using a drill, drill the mounting holes into the
workbench.
4. Place the buffing assembly over the mounting holes
in the workbench. Using (4)
5
⁄16" diameter lag bolts
or through bolts, attach the buffing assembly to the
workbench, making sure that it is secure.
5. Mount the motor on a
1
⁄2" plywood platform and
attach to the back of the workbench with a piano
hinge as shown in Figure 6. Be sure to orient the
motor rotation so the buffing wheels will be rotating
downward on the working side of the buffing
assembly. Attach the motor so the motor pulley is
in-line with the arbor pulley.
6. Install the V-belt on the desired pulleys.
7. We recommend building a plywood guard to cover
the V-belt and motor pulley assembly. This will
prevent the operator from accidentally coming into
contact with the belt during operation.
Buffer Assembly
Motor
Piano
Hinge
1/2" Plywood
Rotation
Working Side
Figure 5. Motor and buffer assembly
locations.
Buffer Assembly
Motor
1/2" Plywood
Piano Hinge
Rotation
Working Side
Figure 6. Side view of motor mounting
behind.
Be sure to mount the motor so the
rotation of the buffing wheels is down-
ward on the working side of the
assembly. If the buffing wheels rotate
upward on the working side, the
object being worked on could be pro-
pelled up and into the path of the
operator causing serious personal
injury.