


-22-
W1761/W1762 12" Table Saw with Riving Knife
SET UP
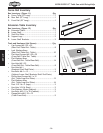
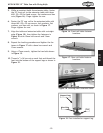
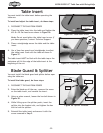
Figure 26. Table insert screw.
Table Insert
Screw
You must install the table insert before operating the
table saw.
To install and adjust the table insert, do these steps:
1. DISCONNECT THE SAW FROM POWER!
2. Place the table insert into the table and tighten the
M5-.8 x 20 flat head screw shown in Figure 26.
Note: Do not overtighten the table insert screw. If
you have questions, contact Technical Support.
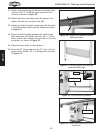
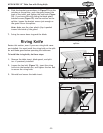
3. Place a straightedge across the table and the table
insert.
4. Use a 3mm hex wrench and straightedge to adjust
the table insert flush with the table as shown in
Figure 27.
The table insert MUST be flush with the table top or the
workpiece will hit the edge of the table insert at the
beginning of the cut.
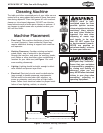
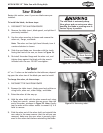
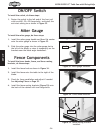
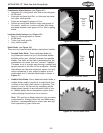
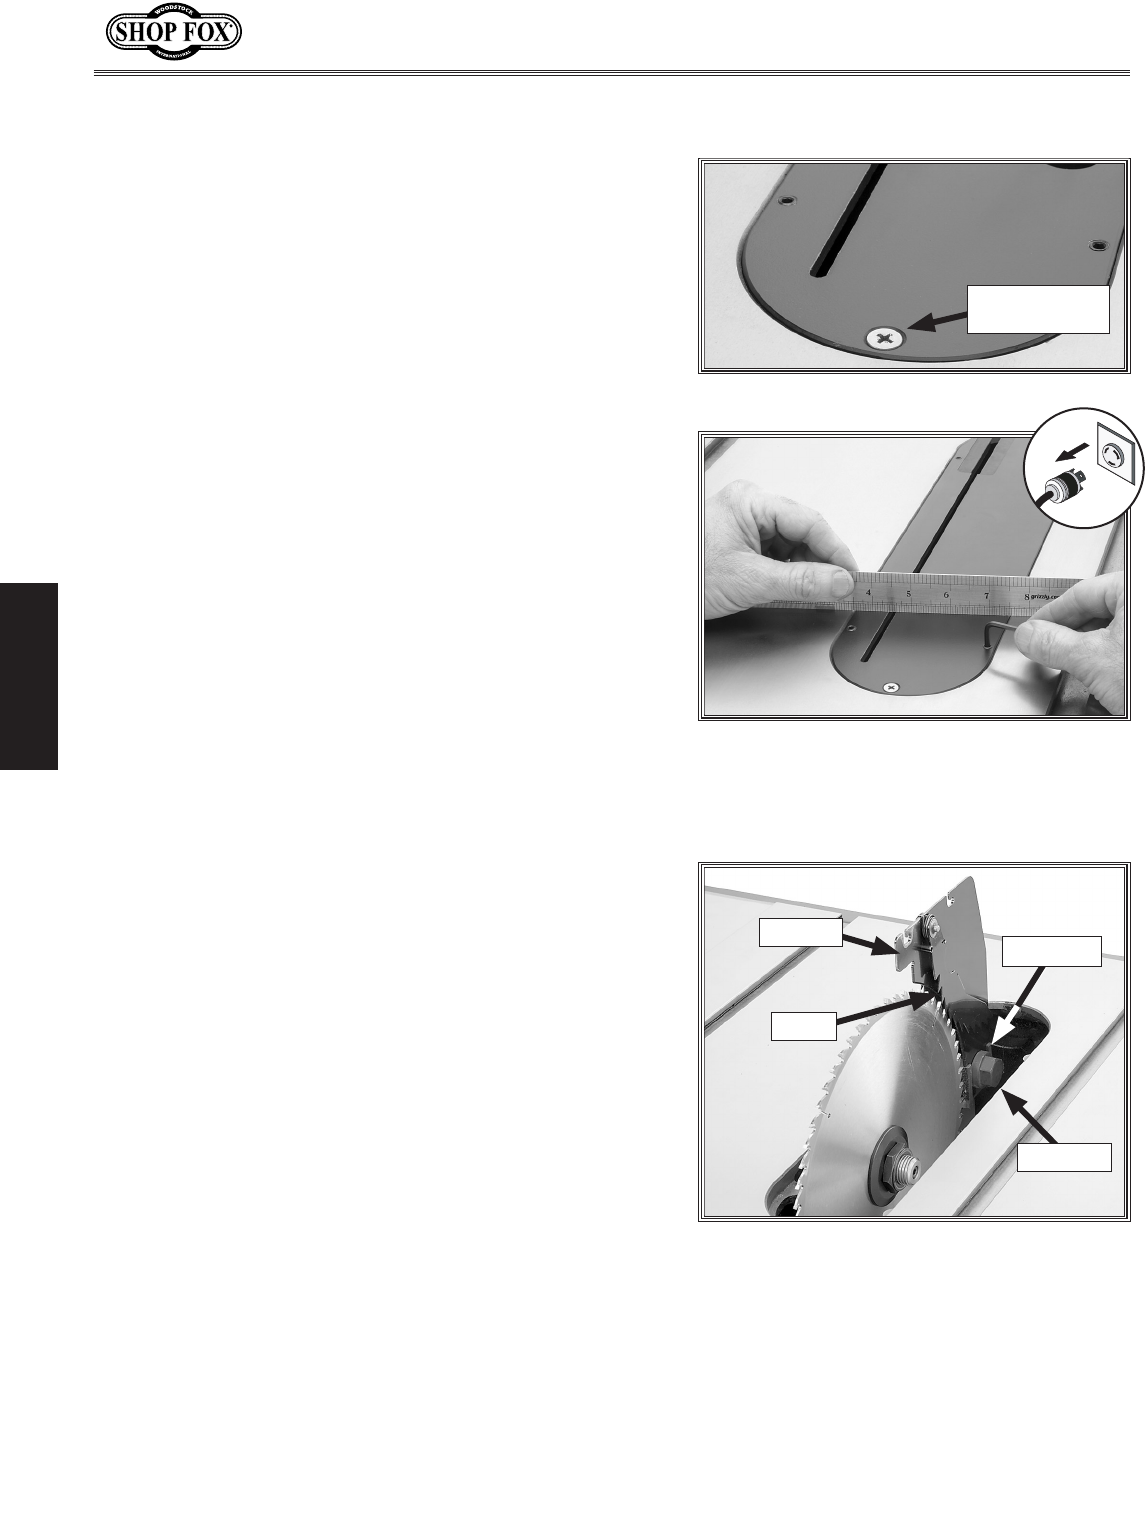
You must install the blade guard and splitter before oper
-
ating the table saw.
To install the blade guard, do these steps:
1. DISCONNECT THE SAW FROM POWER!
2. Raise the blade up all the way, unscrew the screw
on the table insert, and remove the insert.
3. Using an arbor wrench, loosen the hex bolt shown in
Figure 28.
4. While lifting up on the splitter pawls, insert the
splitter into the bracket slot, and tighten the hex
bolt to lock the splitter.
5. Reinstall the table insert and secure it with the
screw removed in Step 2
.
Blade Guard & Splitter
Table Insert
Figure 27. Adjusting the table insert.
Figure 28. Splitter installed.
Hex Bolt
Splitter
Bracket
Pawls