


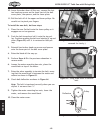


-50-
W1761/W1762 12" Table Saw with Riving Knife
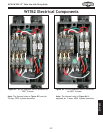
SERVICE
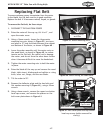
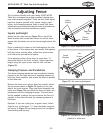
3. Move the blade angle to 30°, or remove the panel
on the right side of the cabinet to access the 45
°
stop bolt.
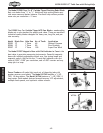
4. Using a 12mm wrench, loosen the jam nut (Figure
67) on the 45° stop bolt, adjust the stop bolt up or
down, then check to see if the blade is 45° to the
table.
5. Continue adjusting the stop bolt until it contacts the
cabinet when the blade is at 45
°.
6. Tighten the jam nut.
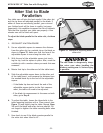
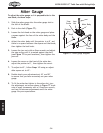
To adjust the tilt indicator arrow, do these steps:
1. Set the 90° stop bolt (see instructions on Page 49).
2. Loosen the blade height handwheel set screw and
remove the handwheel.
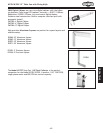
3. Loosen the Phillips head screw shown in Figure 68
and move the tip of the indicator to 0°.
4. Tighten the Phillips head screw and reinstall the
handwheel.
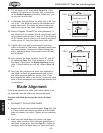
Digital Readout
The digital readout displays the current blade angle. We
recommend you set the readout after verifying the 90°
and 45° blade tilt stops.
To set the digital readout, do these steps
:
1. Ensure the 90° stop bolt is set (see Blade Tilt Stops
on Page 49.
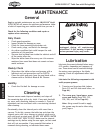
2. Move the blade angle to 0° and press the 0° SET
button (
Figure 69) for several seconds until the
readout displays 0.00.
3. Move the blade angle to 45° and press the SET but-
ton for several seconds until the readout displays
45.0.
Note: If you move the blade angle handwheel when
the power is
disconnected, the digital readout will
be incorrect when the saw is reconnected
.
Figure 69. Digital readout.
Figure 68. Tilt indicator arrow.
45° Set Button
0° Set Button
Indicator
Phillips Head
Screw
Figure 67. 45° stop bolt and jam nut.
45° Stop Bolt
Jam Nut