


-7-
Model W1822 (For Machines Mfg. Since 9/10)
SETUP
Assembly
The assembly process typically requires modifications to
your table saw. To make the process easier, we strongly
recommend that you have another person help you. Also,
if you have to drill new holes, we recommend clamping
the components in place when marking or drilling; this
will ensure accurate final results.
Tools Needed Qty
Another Person For Lifting ....................................1
Wrench 13mm ...................................................1
Hex Wrenches 4mm & 6mm ............................ 1 Each
Marker ............................................................1
Precision Straightedge .........................................1
Adjustable Square ..............................................1
Feeler Gauges ..............................................1 Set
Masking Tape ......................................... As Needed
To assemble and install your sliding table attachment,
do these steps:
1. DISCONNECT SAW FROM POWER!
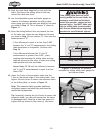
2. Attach the sliding table to the left side of the saw
table so that the sliding table top is 0.010"–0.020"
higher than the top of the table saw to prevent the
workpiece from dragging on the saw table.
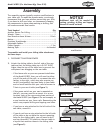
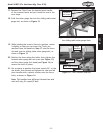
— If the fence rails on your saw prevent installation
of the Model W1822, then you will need to either
cut off the ends of the rails, or re-mount the rails
farther to the right, which may also require you
to drill (and possibly tap) new holes in your table
and cut small notches into your rails for access to
T-slots in your saw’s table (see Figure 3).
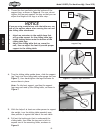
— If the power switch on your saw is mounted on
the left, you may need to re-mount it to a new
location, such as the non-moving base portion of
the Model W1822 (see Figure 4 for an example) or
a new location on your fence rails. Remounting the
switch may require drilling and tapping new holes.
— If you have a wing attached to the left side of the
saw table, remove it.
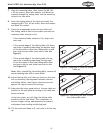
— If you do not have a wing attached to the left side
of the table or do not have the correct mounting
holes for the sliding table, you will need to drill
and tap three M8-1.25 holes into the saw table in
a layout that matches those in the sliding table
(see Figure 5).
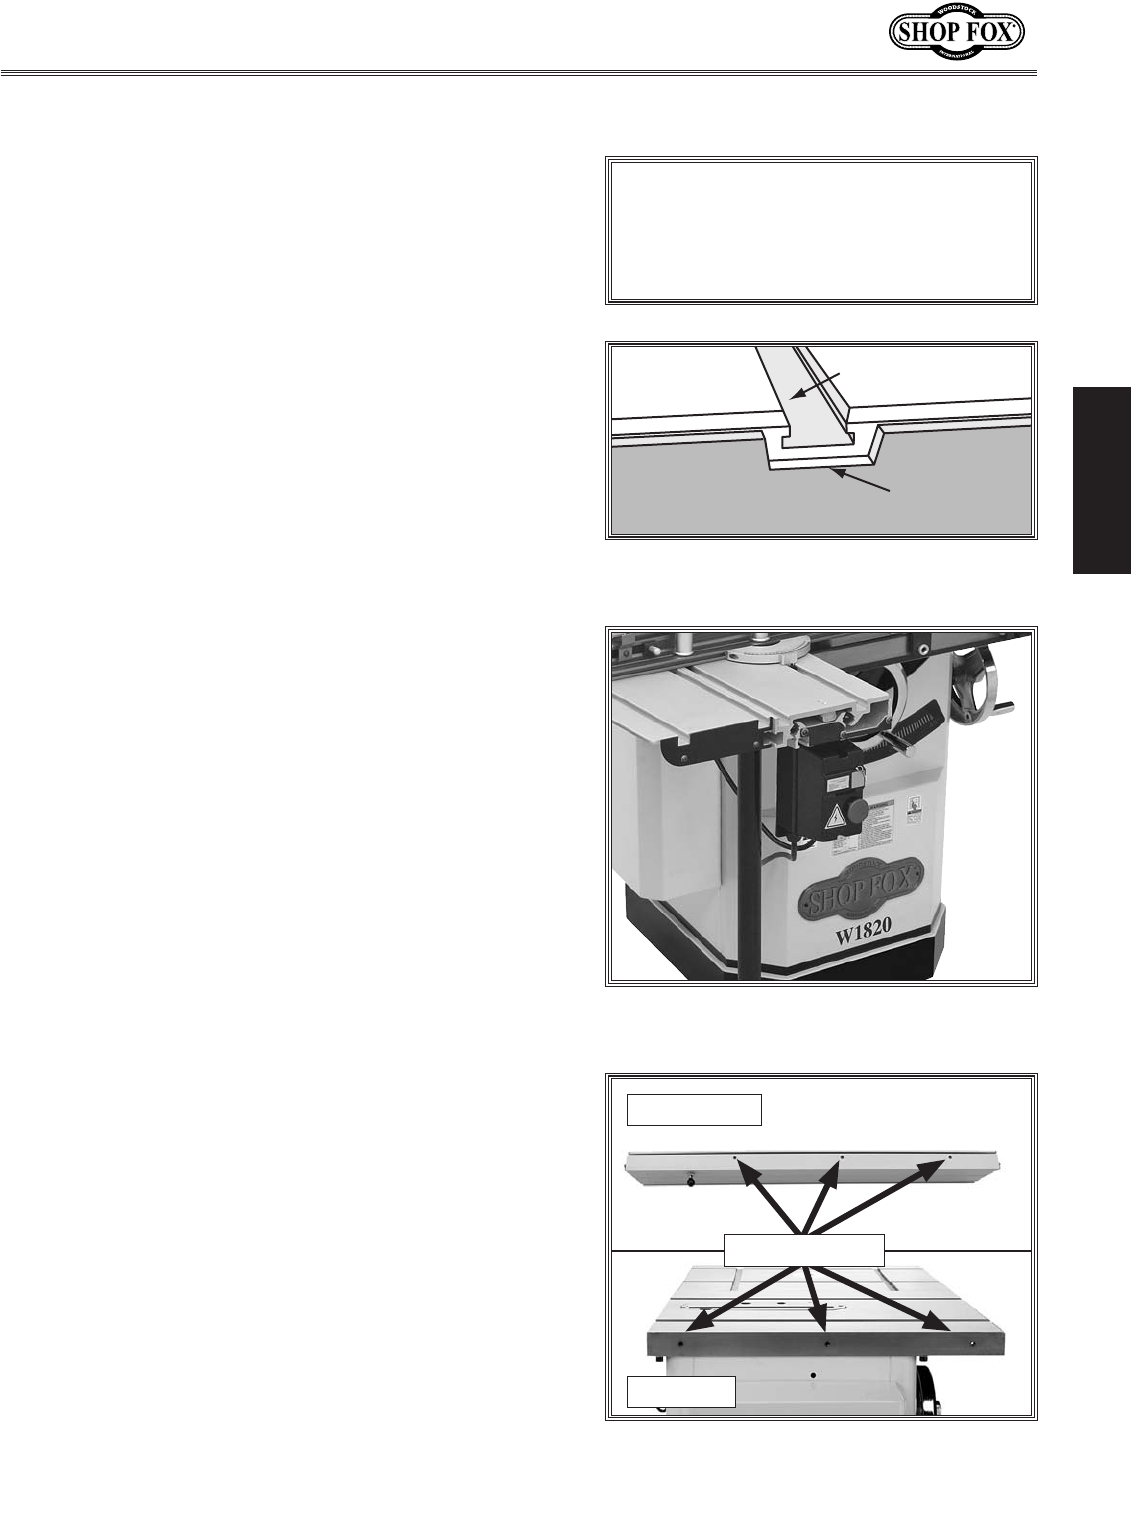
Figure 5. Mounting hole locations.
Mounting Holes
Sliding Table
Saw Table
Figure 4. Example of relocating the power
switch.
NOTICE
Additional tools will be needed for
cutting, grinding, drilling, and tapping
threads in metal surfaces
Fence Rail
Table T-Slot
Cut-Out
Figure 3. Illustrated example of a fence
modification.