


Maintenance
T
o reduce the risk of injury, turn
p
ower switch “OFF” and remove
p
lug from the power source outlet before
maintaining or lubricating your band saw.
GENERAL
Frequently blow out any dust that may accumulate
inside of the housing and motor.
Clean off pitch which accumulates on the table, blade
guides, and bearings.
Remove pitch and dust from the upper and lower
wheels using a stiff brush. Do not use solvents.
An occasional coat of paste wax on the work table
will allow the wood being cut to glide smoothly across
the work surface.
Certain cleaning agents and
solvents damage plastic parts.
Including: gasoline, carbon tetrachloride, chlorinated
cleaning solvents, ammonia and household
detergents that contain ammonia. Avoiding use of
these and other types of cleaning agents minimizes
the probability of damage.
To avoid shock or fire hazard, if the power cord is worn,
cut or damaged in any way, have it replaced
immediately.
All repairs, electrical or mechanical,
should be attempted only by trained
repairmen.
Contact the nearest Skil Factory Service
Center, Authorized Skil Service Station or other com-
petent repair service. Use only Skil replacement parts;
any other may create a hazard.
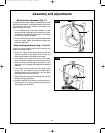
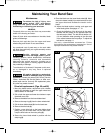
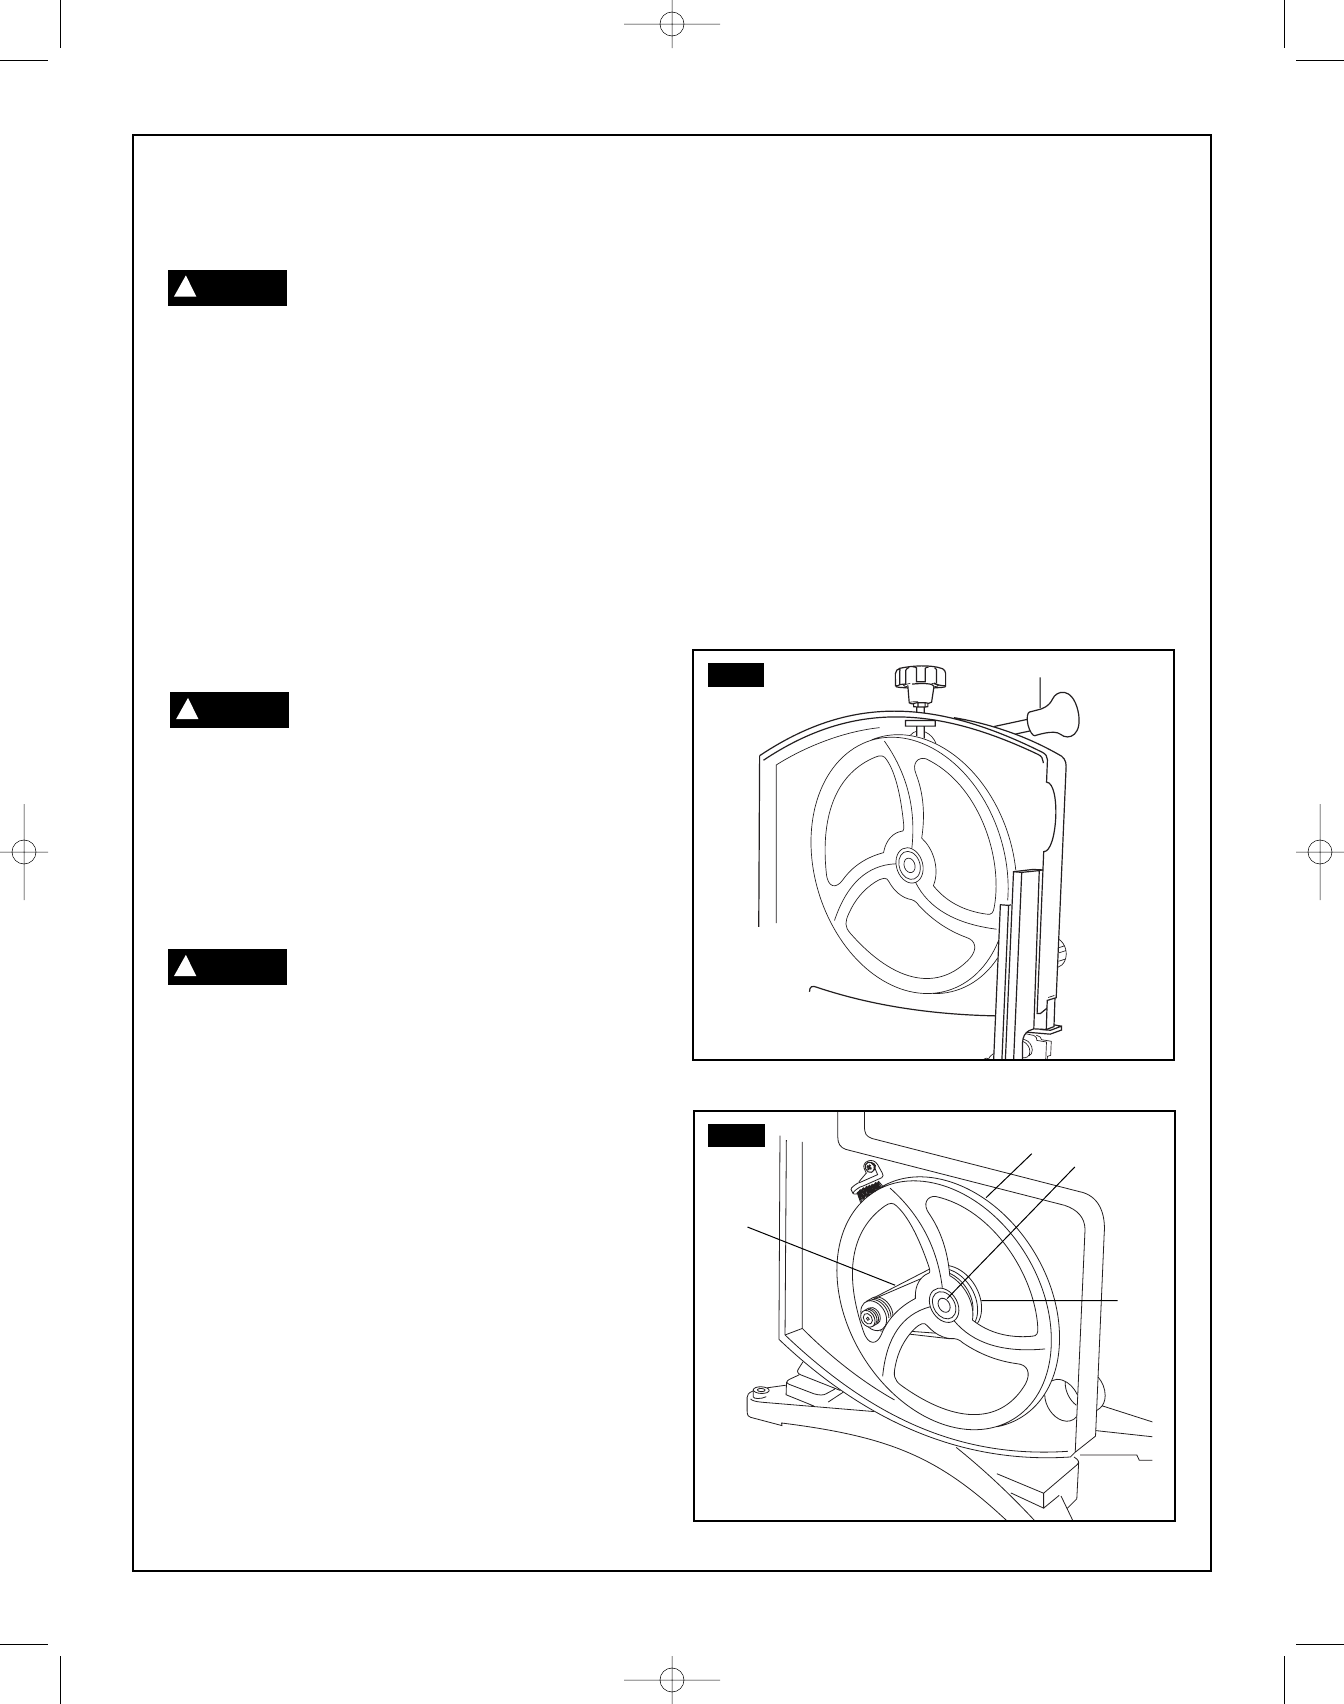
Drive belt replacement (Figs. 25 and 26)
1. Move the blade tension adjustment quick release
handle (1) clockwise to lower the upper wheel and
reduce tension on the blade.
2. Pull on both the upper and lower door latches to open
the wheel cover door.
3. Remove the blade from the lower blade wheel.
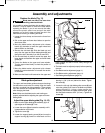
4. Remove the snap ring (3) from the lower wheel shaft.
5. Pull the lower blade wheel (2) from the band saw.
6. Remove the drive belt (4).
7. Position a new drive belt on the lower blade wheel
pulley and put the wheel back into the band saw.
Loop the drive belt over the motor pulley
(5).
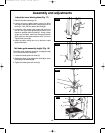
8. Secure the lower blade wheel in position with the
snap ring
(3).
9. Place the blade over the lower blade wheel (2). Move
the quick release handle (1) counterclockwise to raise
t
he upper wheel and increase the tension on the
blade.
1
0. Adjust the blade tension, tracking, and upper and
l
ower blade guides. See pages 11 - 13.
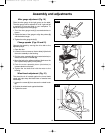
11. Check the deflection of the drive belt in the center
between the two pulleys on the opposite side from
the belt tension wheel. The belt should deflect 1/2"
(12 mm) deflection when pressing on the drive belt
in the center between the two pulleys. To adjust the
belt tension, see page 11.
Use only recommended accessories. Follow
instructions that accompany accessories. Use of
improper accessories may cause hazards.
18.
Maintaining Your Band Saw
FIG. 25
2
FIG. 26
2
3
5
4
W
ARNING
!
CAUTION
!
WARNING
!
SM 2610957105 05-08 6/5/08 7:39 AM Page 18