


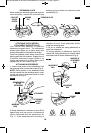

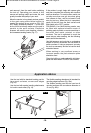
This tool is particularly suitable for one hand ed
operation, and access to corners and edges
that are otherwise difficult to reach and require
hand sanding. Profiles and grooves may be fin -
ished using the tip or edge of the selected
attachment, which should occasionally be
rotated during use to distribute the wear on the
attachment and backing pad surface.
Always be certain that smaller workpieces are
securely fastened to a bench or other support.
Larger panels may be held in place by hand on
a bench or sawhorses.
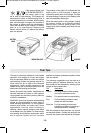
SANDING: Open-coat aluminum oxide sanding
sheets are recommended for most wood or
metal sand ing applications, as this synthetic
material cuts quickly and wears well. Some
applications, such as metal finishing or
cleaning, require spe cial abrasive pads which
are available from your dealer. For best results,
use sanding and polishing accessories which
are of superior quality and are carefully
selected to produce professional quality results
with your sander.
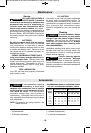
The following suggestions may be used as a
gen eral guide for abrasive selection, but the
best re sults will be obtained by sanding a test
sample of the workpiece first.
Grit
Application
Coarse For rough wood or metal sanding,
and rust or old finish removal.
Medium For general wood or metal sanding
Fine For final finishing of wood, metal,
plaster and other surfaces.
Extra fine For final sanding of bare wood,
smoothing old paint, or preparing a
finished surface for recoating.
With the workpiece firmly secured, turn tool on
as described above. Contact the work with the
tool after the sander has reached its full speed,
'<<9'6=@
-15-
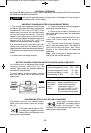
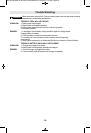
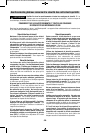
If the green indicator light
is “BLINKING RAPIDLY”,
the battery pack is too
hot or cold for fast-charging. The charger will
automatically switch to fast-charging once a
suitable temperature is reached, <? the battery
pack cannot accept a charge or the contacts of
t
he charger or battery pack are contaminated.
Clean the contacts of the charger or battery
pack (e. g. by inserting and removing the
battery several times) or replace the battery
pack, as required.
The purpose of the light is to indicate that the
battery pack is fast-charging. It does not
indicate the exact point of full charge. The light
will stop blinking in less time if the battery pack
was not completely discharged.
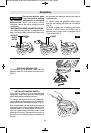
When the battery pack is fully charged, unplug
the charger (unless you're charging another
battery pack) remove battery pack from
charger and slip the battery pack back into the
tool handle.
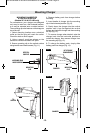
BATTERY
PACK
CHARGER
FIG. 16
INDICATOR LIGHT
SM 1619X04464 05-09:SM 1619X04464 05-09 5/20/09 1:54 PM Page 15