


12 ► RS25 User Manual
OPERATING PROCEDURES
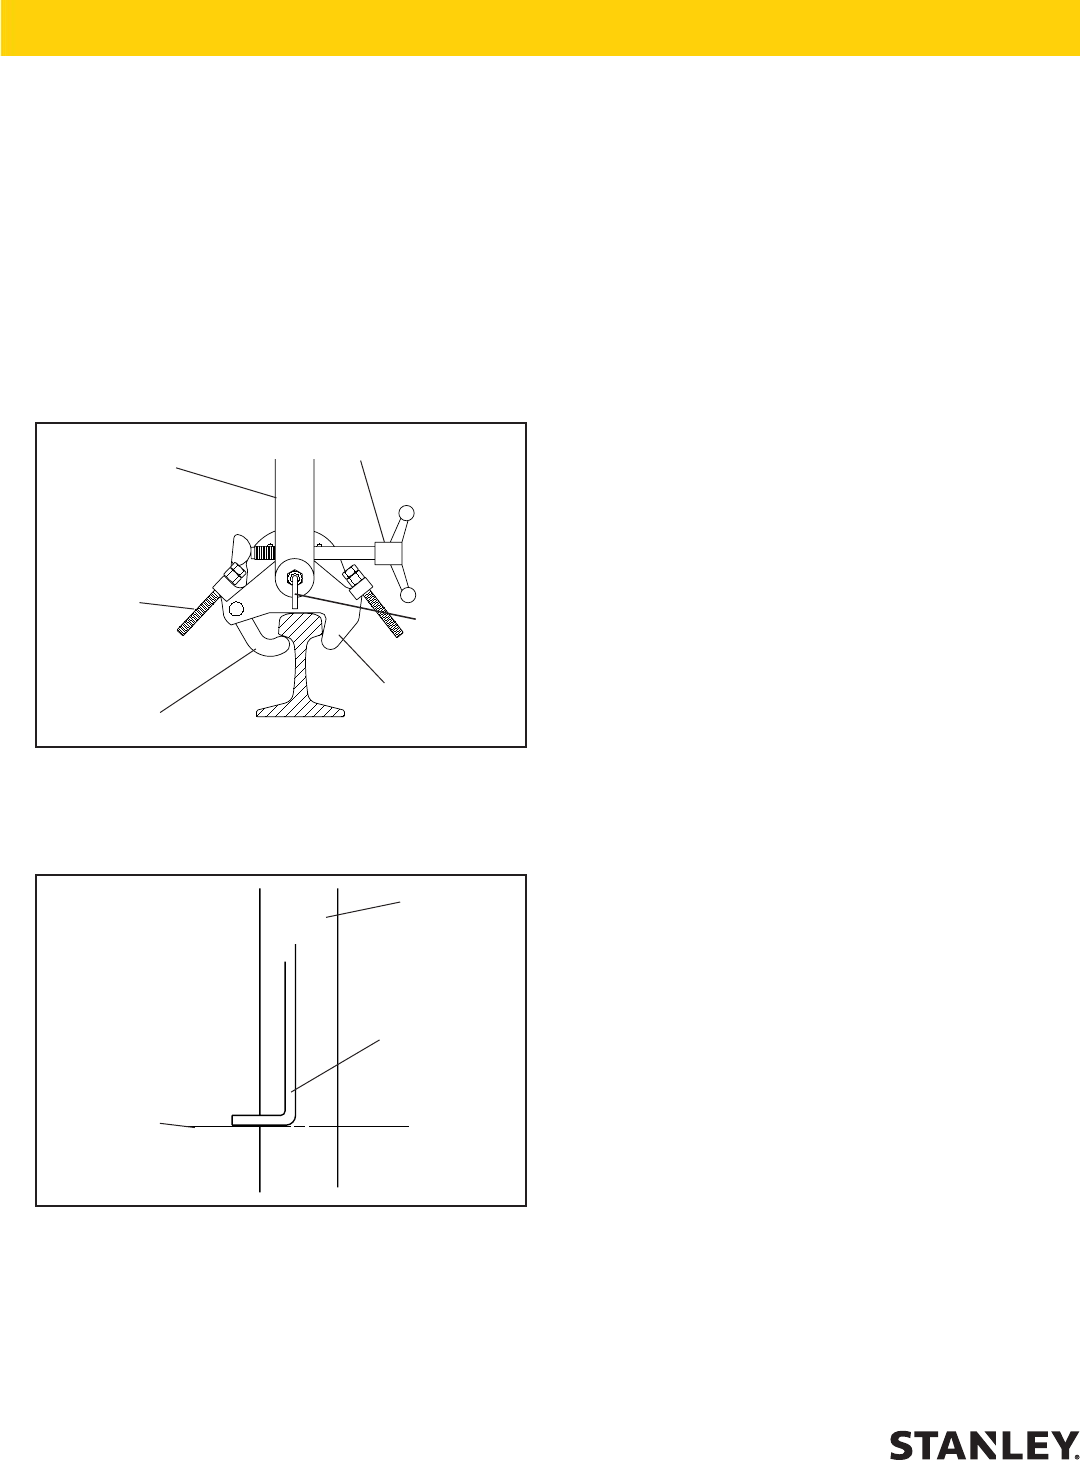
CLAMPING THE RAIL SAW TO THE RAIL
1. Observe all safety precautions.
2. Make sure the rail clamp assembly is tight to the
disconnect pivot (60) by turning the handle (20) to
tighten the disconnect pivot bolt.
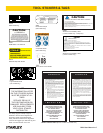
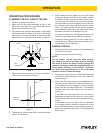
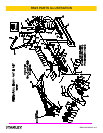
3. Fully extend the indicator rod located on the clamp
and position the rail clamp on the rail so the clamp
arms bear on the top and sides of the rail and the
bell crank bears under the rail as shown in Figure 2.
LOWER
CAPSCREW
BELL
CRANK
CLAMP
CLAMP
Figure 2.
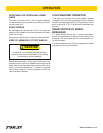
4. Move the rail saw along the rail until the indicator is
next to the cut as shown in Figure 3.
RAIL
EDGE OF
CUT LINE
INDICATOR
Figure 3.
5. Tighten the bell crank to the rail by turning the clamp
screw (75) clockwise.
6. While holding onto the upper link of the rail clamp
assembly (near the red knob of the handle), release
the detent (129) by turning the knob and then posi-
tion the lower link forward (away from the operator)
until the detent can be re-engaged in one or the oth-
er of the two holes away from the “top dead center
hole”. This positions the saw so that the operator
may stand erect while cutting the rail and also allows
the saw to cut down to the ange of the rail.
An optional method is to disengage the detent and
adjust the capscrews (see Figure 2) as required.
7. Adjust the wheel guard (87) so that it does not in-
terfere with the cutting process and cuttings are di-
rected away from the operator.
SAWING THE RAIL
1. Always start the rail saw with the cutting wheel away
from the work surface.
2. Start the cut with the wheel rotating.
NOTE:
Do not “bump” the rail. Feed the wheel through
the material as fast as possible without allowing
the wheel to reduce its speed. Cutting through the
material too slowly allows heat expansion and can
cause wheel “pinching” in the material. “Pinching”
the wheel from heat expansion is one of the most
common causes of wheel breakage.
3. Starting at the top of the rail, cut straight down while
rocking the handle back and forth. Cut down until
near the ange.
4. When near the ange, stop the saw, release the de-
tent and move the lower link toward the operator un-
til the detent can be re-engaged in one of the holes
away from the “top dead center hole”. This positions
the saw lower so that the ange of the rail may be
easily cut.
If the detent has been removed in favor of using the
capscrews as stops for the lower link, simply move
the lower link toward the capscrew closest to the op-
erator.
If the wheel is worn such that it will not completely
cut through the rail, loosen the clamp lever on the
saw, and rotate the saw to allow cutting from the op-
posite side. Readjust the lower link as required and
nish the cut.
INDICATOR
ROD
OPERATION