


8
INSTALLINGTHE METAL CONNECTOR ATTACHMENT KITTO
YOUR BOSTITCH F21PL / F21PL2 / F33PT / F33PTSM
Disconnect tool from air supply before attempting any parts disassembly and
before changing the work contacting element.
Never use contact trigger (black trigger) with metal connector attachment. Only use
sequential trigger (gray trigger) with metal connector attachment. Refer to trigger
conversion instruction included in the kit.
When installing Metal Connectors, use ONLY BOSTITCH Heat Treated Metal
Connector Nails
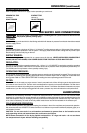
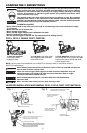
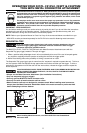
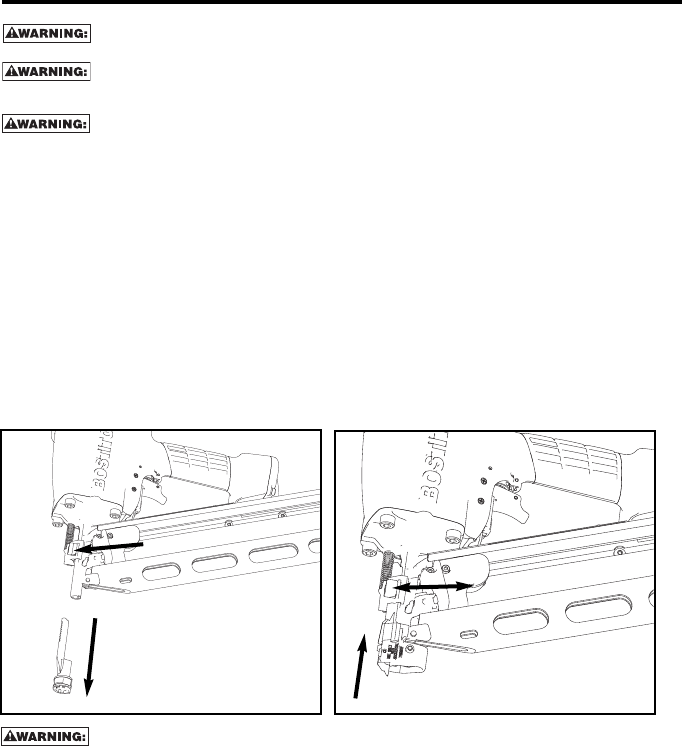
-
Push in locking button.(See figure 1)
- Slide contact arm down until it easily detaches from the tool.
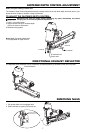
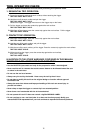
-
Push in locking button and fully slide Metal Connector Attachment onto tool as shown in figure 2.
- Release Locking Button.
- Make sure that Metal Connector attachment is installed in the full up -position and that the locking button
has returned to the released position.
NOTE:The Metal Connector Attachment is not adjustable for depth control.
- MCN-KIT3 must be purchased separately for the F21PL2 to be used for fastening metal connectors.
- Check that the Metal Connector Attachment now moves freely up and down. If not, DO NOT USE. Have
tool and Metal Connector Attachment serviced by an authorized service center.
- Reverse procedure to remove Metal Connector Attachment and to installstandardframing Lower Contact Arm.
Always check that the Lower Contact Arm or Metal Connector Attachment moves freely
before using tool. If any binding occurs, repeat assembly procedure or have tool serviced
at an authorized BOSTITCH service center.
For locations call: 1-800-556-6696
If further information is required, call BOSTITCH Customer Service at 1-800-556-6696 or write to:
BOSTITCH Customer Service, Briggs Drive, East Greenwich, RI 02818.
Figure 1
Figure 2