


10 Finish 230 AC Compact
GB
Spraying
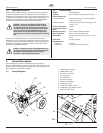
5. Spraying
The AirCoat spray system has two dierent painting modes. The
AirCoat mode is used for ne nish work with low to medium
viscositymaterials(oil,stains,lacquers,etc...).Theairlessmodeis
usedforgeneralpaintingwithhighviscositymaterials(latex).
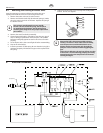
5.1 Spraying in AirCoat mode
Use the AirCoat mode for low-pressure ne nish work
(recommendedpumppressureupto69bar(6.9MPa,1000PSI).
1. Make sure that the airless spray hose is free of kinks and clear
of objects with sharp cutting edges.
2. Turn the pressure control knob counterclockwise to its lowest
setting.
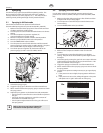
3. Turnthecompressorairpressureregulator(b)
counterclockwise to its lowest setting.
4. Move the compressor ON/OFF switch to the ON position.
5. Move the pump ON/OFF switch to the ON position.
6. TurnthePRIME/SPRAYvalvetoSPRAY.
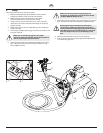
7. Turn the pressure control knob clockwise until the material
pressuregauge(a)reads27.5bar(2.7MPa,400PSI).Thepaint
hoseshouldstienaspaintbeginstoowthroughit.
8. Turntheairpressureregulator(b)clockwiseuntiltheair
pressuregauge(c)reads1.3bar(0.13MPa,20PSI).
(b)
(c)
(a)
9. Unlock the spray gun gun.
10. Trigger the spray gun to bleed air out of the material hose.
11. When material reaches the spray tip, spray a test area to check
the spray pattern.
12. Adjustthespraypatterntothedesiredsizeandatomization.
• Usethepressurecontrolknobtocontroltheowofpaintto
the gun.
• Usetheairpressureregulatortocontroltheamountof
atomizationairavailabletothegun.
• Usethepatternadjustmentknobontheguntonetune
the spray pattern.
i
Refer to the spray gun Owner’s Manual for
information on the operation of the gun.
5.2 Spraying in Airless Mode
Usetheairlessmodeforgeneralhigh-pressurespraying(pump
pressurefrom34.4bar(3.4MPa,500psi)to193bar(19.3MPa,2800
PSI).
1. Make sure that the airless spray hose is free of kinks and clear
of objects with sharp cutting edges.
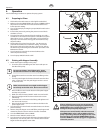
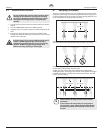
2. Turnthepressurecontrolknob(d)counterclockwisetoits
lowest setting.
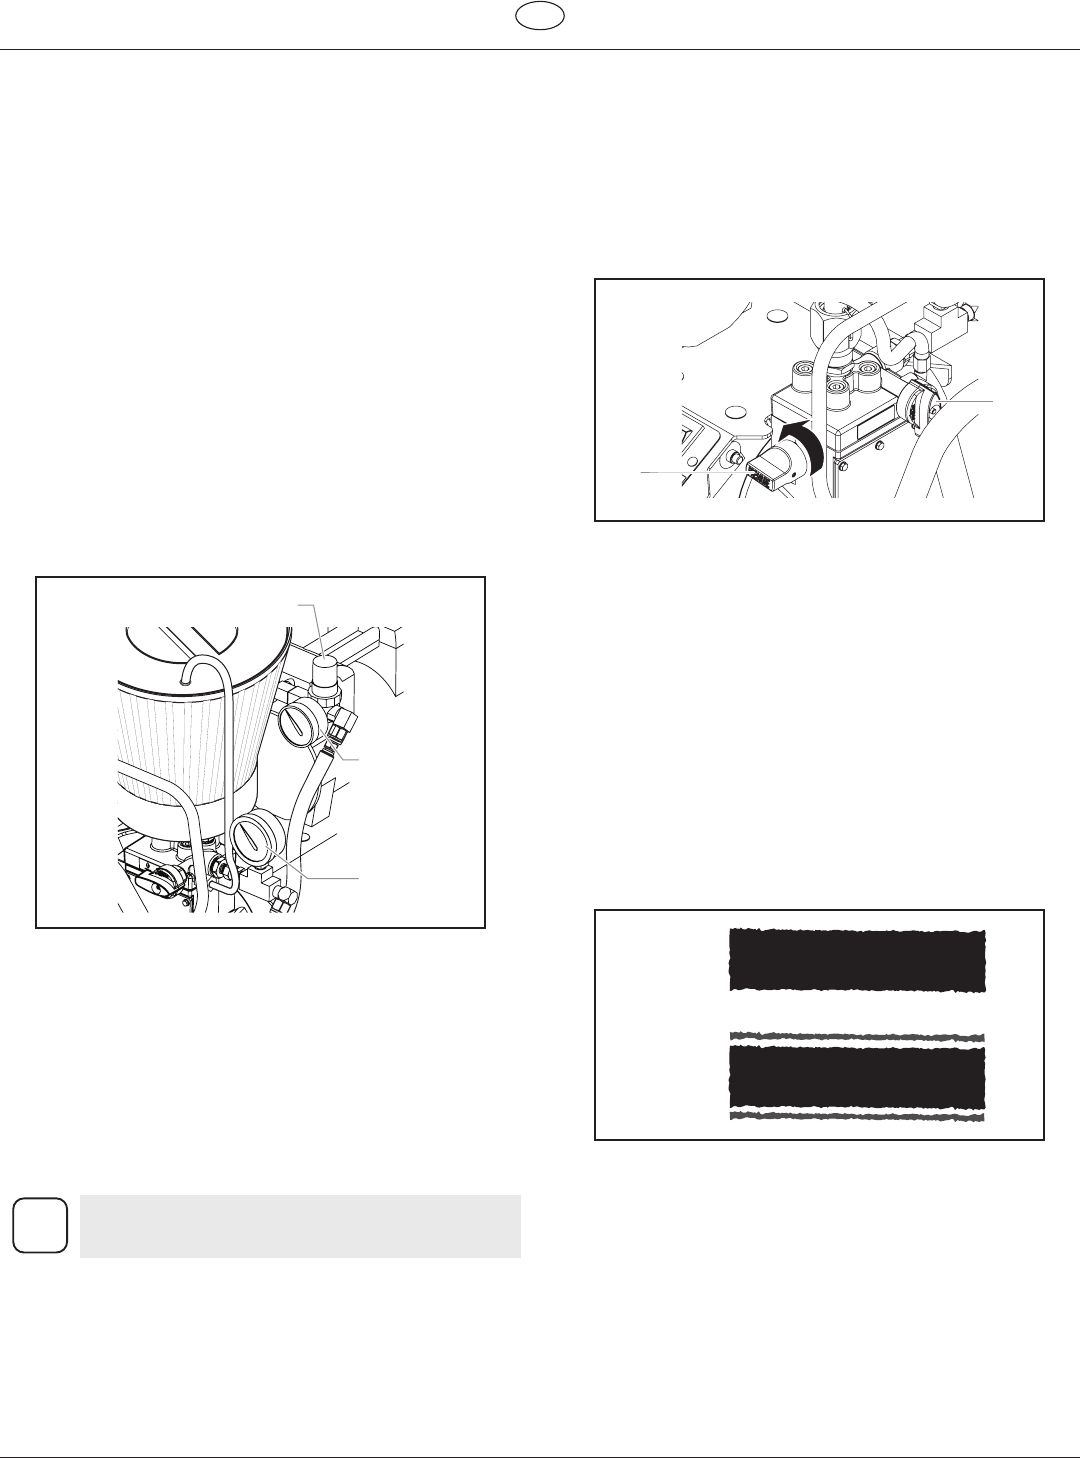
3. TurnthePRIME/SPRAYvalve(e)toSPRAY.
(e)
(d)
4. Move the pump ON/OFF switch to the ON position.
5. Make sure the compressor ON/OFF switch is in the OFF
position.
6. Turn the pressure control knob clockwise to its highest
setting.Thepainthoseshouldstienaspaintbeginstoow
through it.
7. Unlock the gun by turning the gun lock nut counter-clockwise
(whenlookingfromthebackofthegun)threefullturns.This
opens the material valve in the gun.
8. Trigger the spray gun to bleed air out of the material hose.
9. When material reaches the spray tip, spray a test area to check
the spray pattern.
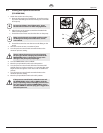
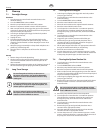
10. Use the lowest pressure setting necessary to get a good spray
pattern.
a. If the pressure is set too high, the spray pattern will be too
light.
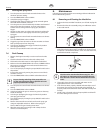
b. If the pressure is set too low, tailing will appear or the paint
willspatteroutin“gobs”ratherthaninanespray.
10a.
10b.