


ProSpray 3.25 13
GB
Cleaning the unit (shutting down)
8. Cleaning the unit (shutting down)
A clean state is the best method of ensuring operation without
problems.Afteryouhavenishedspraying,cleantheunit.Underno
circumstances may any remaining coating material dry and harden in
the unit.
The cleaning agent used for cleaning (only with an igni tion point
above21°C)mustbesuitableforthecoatingmaterialused.
• Secure the spray gun, refer to the operating manual of the
spray gun.
Clean and remove tip.
For a standard tip, refer to Page 19, Section 12.2.
If a non-standard tip is installed, proceed according to the relevant
operating manual.
1. Remove suction hose from the coating material.
2. Closethereliefvalve,valvepositionSPRAY(p spray).
3. Switch the unit ON.
4. Pull the trigger of the spray gun in order to pump the
remaining coating material from the suction hose, high-
pressure hose and the spray gun into an open container.
Attention
The container must be earthed in case of coating
materials which contain solvents.
Caution! Do not pump or spray into a container with
a small opening (bunghole)!
Refer to the safety regulations.
5. Immerse suction hose with return hose into a container with a
suitable cleaning agent.
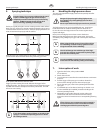
6. Turnthepressurecontrolknobintothebluezone-pulsating
pressure for unit cleaning.
7. Open the relief valve, valve position PRIME
(k circulation).
8. Pump a suitable cleaning agent in the circuit for a few
minutes.
9. Closethereliefvalve,valvepositionSPRAY(p spray).
10. Pull the trigger of the spray gun.
11. Pump the remaining cleaning agent into an open container
until the unit is empty.
12. Switch the unit OFF.
8.1 Cleaning unit from outside
First of all pull out mains plug from socket.
Attention
Danger of short circult through panetrating water!
Never spray down the unit with high-pressure or
high-pressure steam cleaners.
Attention
Do not put the high-pressure hose into solvents.
Use only a wet cloth to wipe down the outside of the
hose.
Wipe down unit externally with a cloth which has been immersed in a
suitable cleaning agent.
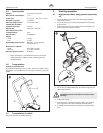
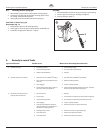
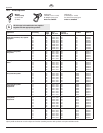
8.2 Suction lter
i
A clean suction lter always guarantees maximum
feed quantity, constant spraying pressure and
problem-free functioning of the unit.
1. Screw o the lter (Fig. 9) from suction pipe.
2. Clean or replace the lter.
Carry out cleaning with a hard brush and an appropriate cleaning
agent.
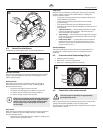
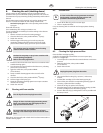
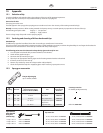
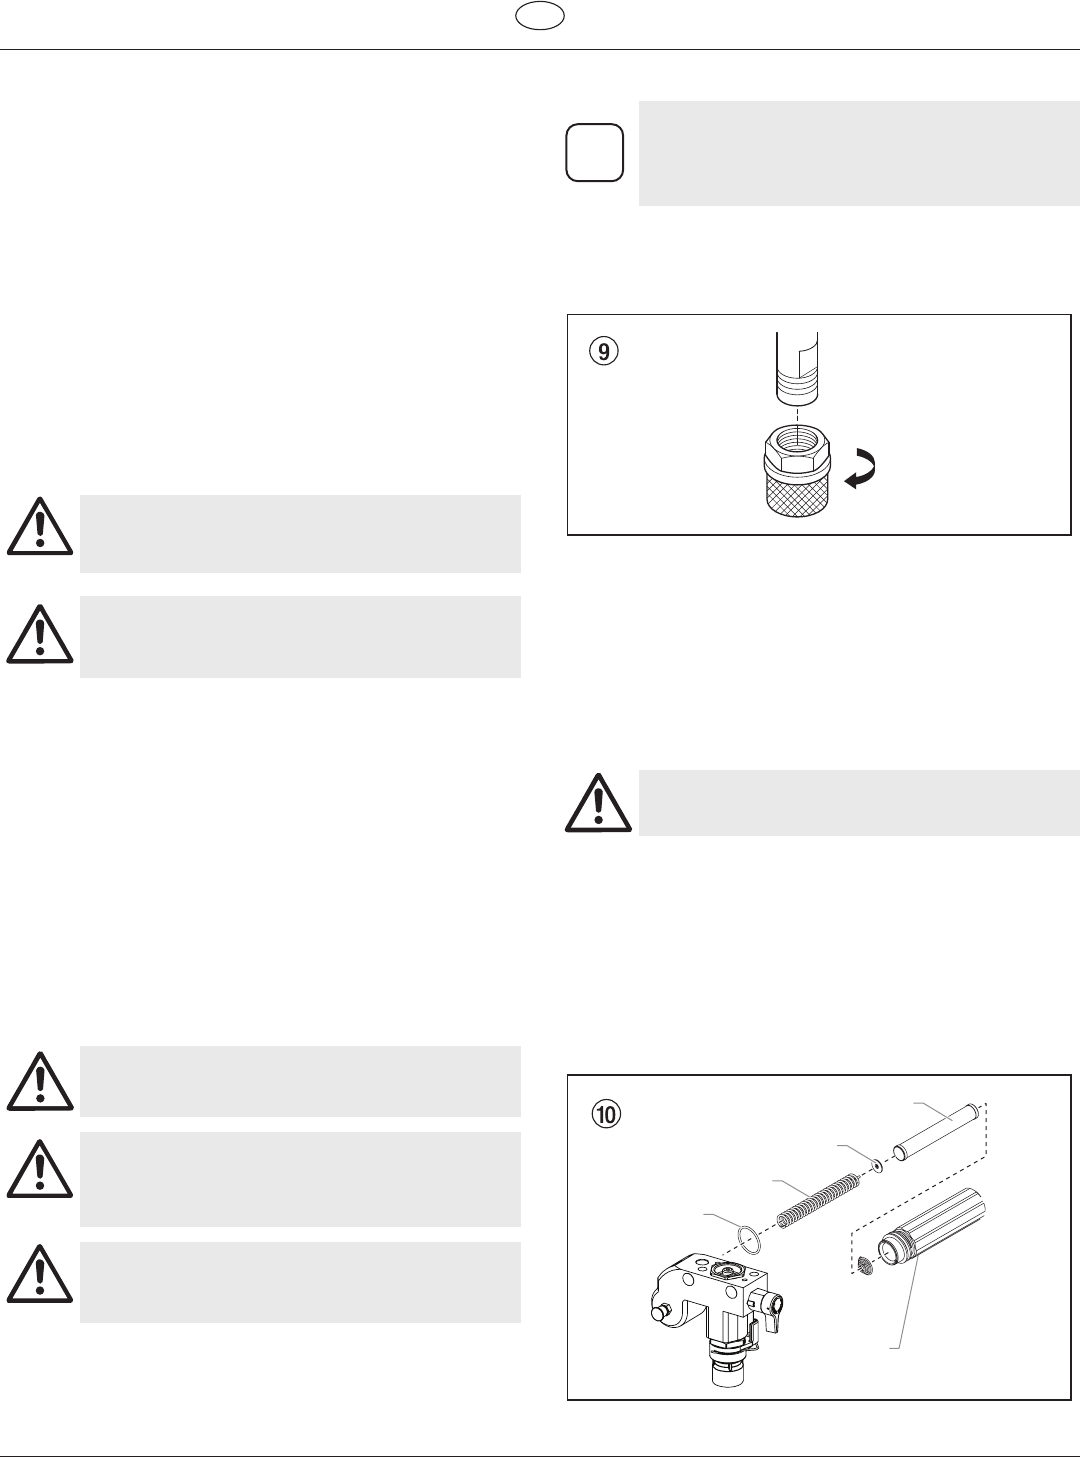
8.3 Cleaning the high-pressure lter
Clean the lter cartridge regularly.
A soiled or clogged high-pressure lter can cause a poor spray
pattern or a clogged tip.
1. Turn the pressure control knob counterclockwise to minimum
pressure.
2. Open the relief valve, valve position PRIME
(k circulation).
3. Switch the unit OFF.
Unplug the power plug from the outlet.
4. Unscrewthelterhousing(Fig.10,Item1).withastrap
wrench.
5. Pull the lter cartridge (2) from the bearing spring (3).
6. Clean all the parts with the corresponding cleaning agent. If
necessary, replace the lter cartridge.
7. Check the O-ring (4), replace it if necessary.
8. Place the bearing ring (5) against the bearing spring (3). Slide
the lter cartridge (2) over the bearing spring.
9. Screw in lter housing (1) and tighten it as far as possible with
the strap wrench.
1
4
3
2
5