


GA 250AL_GA 400AL.
23
!
"
#
$
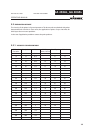
37
%
"?
OPERATING MANUAL
EDITION 07 /2005 PART NO. DOC0350941
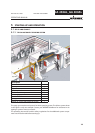
6.1 FINISHING WORK AND CLEANING
1. Ensure that the material pressure has been relieved and interrupt the air supply to the
gun.
2. Connect the cleaning solvent supply.
3. Detach the Airless nozzle and clean separately (see Paragraph 5.4.3)
4. Connect the air supply and thoroughly rinse the gun.
5. Relieve spray gun and unit pressure.
6. Clean body of the gun with solvent recommended by the manufacturer and dry with
a cloth or blow gun.
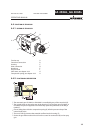
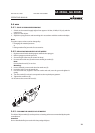
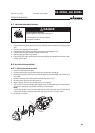
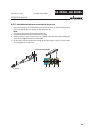
6.2 REPLACING THE VALVESTEM
6.2.1 REPLACING THE VALVE STEM
1. Put out of operation and clean.
2. Unscrew the tension cap (A) and remove the compression spring (B).
3. Carefully pull out the valve stem (E) with the piston (D) until the fl ats of the valve stem
are visible.
4. Hold the valve stem (E) with a spanner AF2 and unscrew nut (C).
5. Remove piston (D) from the valve stem (E).
6. With a spanner AF5 unscrew sealing screw (F) completely.
7. Pull out valve stem (E) including the sealing screw (F), the packing (G), the thrust piece
(H), the disc spring set (I) (6 pieces), and the pressure ring (K).
Note:
If parts are caught in the hole, the nozzle (M) and the valve seat assy. (L) have the be
unscrewed. The parts can be pushed out with a rod of max. ø 4.5 mm; 1.78 in.
8. Exchange worn parts.
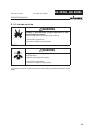
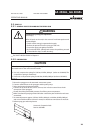
$!.'%2
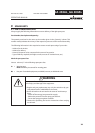
%XPLODINGGASAIRMIXTURE
$ANGERTOLIFEFROMmYINGPARTSANDBURNS
.EVERSPRAYINTOACLOSEDCONTAINER
%ARTHTHECONTAINER
3)()??'"