


pg. 8 of 10 AM16905-001 Rev. A
General Guidelines
• Route the Input Power from the general area where the unit(s) will be mounted.
• Protect the cables with a snap-in bushing if they must be routed through a wall or
sheet-metal enclosures.
• Make sure that cable routing does not interfere with other equipment.
• Make sure that cable routing does not invite damage to the cable.
• Secure the input power cable at least every 12 inches [30 cm] throughout the cable
run.
FINISH THE INSTALLATION
Charger Location
Locate the Charger in a location convenient to the printer. Follow these guidelines:
• Select a location that will avoid contact with the operator in case of an accident.
• If you are using the Charger in conjunction with an MMQ4 Mobile Mount, place the
Charger so that you can easily unplug the charger’s output cable from the Printer’s
battery connection.
• Route the charger’s output cable to prevent undue strain being placed on the connec-
tion to the printer’s battery.
• Make sure that cable routing does not invite damage to the cable.
• Secure the Charger with #6 (3mm) hardware using the mounting flanges molded into
the Charger cover. Ensure that the mounting hardware will not become loose due to
vibration by using locking hardware or prevailing torque fasteners.
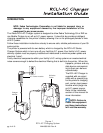
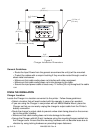
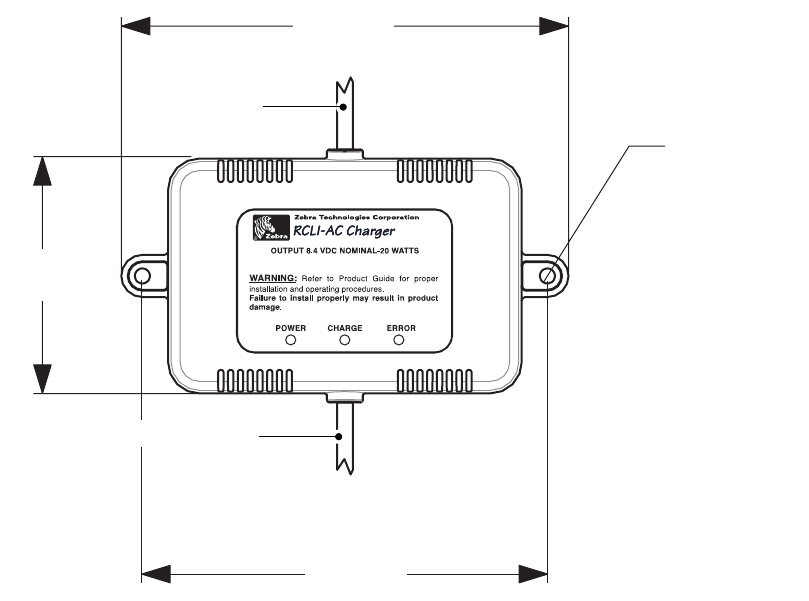
6.25”
(15.88 cm)
3.25”
(8.25 cm)
5.62”
(14.27 cm)
.21” Dia. x 2
(5.3 mm)
8.4 VDC Output (to Printer)
A.C. Power In-
put
Figure 2
Charger Installation Dimensions