3Com Router 6000 Family
Installation Manual
Chapter 4
Starting and Configuring the Route
r
3Com Corporation
3-3
(1)
(3)
(1)
(2)
(2)
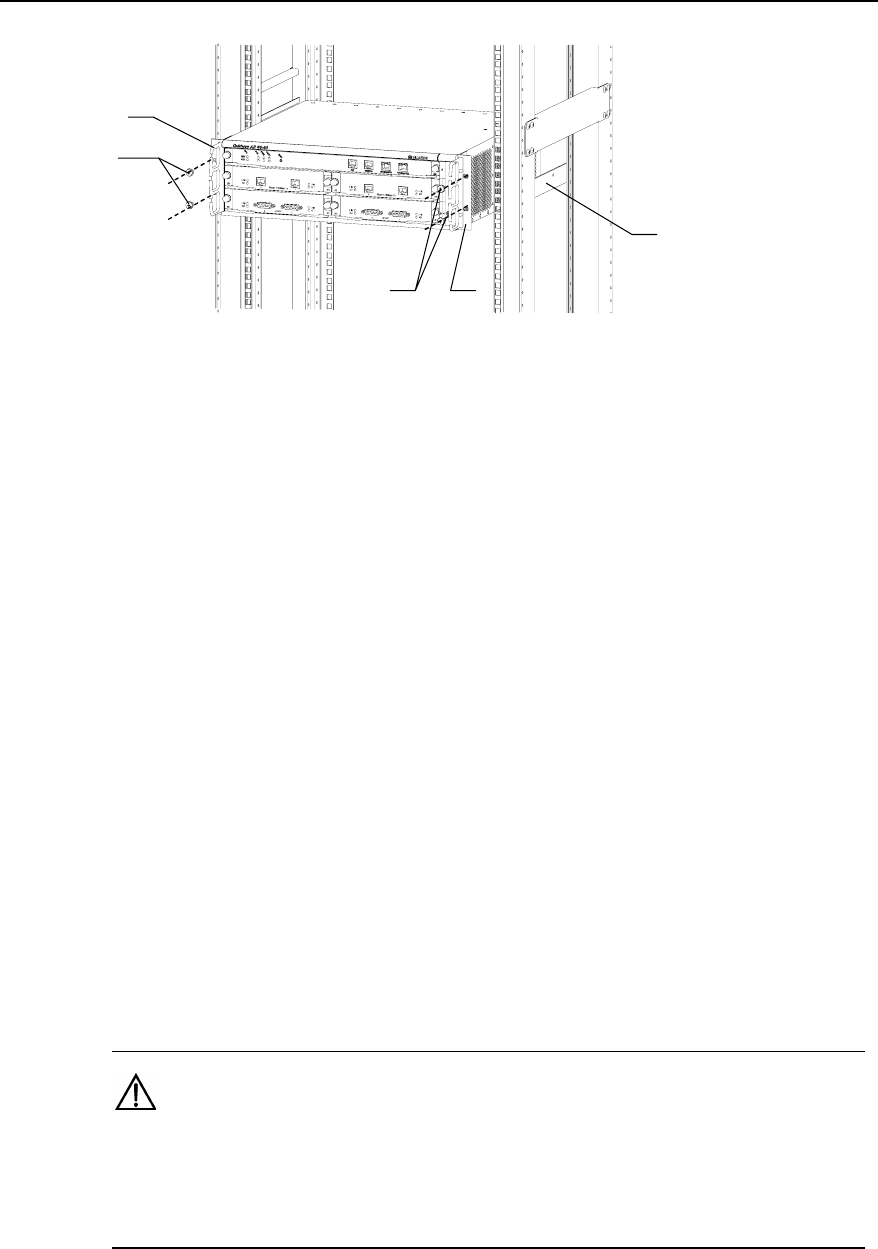
1) Mounting screws 2) Mounting brackets (with cable-management brackets installed)
3) Guides
Figure 3-2 Mount the router in a rack
3.3.2 Mounting the Router on a Tabletop
When mounting the router on a tabletop, ensure that the surface is clean and you have
considered the following:
z The table is sturdy and well grounded.
z 10 cm (3.9 in.) clearance is available around the sides of the chassis for heat
dissipation.
z Do not place any heavy object on the chassis.
3.4 Installing the Generic Modules
Installing generic modules includes installing the main control board, PSUs, the fan module,
and FICs.
Refer to the chapter “FICs” for the FIC installation procedures and the chapter “Maintaining
Hardware” for the installation procedures of other modules.
3.5 Connecting the PGND
Warning:
The normal connection of the protection ground (PGND) on the router chassis is an
essential safeguard against lightning shocks and interference. You must correctly
connect the PGND when installing or using the router.
As shown in the following figure, the router provides a protection ground (PGND) screw at the
top right-rear of the chassis. You must securely connect it to the earth ground to safely channel
faradic current and leakage electricity to the ground and have the device less susceptible to


