


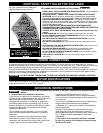


8
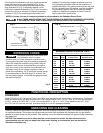
ATTACHING DUST BAG
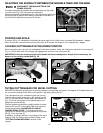
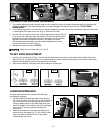
Attach the dust bag (A) Fig. 5 to the dust spout (B)
making sure the wire ring (C) is engaged with the ridge
in the spout (see inset).
Fig. 5
A
C
B
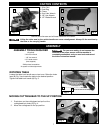
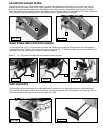
FASTENING MACHINE TO SUPPORTING SURFACE
Before operating your compound miter saw, mount it to
a sturdy workbench or other supporting surface. Four
holes are provided, two of which are shown at (A) Fig. 6.
When frequently moving the saw from place to place,
mount the saw to a 3/4”piece of plywood. The tool
can then be easily moved from place to place and the
plywood can be clamped to a supporting surface using
“C” clamps.
A
Fig. 6
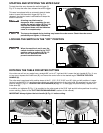
OPERATING CONTROLS AND ADJUSTMENTS
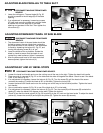
TABLE HAZARD AREA
The area inside the two red lines on
the table (A) Fig. 7 is designated as a
"HAZARD ZONE". Never place your
hands inside this area while the
machine is running. Maintain hands
6” from blade.
Keep your hands out of the path of
the saw blade. If necessary, clamp
the workpiece in place before making
the cut if hands would be within 6” of
blade.
A
Fig. 7
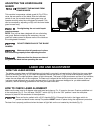
WORK CLAMP
Fig. 8
A
B
Position the work clamp in one of the two holes (B)
Fig 8 in the left or right side of the base. Use this
clamp, especially with short workpieces.