8
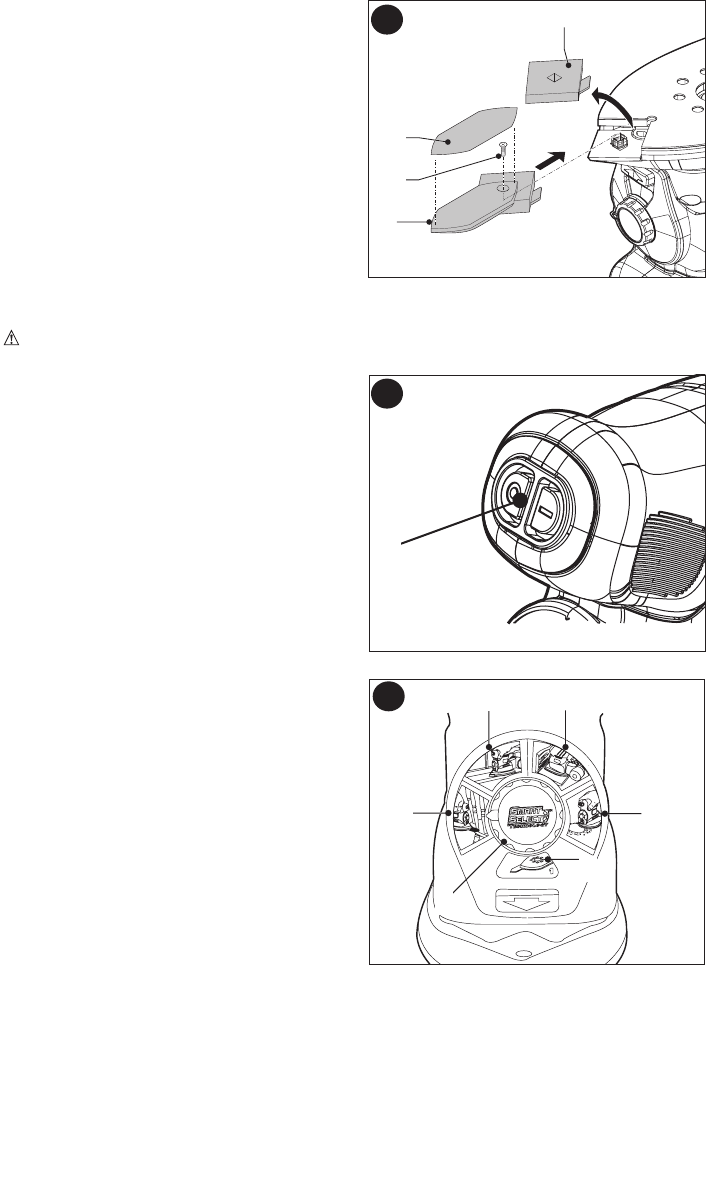
Finger attachment - Figure I
The finger attachment is used for fine detail
sanding.
•Removethescrew(15).
•Removethesandingholdertip(7)fromthe
sanding base.
•Fitthefingerattachment(8)ontothe
sanding base.
•Fitandtightenthescrew(15).
•Fittheappropriatesandingsheet(16)onto
the finger attachment.
Operation
Let the tool work at its own pace. Do not overload.
Warning: Do not cover the ventilation slots when using the tool. Make sure that the
sanding base is flat on the workpiece.
Switching on and off - Figure J
•Toswitchthetoolon,settheon/offswitch
(1) to position I.
•Toswitchthetooloff,settheon/offswitch
to position O.
Smart Select Technology - Figure K
This sander is fitted with a smart select
dial (2) which depicts various sanding
applications. They are used to select the
proper operating mode for your particular
sanding application.
Step 1: Using the Smart Select dial (2)
choose the application that you are going to
perform; detail sanding (3), corner sanding
(4), flush sanding (5), random orbit sanding
(6).
Step 2: Once your application is selected,
the window below (7) will recommend
the correct base that should be used and
identifies the corresponding sanding speed
(which is automatically set for you).
Step 3: Snap on the recommended base
(using the picture and color recommendation in window 7).
Note: You can override the speed at anytime by moving the Smart Select dial
clockwise for increased speed.
15
7
8
16
i
J
1
K
2
3
4
5
6
7


