6 720 608 263
28
Maintenance and service
5 Maintenance and service
The unit should be checked once a year by a gas
technician. If repairs are needed, the repairs should be
done by a gas technician
5.1 Annual maintenance
(To remove front cover, see page 5.)
Venting System
• Venting system - inspect inside of flue pipe for any
blockage or restriction. Observe burner flames
during heater operation. Verify that the damper inside
flue gas exhaust accessory is able to move freely.
(Vent pipe must be removed in order to access
damper). Inspect the combustion air inlet pipe for
blockage or debris. Inspect combustion air and
exhaust terminations for blockage or debris.
Combustion chamber
• Inspect burner observation window (Fig. 46, #10) for
cracks or leakage of flue gases. Observe burner
flames during heater operation. Flames should be
steady and blue with no signs of yellowing. Yellow
burner flames are an indication of improper
combustion. Refer to Section 3.5 & 3.6 of this
manual to verify exhaust system and combustion air
supply meets manufacturer's specifications.
Pressure relief valve
• Manually open the pressure relief valve to ensure
proper operation.
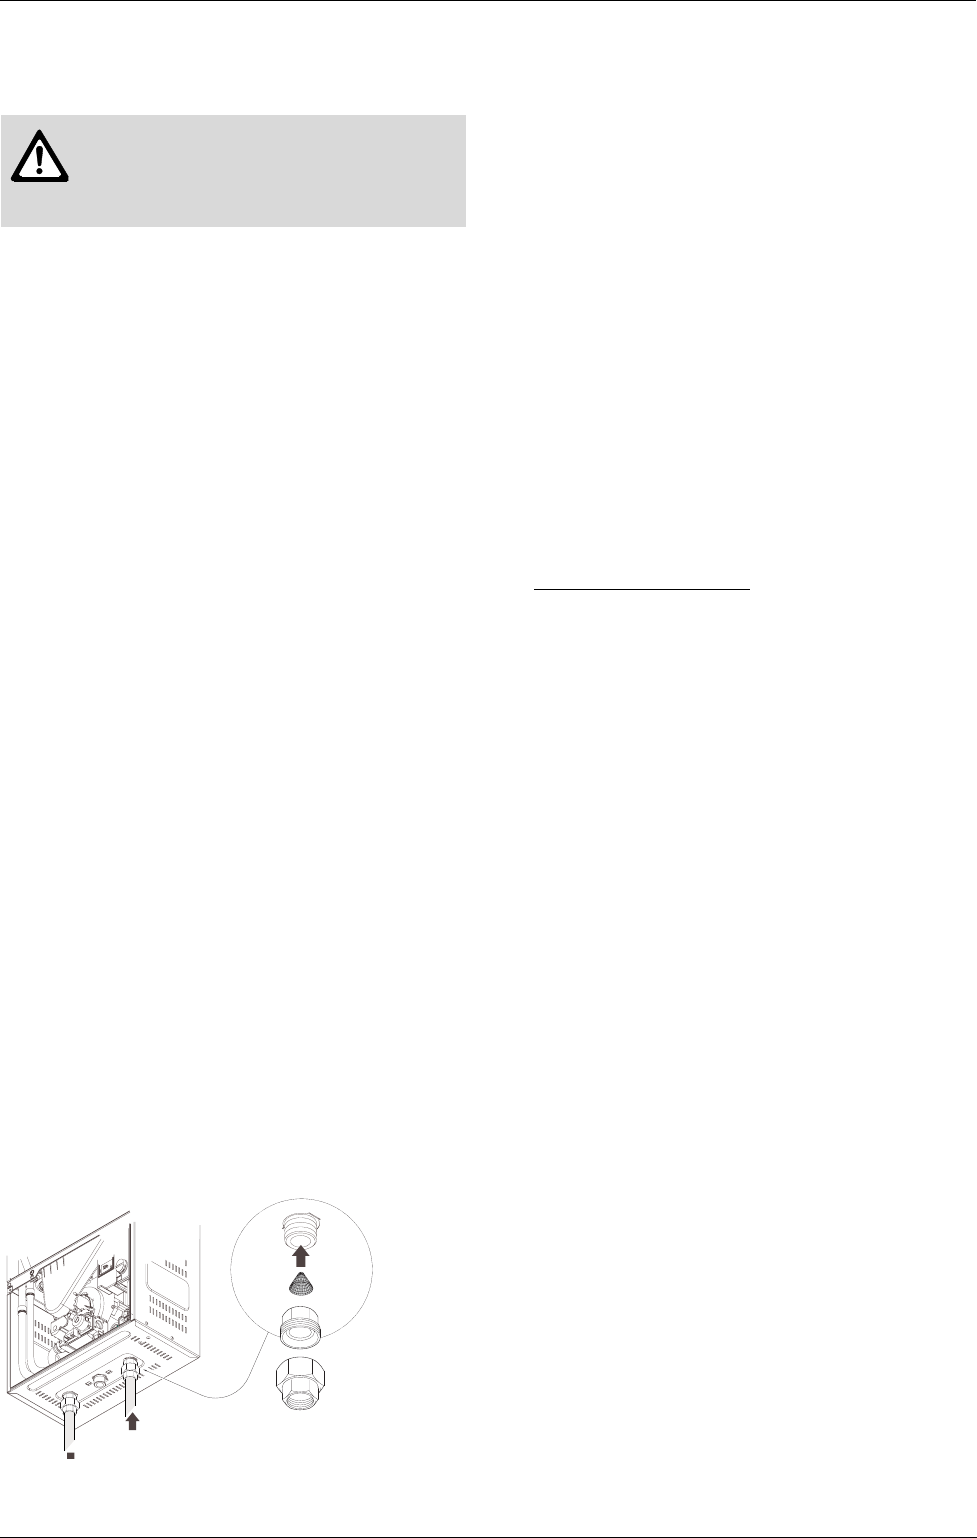
Inlet water filter
• Verify the inlet filter screen is clean and undamaged.
The inlet water filter is located within the ¾" cold
water inlet on the bottom right side of the appliance
(See Fig. 38). Close installer supplied cold water
shutoff and remove cold water supply pipe. Remove
filter, clean or replace if damaged.
Fig. 38
Descaling
• In areas where the water supply has a high mineral
content, the heat exchanger may need to be flushed
with a descaling solution. Scale build up will shorten
the life of the water heater and damage resulting from
scale is not covered under warranty. Refer to
section 5.3 for detailed instructions on descaling the
heat exchanger.
Heat exchanger
• Inspect heat exchanger fincoil for soot build-up or
blockage. To access fincoil, venting must be
removed from flue gas exhaust accessory. With
venting removed, manually hold open damper and
inspect fincoil below with a flashlight. If there is
evidence of soot build-up or blockage, the heat
exchanger should be removed by a professsional and
cleaned thoroughly. To remove the heat exchanger,
consult service bulletin TWH-G2-22 at
www.boschhotwater.com
.
5.2 Winterizing for seasonal use
Please note that installation instructions state that the
water heater must not be installed in a location where it
may be exposed to freezing temperatures. If the heater
must be left in a space which is likely to experience
freezing temperatures (less than 36° F), all water must
be drained from the heater. If precautions are not taken,
resulting damage will not be covered under the
warranty. NOTE: Use of agents such as anti-freeze is
not recommended as they may cause damage to the
water heater's internal components.
1. Turn on/off switch on the water heater to the off (O)
position and unplug power supply cord. The display
should be blank.
2. Shut off gas supply to heater.
3. Shut off the water supply to the water heater using
installer supplied shutoff valve.
4. Open hot water taps to drain and relieve pressure
from the plumbing system. If water continues to flow
after 5 minutes, a plumbing crossover is present and
must be corrected before proceeding.
5. Disconnect inlet and outlet water pipes from the
water heater. Place a small bucket underneath the
water heater to catch residual water remaining inside
the water heater. Save washers for future use.
6. Using an air compressor, blow short bursts of air
(100 PSI Maximum) through the inlet water connec-
tion until there is no water coming out of the outlet
water connection of the heater.
7. Reconnect water fittings and return heater to service
when danger of freezing has passed.
Warning: Always turn off the electrical
power supply, turn off the manual gas
valve and turn off the manual water
control valves when servicing heater.
HOT
INLET
FILTER
COLD


