


16.
Adjustments (continued)
Disconnect plug from power source
before performing any assembly,
adjustment or repair to avoid possible injury
.
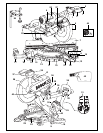
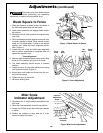
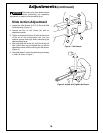
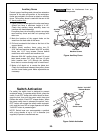
Blade Square to Fence
1. Slide saw forward so blade is near the center of
the table and tighten slide rail lock knob.
2. Lower head assembly and engage head assem-
bly lock pin.
3. Set table at the 0° miter position and tighten miter
lock knob.
4. Place combination square against fence with ruler
of square parallel to blade. Ruler should contact
blade, but not blade teeth. If blade is not square
against ruler, follow the fence alignment proce-
dure. (Figure 1)
5. Loosen rail lock knob and slide head assembly
back to check squareness of complete slide cut
against the square’s ruler.
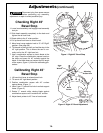
Fence Alignment
a. Remove both fences by loosen fence knob, slide
fence to full in position, and pull up on fence.
b. The head assembly should remain in lowered
position.
c. Loosen the four (4) hex bolts behind fence using
multi purpose wrench (Figure 2).
d. Adjust fence until blade and fence have full con-
tact with the square.
e. Tighten the four (4) hex bolts.
f. Re-attach sliding fence.
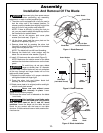
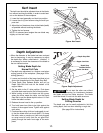
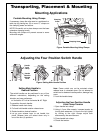
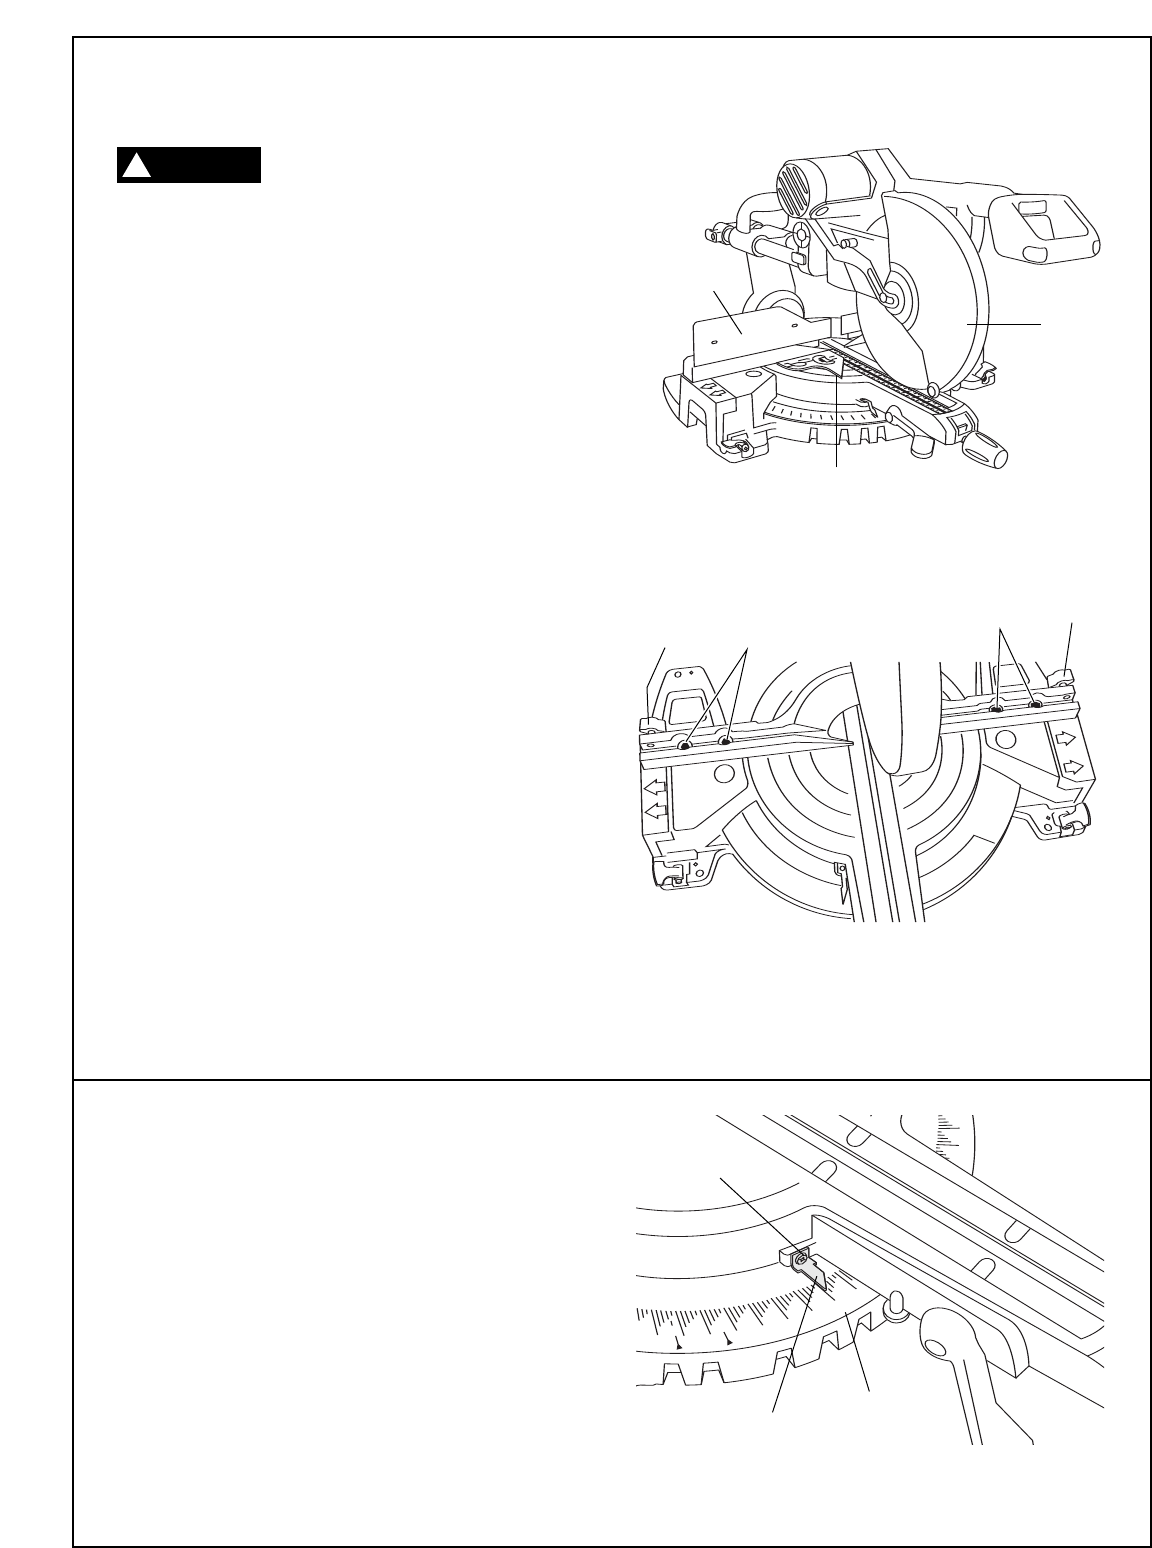
Miter Scale
Indicator Adjustment
1.
Set table at the 0
°
miter position and tighten miter
lock knob.
2. Raise the head assembly to the full-up position.
3.
Loosen the Phillips screw that holds the indicator
in place.
4. Position the indicator to align with the 0° miter
mark and tighten the screw.
Figure: Miter Scale Adjustment
Fence
Blade
Combination Square
Hex
Bolts
Hex
Bolts
Fence
Knob
10
5
0
5
15
20
25
85
0
80
30
35
75
70
65
60
55
22.5
31.6
85
Bevel Lock
60
55
50
45
35
30
40
Miter Scale
Indicator
0
°
Mark
Indicator
Adjustment
Screw
Fence
Knob
WARNING
!
Figure 1. Blade Square to Fence
Figure 2. Fence Adjustment