


-8-
or sustains significant impact, the user should
check calibration by following these steps:
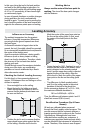
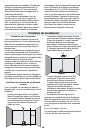
Calibrating the Top and Bottom Beams
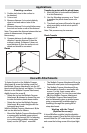
1. Choose your recalibration site. To get the
most accurate calibration possible, it is best
to use a floor/ceiling distance greater than
10’ (the greater distance, the better the
accuracy). Floor/Ceiling (top of doorway)
distance of approximately 10’.
2. Turn the tool off.
3. Remove the calibration plug on the side of
tool with a flathead screw-driver. Set the
plug where it will not be lost.
4. Draw a straight line on the ceiling.
5. Turn the tool on.
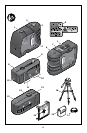
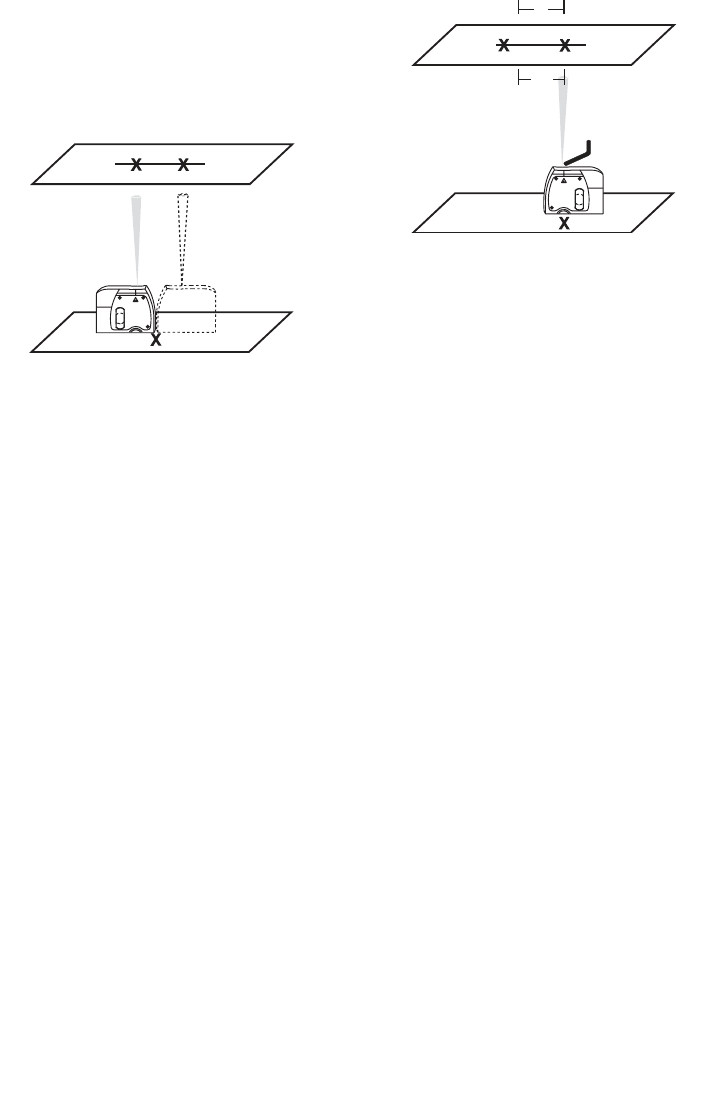
6. Place the tool on the floor (on its accessory
so that you can see the down laser beam
on the floor).
7. Align the tool so that the top laser beam hits
the line on the ceiling.
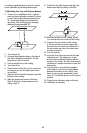
8. Mark the down laser beam on the floor,
Mark D. Mark the up laser beam on the
ceiling, Mark E.
9. Rotate the tool 180 degrees and align the
down beam with the mark on the floor.
10. Mark the up beam on the ceiling, Mark F.
You should have two marks on the ceiling.
11. Compare the two marks on the ceiling.
If the two marks are on the same point,
the unit does not need to be calibrated. If
the two marks are not on the same point,
proceed to step 12.
12. Turn the tool off.
13. Insert the 2mm Allen wrench into the side
calibration port. The objective is to get
the laser beam halfway between the two
marks on the ceiling. Turn the Allen wrench
clockwise or counter clockwise to move the
laser beam.
14. Turn the tool on and check the position
of the beam to see if it is exactly halfway
between the marks on the ceiling. If the
beam is not correctly positioned, repeat
steps 12–14 until the beam is at the correct
position.
15. Plug the side calibration plug on the tool.
16. Calibration is complete.
B
A
5
ʹ
50
ʹ
C
1/2
1 ecafruS2 ecafruS
E
D
F
E
D
F
1
1/2