


-9-
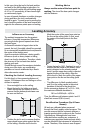
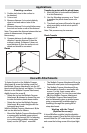
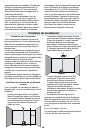
Plumbing a surface
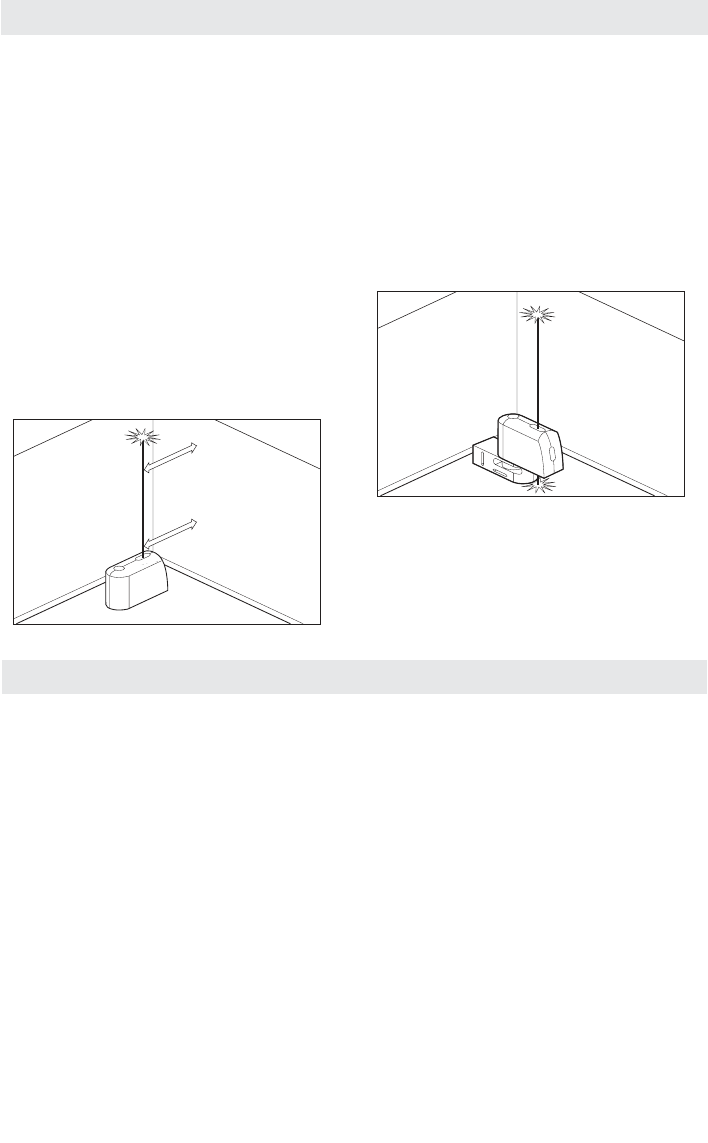
1. Position tool close to the surface to
be plumbed.
2. Turn on tool.
3. Measure distance A at a point relatively
close to tool and make a note of the
distance.
4. Measure distance B at a point further away
from tool and make a note of the distance.
Note: The greater the distance between the two
points of measurement, the greater
the accuracy.
5. Compare distance A with distance B. If
distance A equals distance B, then the
surface is plumb. If distance A does not
equal distance B, then the surface is not
plumb and should be corrected.
Plumb
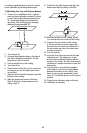
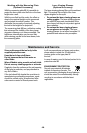
Transferring points with the plumb beam
1. Mark the point to be transferred (labeled
A in this illustration).
2. Use the Mounting accessory or a Tripod
to position the plumb down beam over
point A.
3. The plumb up beam will transfer this point
along a perfectly vertical axis to point B.
4. Mark point B.
Note: This process may be reversed.
Plumb Transfer
Applications
Plumb
Plumb Transfer
A
B
A
B
Plumb
Plumb Transfer
A
B
A
B
Use with Attachments
To fasten the tool on the Multiple-Purpose
Attachment 8, screw the locking screw 9 of
the Multiple-Purpose Attachment into the 1/4”
tripod mount 6 on the tool and tighten. To rotate
the tool on the Multiple-Purpose Attachment,
slightly loosen the screw 9.
– Rotate the tool on the Multiple-Purpose
Attachment 8 sideward or toward the rear
to make the bottom plumb beam visible.
– Rotate the tool on the Multiple-Purpose
Attachment 8 to project heights with the
horizontal laser beam.
With the Multiple-Purpose Attachment 8, the
tool can be attached as follows:
– Mount the Multiple-Purpose Attachment 8 to
a commercially available camera tripod
via the 1/4” tripod mount 13. For fastening
to a commercially available construction
tripod, use the 5/8” tripod mount 14.
– The Multiple-Purpose Attachment 8 can be
fastened to steel parts via the magnets 12.
– The Multiple-Purpose Attachment 8 can
be fastened to drywall or wood walls with
screws. For this, insert screws with a
minimum length of 2 in. into the screw holes
10 of the Multiple-Purpose Attachment.
– The Multiple-Purpose Attachment 8 can
also be fastened to pipes or similar beams
using a commercially available strap by
threading it through the opening 11 for
strap attachment.
Working with the Tripod
(Optional Accessory)
A tripod 18 offers a stable, height-adjustable
measuring support. Place the tool via the tripod
mount 6 onto the 1/4” male thread of the tripod
and screw the locking screw of the tripod tight.