


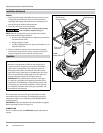
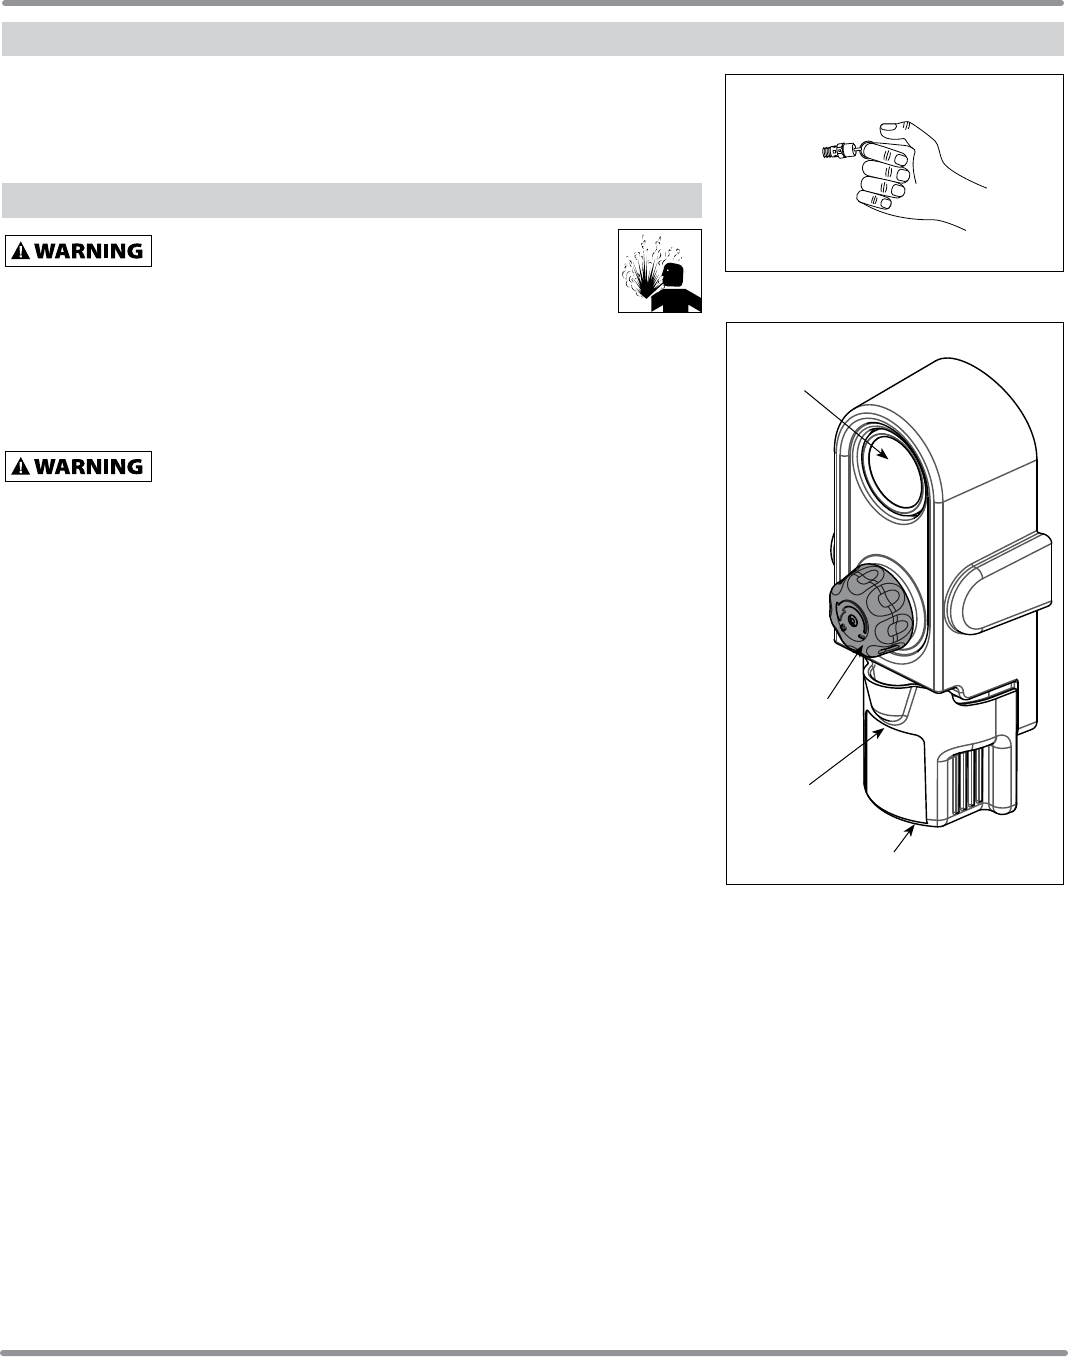
4. Wearing safety glasses, drain tank of any remaining air pressure by pulling the
ring on the safety valve. Use other hand to deflect any fast moving air that may be
directed towards your face.
5. Store compressor in a cool, dry place.
Maintenance
Disconnect power source then release all pressure from the
system before attempting to install, service, relocate or
perform any maintenance. Service should be performed by an authorized service
representative.
The compressor should be checked often for any visible problems and the
following maintenance procedures should be performed each time the compressor is
used.
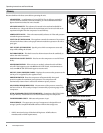
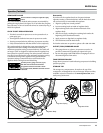
ASME SAFETY VALVE
Do not remove or attempt to adjust the safety valve!
Check the safety valve by performing the following steps:
1. Plug the compressor in and run until shut off pressure is reached (see Operating
Procedure).
2. Wearing safety glasses, pull the ring on the safety valve to release pressure from
compressor tank. Use your other hand to deflect fast-moving air from being
directed toward your face.
3. The safety valve should automatically close at approximately 40-50 psi. If the safety
valve does not allow air to be released when you pull on the ring, or if it does not
close automatically, it MUST be replaced.
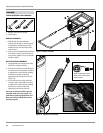
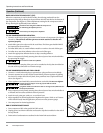
DRAIN TANK
1. Turn compressor off at foot pedal switch.
2. Check air pressure in tank. To properly drain tank of condensation, tank pressure
should be between 20-60 psi. Drain system will not work if there is no pressure in
the tank. If tank pressure is above 60 psi, decrease pressure in tank by pulling the
ring on the safety valve. Burst of air will be audible.
3. Slowly turn easy drain knob, located below the tank gauge, to the left
(counterclockwise) until fluid begins to fill drain cup. Watch draining to make sure
drain cup does not overflow. If there is a lot of fluid in the tank, you may need to
close drain knob by turning fully to the right (clockwise) then remove the drain cup
to dispose of fluid.
4. When fluid stops draining, close drain knob by turning all the way to the right
(clockwise).
5. Lift cup up and pull out to dispose of drained fluid. Reinsert cup, making sure to
secure in place.
CLEANING
Turn power OFF and clean dust and dirt from motor, tank, and air lines.
15
WL6700 Series
www.chpower.com
Operation (Continued)
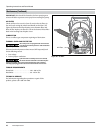
Figure 18 - Safety valve
Figure 19 - Draining tank
Tank Pressure
Gauge
Easy-Drain
Knob
Easy-Drain Cup
Fill Line