


Page 6SKU 3663 For technical questions, please call 1-800-444-3353.
REV 04f, 07k
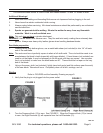
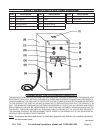
Loosen both of the clamp handles (Left Hand Clamp (14) and Right Hand Clamp (6)). See 3. FIG-
URE 3.
Place one end of the saw blade (not included) under the Left Electrode (13). See 4. FIGURE 4
on page 6. Make sure it is aligned squarely and the teeth are facing back. The saw blade end
should protrude 1/4” out of the clamp, toward the center.
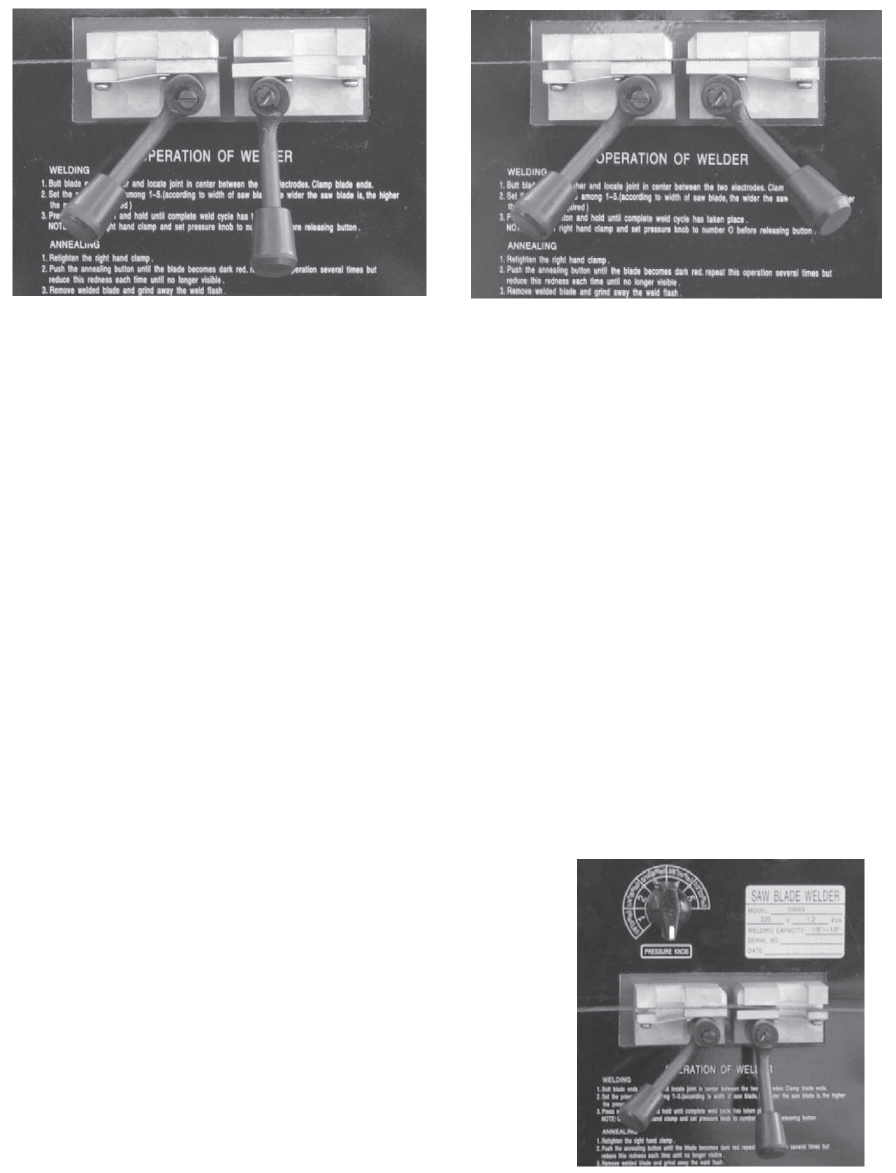
Tighten the Left Hand Clamp (14). See 5. FIGURE 4.
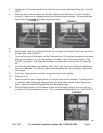
Repeat steps 4 and 5 on the Right Electrode (5) and Right Hand Clamp (6) with the other end of 6.
the saw blade. See FIGURE 5.
To butt up the ends of the blades, turn the Pressure Knob (12) to the setting based on the blade 7.
width you are welding, i.e. if you are welding a 1/4” blade, adjust the knob to number 2. See
FIGURE 2 on page 5. The wider the saw blade, the higher the Pressure Knob (12) should be
set.
Verify that the saw blades align squarely, front to back, and that the two ends butt together with 8.
no space in-between. If they do not, remove the saw blades and recut the ends to make them
more square.
Put on your safety glasses, respirator, and gloves approved for welding.9.
Plug the unit in.10.
Press and hold the green Welding Button (4) until the weld cycle is complete. If popping occurs, 11.
or holes are created during the welding process, the blade ends were not butted together cor-
rectly. Unplug the Welder and prepare the saw blade ends again.
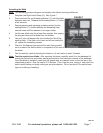
With the Welding Button (4) still pressed, loosen the Right Hand Clamp (6) and turn the Pres-12.
sure Knob (12) counterclockwise to zero. Then, release the Welding Button (4). See FIGURE 6.
FIGURE 4
FIGURE 5
FIGURE 6