


SKU 67119 For technical questions, please call 1-800-444-3353. Page 15
tool may try to twist from the strong
initial torque.
Note: The Router bit should always be fed
into the stock from left to right so as
to match the clockwise rotation of the
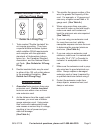
router. When cutting outside edges,
rotate the router counterclockwise.
Rotate it clockwise when cutting in-
side edges.
Note: Make practice cuts at different
speeds in scrap material until you are
able to produce a smooth cut with no
burnishing or burn marks. Burn marks
are caused by moving too slowly
through the wood. Feeding the Rout-
er too quickly, or trying to remove too
much material in a single pass cre-
ates a rough cut and can overload
the motor.
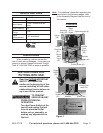
Set the desired speed by turning the 1.
Speed Adjuster (4). Use lower set-
tings for large diameter bits and high-
er settings for small diameter bits.
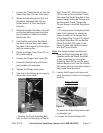
Place the Router directly above the 2.
point you plan to cut. Verify that there
are no obstructions in the cutting
path.
Verify that the Plunge Lock Lever (32) 3.
is loose.
Turn on the Router. The Router can 4.
be powered with or without the Lock-
on Button engaged.
To power the Router so that the •
power is on only while the Trigger
Switch is depressed: depress and
hold in the Trigger Switch (60). To
stop the Router from this setting,
release the Trigger Switch.
To power the Router continuously, •
without holding in any buttons or
switches, depress and hold in the
Trigger Switch (60), then push the
Lock-on Button. Release the Trig-
ger Switch, then the Lock-on Button.
To stop the Router from this setting,
press and release the Trigger Switch.
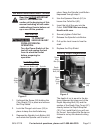
Allow the bit to come to full speed, 5.
slowly engage material. DO NOT
force the Router down into the mate-
rial.
When the tool reaches its pre-set 6.
depth, tighten the Plunge Lock Lever
(32).
Once you have nished the cut, loos-7.
en the Plunge Lock Lever and allow
the spring to lift the Router directly
out of the workpiece.
When nished, raise the Router so 8.
the bit is clear of the material, then
release the Trigger Switch, or press
and release the Trigger Switch if the
Lock-on Button was set. Do not set
the Router down until the bit has
come to a complete stop.
When making more than one pass 9.
to achieve the desired cutting depth,
turn the Depth Stop Turret to the next
lower level and repeat the cut. Re-
peat again as needed until the cut is
the desired depth.
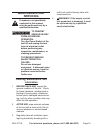
To prevent accidents, disconnect the 10.
power supply after use. Clean, then
store the tool indoors out of children’s
reach.