


13
WARNING
Plugging in saw during assembly
could result in electrical shock, or
severe cuts from contact with spinning
blade.
Do not plug in saw at any time during
assembly.
Plug in saw only when it is to be used.
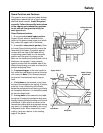
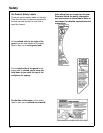
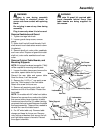
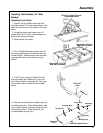
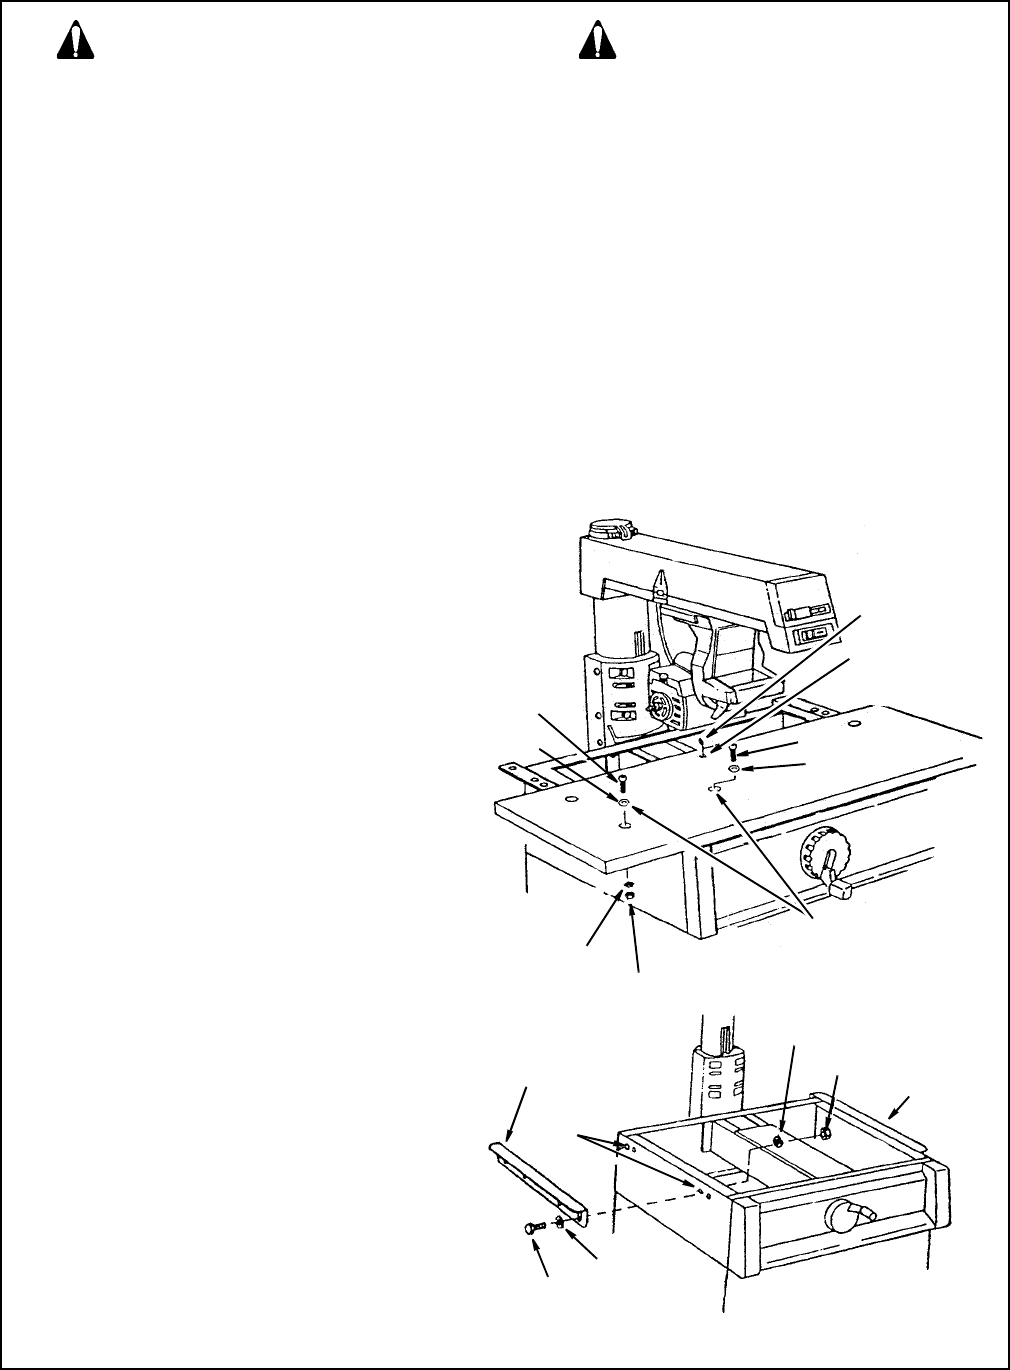
Remove Sawblade and Guard
1. Tighten carriage lock knob.
2. Loosen guard clamp screw, remove
guard.
3. Motor shaft has left hand threads. Hold
shaft wrench and rotate arbor wrench down
(clockwise).
4. Remove shaft nut, outer collar, sawblade,
and inner collar. Dispose of guard but retain
shaft nut, outer collar sawblade and inner
collar.
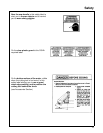
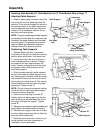
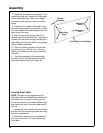
Remove Original Table Boards, and
Mounting Supports
NOTE
: All original hardware (except for T-Nut)
will be required for mounting retrofit parts.
1. Loosen the table clamps and remove the
rear table, spacer table and rip fence.
Discard the rear table and spacer table.
Save the fence, it will be reused.
2. Remove the 1/4-20 x 1" cup point screw
from the T-Nut located in the front table.
Retain this screw for future use.
3. Remove all remaining nuts, bolts, and
washers and lift off front table. Discard the
front table.
NOTE: On models with 44" wide front tables:
Remove four screws from under side of table
that secure table clamp channels to table.
Locate and save the five (5) rubber leveling
grommets that are located between the table
and base assembly. These will be needed to
reinstall the new front table board.
4. For 40" wide table only. Remove table
clamps and keep for future use. Remove
nuts, bolts and washers that secure the left
and right table support channels. Discard
the support channels.
WARNING
This retro fit guard kit required addi-
tional clearance behind fence. New
table boards are being supplied for
this reason.
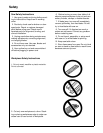
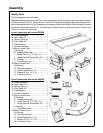
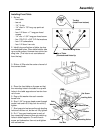
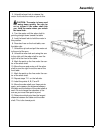
Set Screw
Pan Head Screw
Leveling Hole
Washer
Hex Nut
Lockwasher
Washer
Bolt
Table Support
Screws
Here
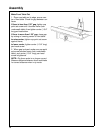
Flat Washer
Hex Head Bolt
Lockwasher
Mounting Holes
Nut
Table Support
Assembly