


18
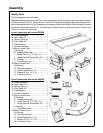
Assembly
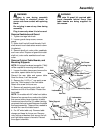
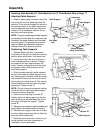
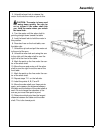
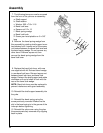
7. Stand the
front table
on one edge. Put a
mounting screw with a washer through each
of the mounting holes. Then put a
rubber
grommet
on the bottom of each mounting
screw.
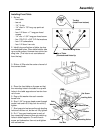
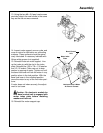
8. Place the
front
table
on the
saw
so that
the mounting screws line up with the
U-clips
.
The
front table
should extend about one inch
beyond the
trim caps
.
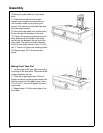
9. Start the mounting screws into the
U-
clips
using a Phillips screwdriver. Tighten the
screws until the heads are just touching the
table
. Make sure that the
table
is not squeez-
ing the
rubber grommets
.
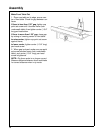
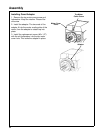
10. Start the leveling screws into the level-
ing holes using a 1/8 inch hex “L” wrench.
Tighten the screws until they are flush with
the
table
.
11. From the underside of the table attach
the table rails to the table board using the
two holes nearest the end of each rail.
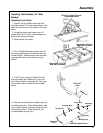
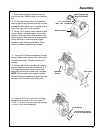
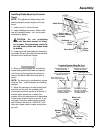
Leveling Front Table
NOTE: The goal of this adjustment is to
make the
front work table
flat and parallel to
the
radial arm
. In order to do this, you will
choose four points on the
table
. When these
four points are level, the entire
table
should
be level.
1. Loosen the three
leveling screws
and be
sure that the five
mounting screws
are snug
but not overtightened.
2. Raise the
radial arm
until the bottom of
the
motor
is about 2-1/2 inches above the
front table
.
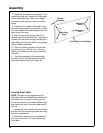
Mounting
Holes
Mounting
Hole
Rubber
Grommet
Front Table on Front Edge
Mounting
Holes