-13-
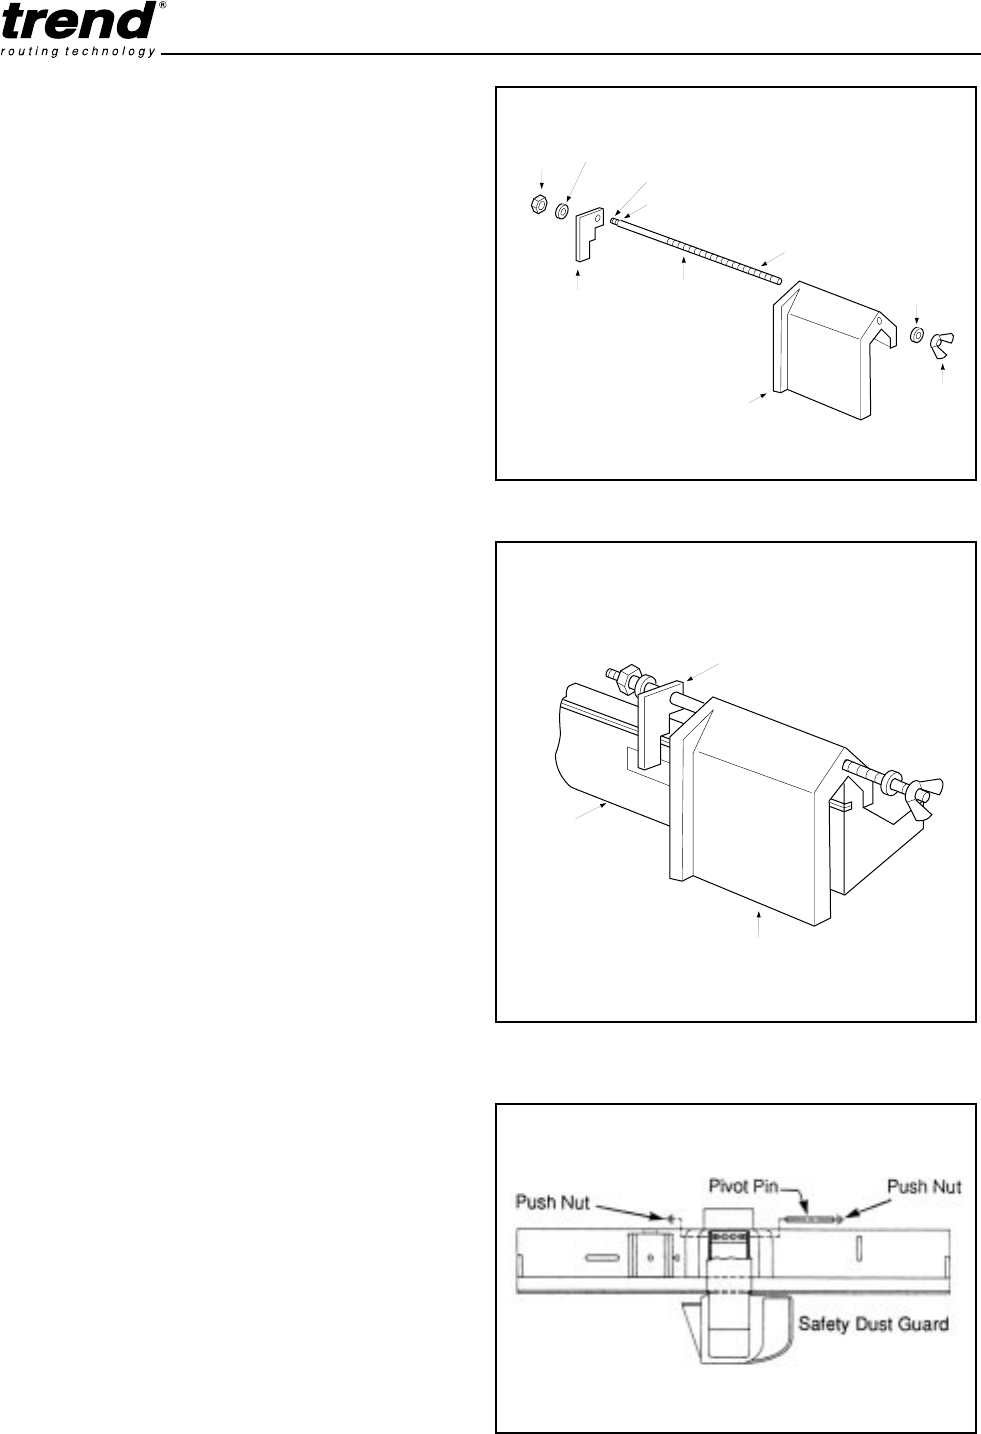
Router Table for the Craftsman
Fig. M
Fig. L.2
Fig. L.1
L.
Assembly of Tenon Push Block
1.
Identify the components required, see opposite.
2.
Screw the smaller threaded end of the Clamp Rod
into threaded hole in Clamp Plate until the plate
bottoms on it’s shoulder (make sure clamp is
oriented such that letter 'C' is facing outwards as
shown in fig. L.1) and
tightly secure Clamp Plate to
Clamp Rod with a 11mm AF spanner.
3.
Insert the longer threaded end of Clamp Rod
through hole in Push Block and fit the flat washer
and the Wing Nut onto it.
Mounting Push Block Assembly on Back Fence
1.
Mount assembled Push Block on the Back Fence
by aligning retaining rib on Push Block with the
groove in the face of Back Fence. See fig. L.2.
2.
Slide push block assembly back and forth along
entire length of Back Fence to ensure that it slides
freely. Occasional application of furniture spray wax
on the sliding surfaces of the Push Block will
improve the sliding motion.
Removing dust and chips from sliding surfaces of
Push Block and Back Fence will ensure a good
sliding motion.
M.
Assembly of Safety Dust Guard to Back Fence
1.
Identify the components required, see opposite.
2.
Position the guard on the Back Fence as shown in
fig. M.
3.
Fit one of the Push Nuts onto one end of the Pivot
Pin. (To ensure a secure fitting it will be necessary
to tap it onto the pin with a hammer).
4.
Align the holes in the Back Fence with those on the
Dust Guard.
5.
Insert the Pivot Pin through the holes.
6.
Fit the remaining Push Nut onto the other end of
the Pivot Pin. It will be necessary to support the
other end of the Pivot Pin onto the corner of a hard
surface in order to tap the Push Nut securely onto
the Pivot Pin with a hammer.
7.
Ensure the guard pivots freely.
Note
Once the guard has been installed, it is recommended
that the Push Nuts are not removed.
Hex
nut
Spring washer
Wing
nut
Flat
washer
Push block
Small threaded end
Long threaded end
Clamp
rod
Shoulder
Clamp
plate
Push block
Clamp
plate
Face of
back fence


