


-17-
Router Table for the Craftsman
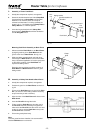
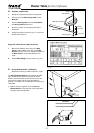
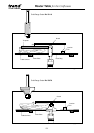
to socket for
plug of router
to plug at
mains supply
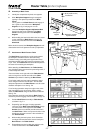
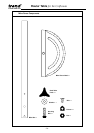
fig. Q.1
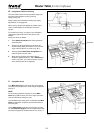
fig. Q.2
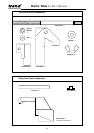
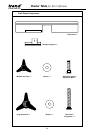
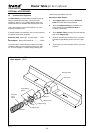
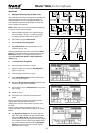
Q.
Assembly of Mitre Fence
1.
Identify the components required, see opposite.
2.
Insert the pin of the Mitre Fence Head into the
Mitre Bar.
3.
Insert the Securing Bolt and fit the Flat Washer
and Securing Knob (small size).
4.
Remove any flash on the plastic pointer with a
sharp knife.
5.
Position the pointer as shown in fig. Q.1 and insert
the bolt, then fit the nut.
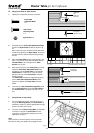
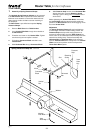
Alignment of Back Fence to Mitre Fence Slot
1.
Measure the distance from each end of Back
Fence to edge of Mitre Fence slot in the Table
Surface as shown in fig. Q.2. Adjust the position of
the Back Fence to ensure both distances are
equal.
2.
Position Mitre Gauge in slot as shown in fig. Q.2.
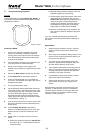
R.
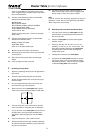
No-Volt Release Switch - NVRS/230V
(Standard accessory on tables made from 1/3/97)
The No-volt Release Switch can be fitted to the table
leg or workboard to provide easy access to On/Off
buttons. Should the power be turned off at source, the
router will not restart until the green start button is
pressed. The switch is for use with 230 volt routers up to
1850 watts.
1. With the fixing kit supplied, mount the No Volt
Release Switch on the right side of the router table
using the holes already drilled.
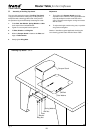
fig. U.1
fig. U.2
workboard
Knob
Knob
Pointer
Hex nut
Securing bolt
Mitre bar
Flat washer
Mitre fence head