


CAP-215
17
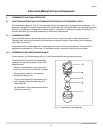
Instruction Manual Oil-Less Compressors
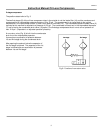
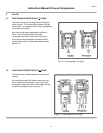
4.3. INITIAL OPERATIONAL CHECK OF VALVES
If the intake pipe to the valve head of the second stage heats up excessively, and the first stage safety valve
relieves, either the intake valve of the second stage or the pressure valve of the first stage is malfunctioning. It
is therefore necessary to remove the valve head and to check and clean these valves, or to replace them as
necessary.
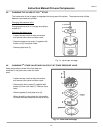
4.4. GENERAL INSTRUCTIONS FOR CHANGING THE VALVES
- Carefully clean dirty valves. Never use a sharp tool for this purpose. Soak the valves in hot soap suds and
clean with soft brush.
- Check individual components for excessive wear. If the valve seat and valve disks are dented, replace
the valves.
- Valve head screws must be tightened with a torque wrench (see tightening torque values chapter 13).
- Check the valve space in the valve heads for dirt and clean, if necessary.
- Use only satisfactory gaskets and 0-rings on reassembly.
- Observe the correct sequence when fitting together again.
- After finishing all maintenance work on the valves, turn the compressor manually using the flywheel and check
whether all items have been correctly installed.
- 30 minutes after restarting the compressor unit after valve maintenance stop unit, let it cool down to ambient
temperature and retighten valve studs and cap nuts. Otherwise valves could work loose due to setting of the
gaskets.
- Remove and check the valves every 7,000 operating hours, if necessary replace them.