


11
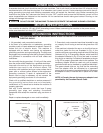
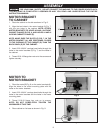
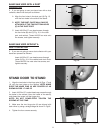
BAND SAW USED WITH A DUST
COLLECTOR
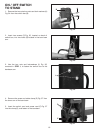
3. If you are going to use your band saw with a dust
collector, attach the dust port as follows:
A. Align the four holes in the dust port (A) Fig. 15,
with the four holes in the side of the stand.
B. NOTE: THE DUST CHUTE WILL ONLY BE
ATTACHED AT THE TWO BOTTOM HOLES
(C) IN THE DUST PORT.
C. Insert #10-32x1/2" pan head screws through
the four holes (B) and (C) Fig. 15, in the dust
port, and cabinet. Thread #10-32 hex nuts onto
the screws, and tighten securely.
Fig. 15
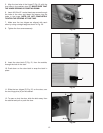
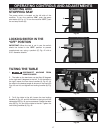
BAND SAW USED WITHOUT A
DUST COLLECTOR
3. If you are not going to use a dust collector with your
band saw proceed as follows:
Insert #10-32x1/2" pan head screws through
holes (A) Fig. 16, in the cabinet and dust chute.
Thread #10-32 hex nuts onto the screws, and
tighten securely.
Fig. 16
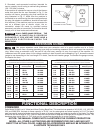
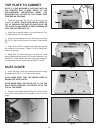
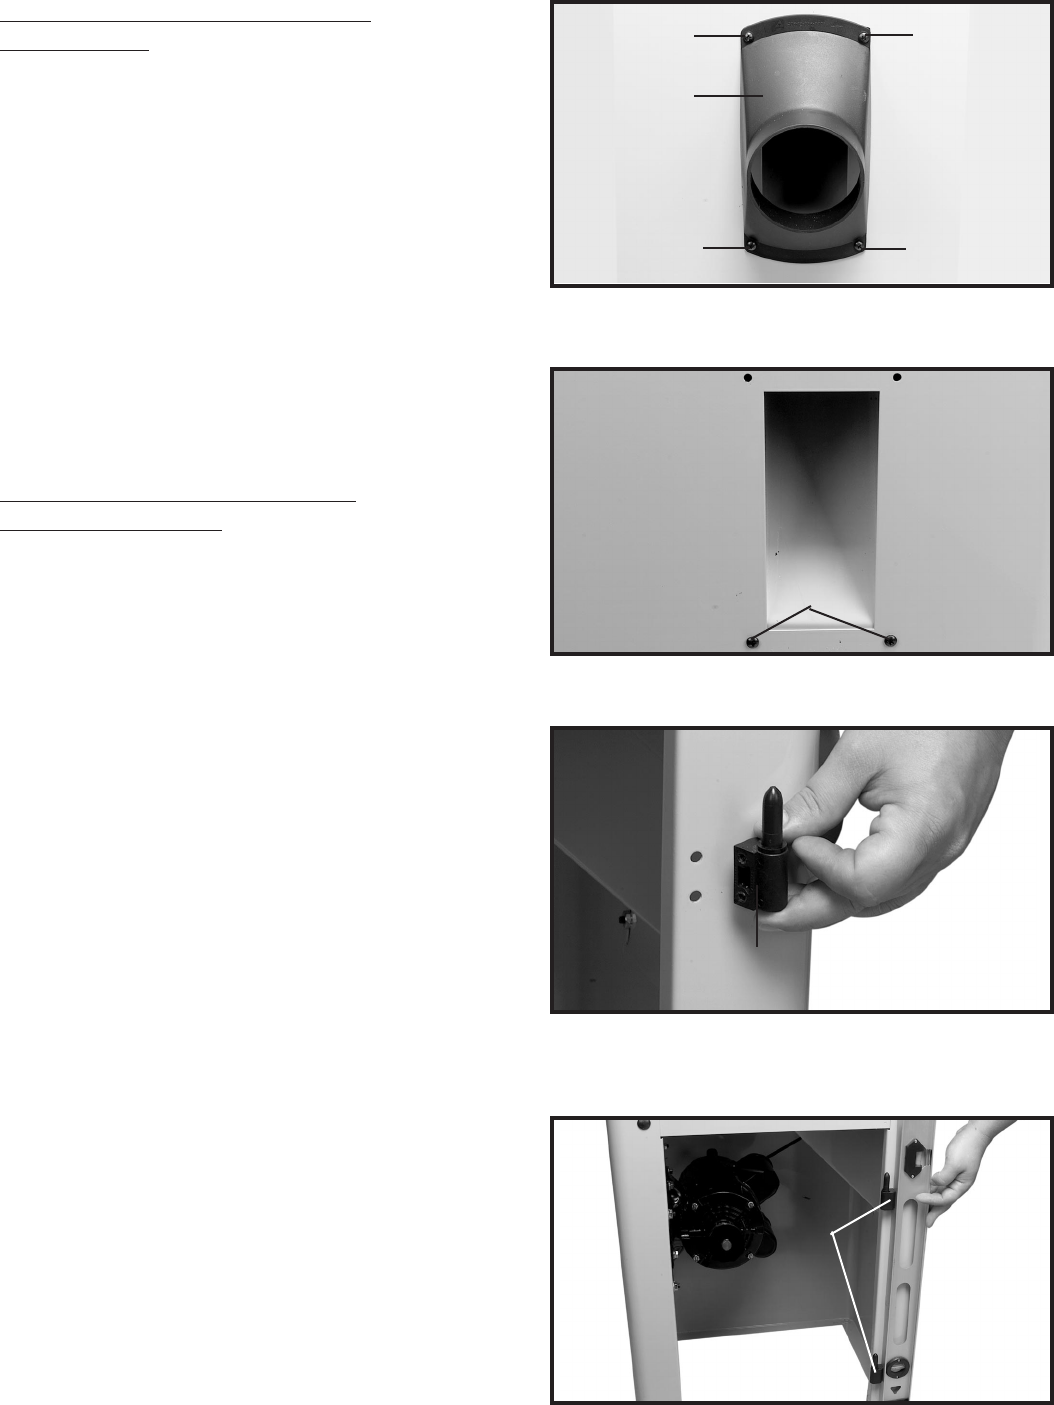
STAND DOOR TO STAND
1. Align the two holes in the hinge pins (A) Figs. 17 and
18, with the two holes on the cabinet. NOTE: MAKE
SURE THE HINGE PINS (A) ARE POINTED UP AS
SHOWN IN FIGS. 17 AND 18.
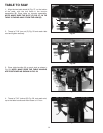
2. Insert #10-24x1/2" socket head cap screws through
the holes in the cabinet, (from the inside of the stand),
and thread the screw into the hinge pins.
NOTE: DO NOT COMPLETELY TIGHTEN THE
SCREWS AT THIS TIME.
3. Make sure the two hinge pins (A) are aligned with
each other by using a straight edge as shown in Fig18.
4. Tighten the four screws securely.
Fig. 17
Fig. 18
A
A
A
B
C
C
B
A