


11
ADJUSTMENTS
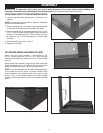
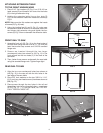
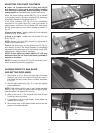
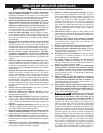
ADJUSTING THE FENCE PARALLEL
IMPORTANT: CHECK TO MAKE CERTAIN THAT THE
MITER GAUGE SLOTS IN THE SAW TABLE ARE
PARALLEL WITH THE SAW BLADE. CHECK WITH
THE INSTALLATION MANUAL THAT CAME WITH
YOUR SAW FOR INSTRUCTIONS.
WW
UU
FIG. 20
VV
FIG. 21
XX
FIG. 22
YY
FIG. 23
YY
A1
B1
ZZ
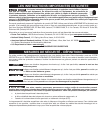
To reduce the risk of injury, turn unit off
and disconnect it from power source before installing
and removing accessories, before adjusting or when
making repairs. An accidental start-up can cause injury.
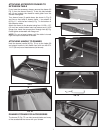
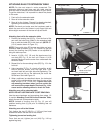
bottom edge is in line with the edge of the miter gauge
slot as shown and push down on fence locking handle
miter slot the entire length of the table. If an adjustment is
the fence on the guide tube and check again. Repeat this
adjustment until you are certain the fence is parallel to
the miter gauge slot. NOTE: Very little movement of the
adjusting screws is necessary to adjust the fence.
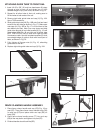
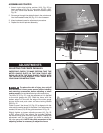
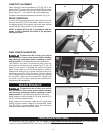
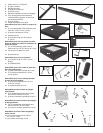
ASSEMBLING POINTER
Fig. 20.
2. Screws go through the slotted holes in the pointer and
3. Keep hardware loose for adjustment procedure.
4. Repeat for the left pointer assembly.
RR