


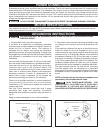
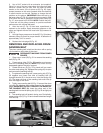
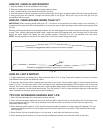

3. Use a 9/16” socket with an extension (not supplied).
Place it in one of the two holes where the hole plugs were
removed. Loosen one hex bolt, then the other to relieve
tension on the motor. (One is shown at (D) Fig. 26). Apply
upward pressure on the motor (located under the machine)
to relieve tension on the belt. Replace or change the belt
positions on the pulleys. IMPORTANT: When the belt is on
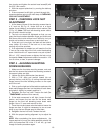
the inner pulleys (F) Fig. 26, the sanding drum speed is 3300
SFM. When the belt is positioned on the outer pulleys (G)
Fig. 27, drum speed is 2210 SFM. NOTE: Position the poly-
v drive belt on the pulleys correctly to provide maximum
performance with minimal belt wear.
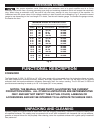
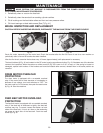
4. After the belt (E) Fig. 28 has been repositioned or
replaced on the pulleys, apply downward pressure on the
motor and tighten the two hex head bolts (D) (loosened in
STEP 3).
5. Use light finger pressure on the belt (E) Fig. 28 midway
between pulleys to check for proper tension. A deflection of
approximately 3/16" is correct.
6. Replace the hole plugs (B) Fig. 25.
Fig. 26
Fig. 27
Fig. 28
E
D
F
F
E
G
E
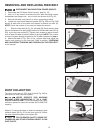
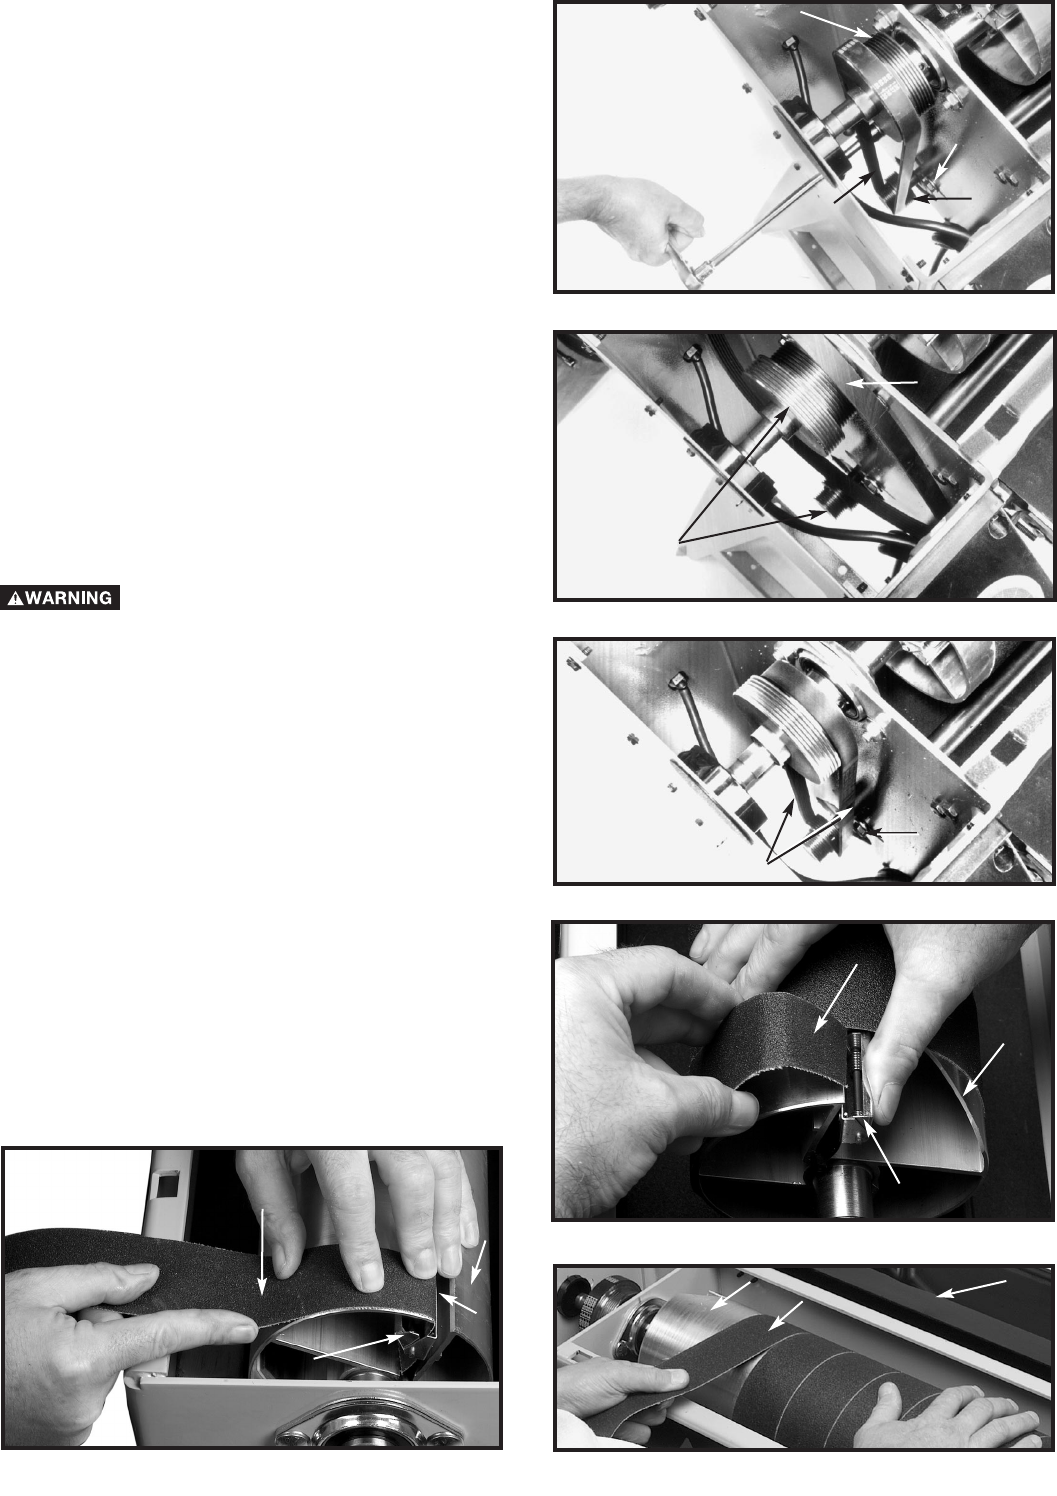
REMOVING AND REPLACING DRUM
SANDING BELT
The drum sanding belt is held on the drum with a spring
clip located on each side of the drum.
DISCONNECT MACHINE FROM POWER
SOURCE.
1. Open drum cover (B) Fig. 31 to remove the sanding
belt (A) Fig. 29.
2. Press spring clips (C) Fig. 29 together and remove
one end of sanding belt (A). NOTE: Clip must be fully
depressed against the drum support.
3. Rotate the drum, (D) Fig. 31 by hand until you reach
the other end spring clip. Squeeze the spring clip to open
and remove the sanding belt (A).
4. To replace the sanding belt, press spring clip (C) Fig.
30 together and insert one end of sanding belt (A)
through the slot (S) in the drum and into the spring clip
(C). The taper cut end of the sanding belt must line up
with the edge of the drum.
5. Tightly wrap sanding belt (A) Fig. 31 around the drum
cylinder (D), keeping each wrap close to the previous
edge.
IMPORTANT: DO NOT OVERLAP THE EDGES OF
THE
SANDING BELT
(A)
. Insert the other end of the
sanding belt into the left spring clip (C) Fig. 29 as tightly as
possible.
6. The sanding belt will stretch during use. Periodically,
press spring clip (C) Fig. 29 and reinsert stretched length
into the clip.
Fig. 29
C
A
Fig. 30
A
Fig. 31
D
D
A
D
S
C
D
B
13