


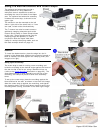
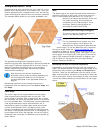
24 Kapex KS120 Miter Saw
Calibration and Adjustment
The Festool Kapex miter saw comes fully calibrated from
the factory and should not require further calibration out of
the box or after normal use. The following calibration
techniques should only be necessary in the event that your
saw is knocked out of alignment, such as can happen
during frequent, or unsecured transport. Use these
procedures only when your saw needs service.
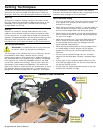
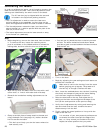
Calibrating the Miter Angle
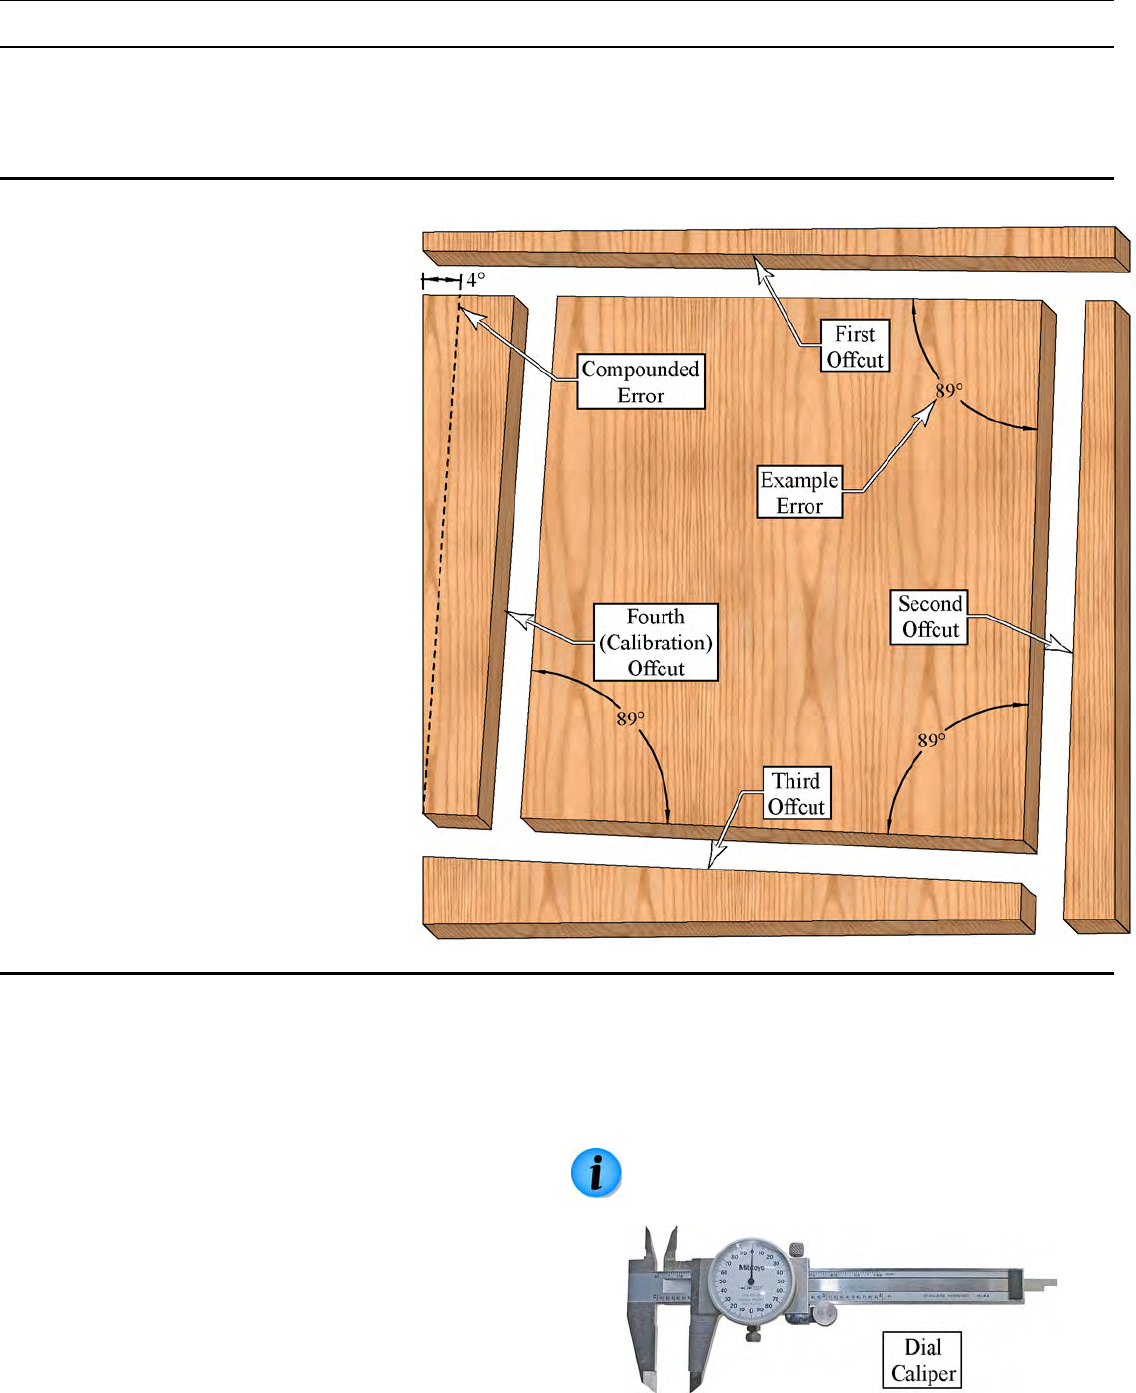
The calibration method described here is
based on compounding an error by a factor
of four. This makes it easier to detect
extremely small calibration errors. However,
care should be taken in over-using this
calibration procedure because it has such a
fine accuracy that it could be easy to get
carried away and try to over-calibrate the
saw. The factory calibration threshold is
±0.16°, but this calibration procedure is
capable of measuring errors as low as
±0.001°, which is nearly impossible to
obtain in actual practice.
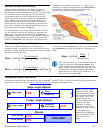
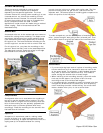
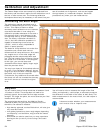
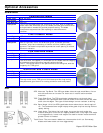
The basis for this procedure is to make four
successive cuts, where each new cut
references from the previous cut. As a r
any angular error in the miter angle will
propagate and be compounded with each
cut. The final cutting error will have 4-times
the actual error of the saw. In the diagram
to the right, you can see that each
successive offcut has a slightly larger angle
than the previous offcut.
esult,
You may have heard of this method referred
to as the “5-cut Calibration Method”, but as
long as you start out with a straight edge on
the board, only 4-cuts are required.
Furthermore, any additional cuts made after
the fourth cut will not increase the accuracy,
and it will remain at 4-times the original
error.
Getting Started
You will need a piece of scrap wood that is between 6 and
12 inches on a side. The scrap does not need to be
perfectly square, but at least the first edge must be
straight. The larger the piece, the more accurate your final
measurement will be.
The material can be anything, but Medium Density
Fiberboard (MDF) will give you the cleanest cuts, and
therefore, the easiest to measure.
► High density plywood, such as Baltic birch, will also give
very accurate results.
► Low-grade plywood may have rough edges, depending
on the quality, and therefore, may provide the lowest
accuracy.
► Solid wood can also be used, but you may experience
burning on the rip-cuts if you are using a fine-tooth
blade.
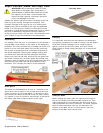
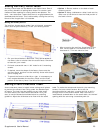
You will need a ruler to measure the length of the final
offcut, and optionally, a dial caliper to accurately measure
the difference in the width of the offcut at both ends. This
width measurement is the most critical, so a dial caliper is
recommended.
It does not matter whether your measurements
are in metric units or imperial units.