


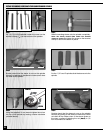
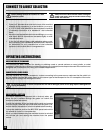


• There is a 2”diameter dust outlet on the rear of the machine
allowing for the connection to a dust collector
(not included).
• A 2” TO 4” DUST HOSE ADAPTOR is also included to facilitate
(if needed) connection to a standard 4” dust collection
hose.
• Be sure to use appropriate size hose and fittings
(not included).
and check that all connections are sealed tightly to mini-
mize airborne dust.
• If you do not already own a dust collection system consi-
der contacting your GENERAL® INTERNATIONAL distributor
for information on our complete line of dust collection
systems or visit our Web Site at: www.general.ca
Before sanding connect the machine to a dust
collection system.
Always turn on the dust collector before starting the
sander and always stop the sander before turning
off the dust collector.
CONNECT TO A DUST COLLECTOR
OPERATING INSTRUCTIONS
BASIC FUNCTIONS OF THIS MACHINE
This machine has been designed for sanding or polishing round or curved surfaces on wood, plastic, or metal
materials. It is ideal for use in smaller woodworking projects in a hobbyist/home shop environment.This machine is not
designed with a continuous duty rating or for industrial applications.
CONNECTING TO A POWER SOURCE
Plug the machine into a proper receptacle – before connecting to the power source make sure that the switch is in
the “off” position and that the power supply is of the same type as that stamped on the I.D. nameplate of the motor.
Running on low voltage will damage the motor.
To avoid risk of shock or fire do not operate the unit with a damaged power cord or plug. Replace damaged cord
or plug immediately.
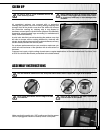
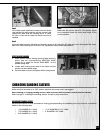
ON/OFF SWITCH & SAFETY PIN
The switch assembly is equipped with a lock-out safety pin.
When the pin is installed through the green “on” button, the
machine cannot be started.
To start the machine, lift the red stop switch panel and remove
the lock-out pin. Lower the stop panel and push the green “ON”
button. Wait for the spindle to reach full speed before sanding.
To stop the machine, push on the RED “STOP” panel and wait for
the spindle to come to a complete stop.
When you have finished using the machine be sure to re-install
the lock-out pin and unplug the machine from the power
source.
12