


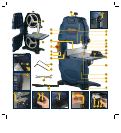


14
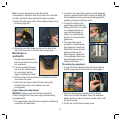
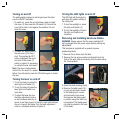
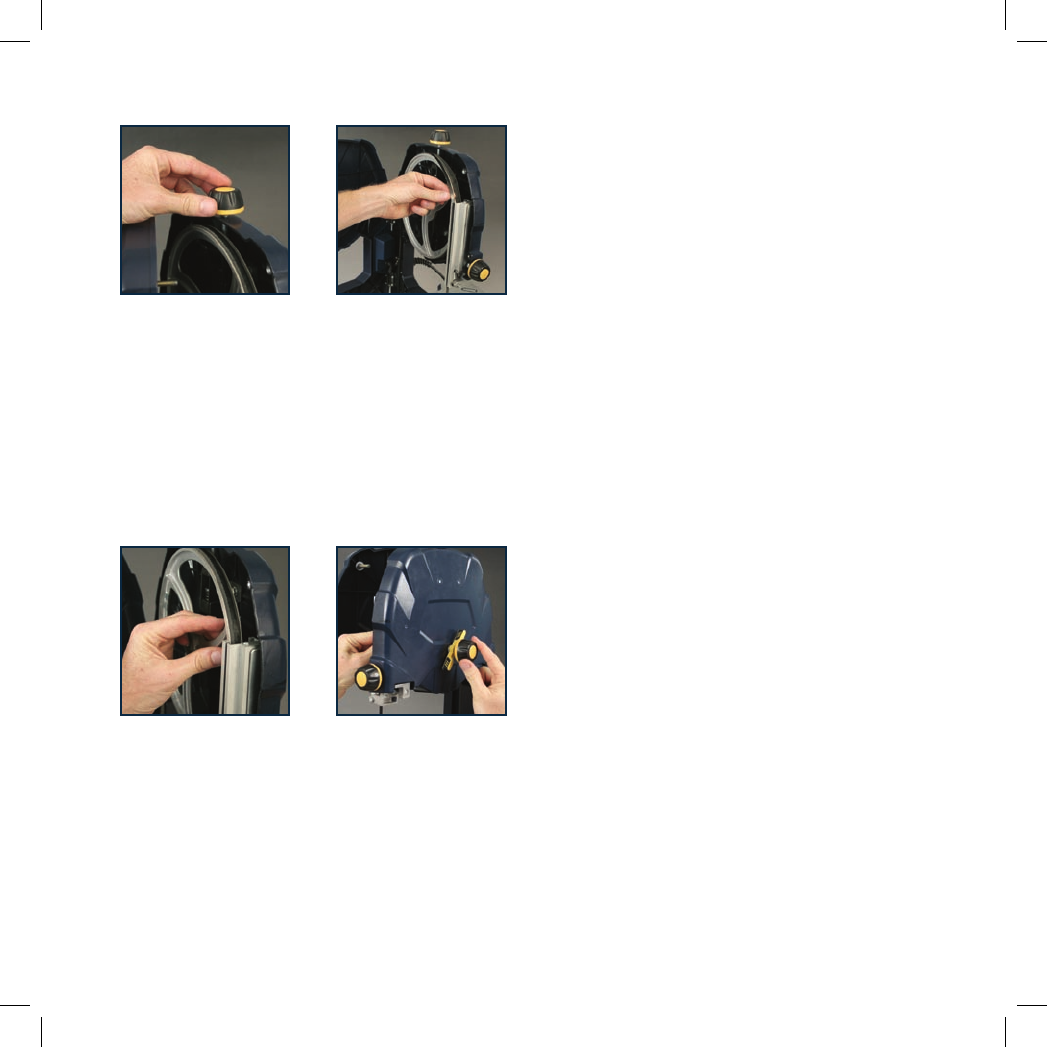
5. Loosen the blade tension knob to slacken the blade.
6. Remove the blade by guiding it through the slot in the
work table and the upper and lower blade guides.
7. Fit the new saw blade ensuring that the teeth are pointing
towards the front of the saw where the doors are.
8. Lightly tension the new blade by rotating the blade
tension knob.
9. Centre the band saw blade on the rubber tyres of the
band saw wheels.
10. Turn the upper wheel by hand to ensure the blade is
running in the centre of the rubber-lined wheels.
11. If required, adjust the saw blade tracking.
12. Once the tracking is correct, tighten the blade tension
knob. Adjust the thrust bearings and guide pins as
described earlier.
13. Close the housing doors.
14. Place the lower blade guard back into position and fit
the hex screw to secure the guard in position.
15. Replace the table insert.
16. Attach the bracket to the front of the work table by
tightening the hex head screw using the 10mm wrench.
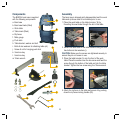
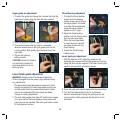
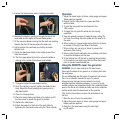
Operation
1. Adjust the bevel angle, rip fence, mitre gauge and upper
blade guide as required.
2. Ensure that the table insert is in place and flush
with the table.
3. To start the saw push the on/off switch to the
‘ON’ position.
4. To begin the cut guide the wood into the moving
saw blade.
5. Use only enough pressure to keep the saw cutting. Do
not force the cutting, allow the blade and the saw to do
the work.
6. When cutting on a bevel angle ensure that the rip fence
is located on the right hand side of the blade.
7. When cutting rod, use a jig or fixture to prevent the
workpiece from turning.
8. When cutting boards vertically, use a suitable push block
to feed the workpiece into the saw.
9. Once finished turn off the tool by pushing the red button
on the switch cover and unplug the tool from the power
point to prevent unauthorised use.
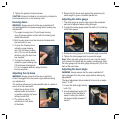
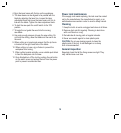
Using the REDEYE
®
laser line generator
WARNING. Do not stare directly at the laser beam.
Never aim the beam at any person or an object other than
the workpiece.
Do not deliberately aim the beam at personnel and ensure
that it is not directed towards the eye of a person.
Always ensure the laser beam is aimed at a sturdy
workpiece without reflective surfaces. i.e. wood or rough
coated surfaces are acceptable. Bright shiny reflective sheet
steel or the like is not suitable for laser use as the reflective
surface could direct the beam back at the operator.
Only turn the laser beam on when the workpiece is on
the tool.
1. Mark the line of cut on the workpiece.
2. Adjust the bevel angle, rip fence, mitre gauge and upper
blade guide as required.
3. Switch on the laser beam using the laser light
on/off switch.