


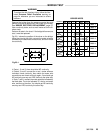
307–758 31
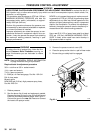
PRESSURE
CONTROL ADJUSTMENT
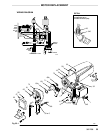
6.
Plug in the sprayer
.
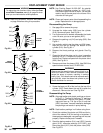
7. Turn the pressure control knob (B) to the
minimum
setting
(fully counterclockwise), and turn the
sprayer
ON. THE DISPLACEMENT PUMP SHOULD NOT
CYCLE
If it does cycle
, remove the plug (15) from the
bottom
of the pressure control. Insert a 3/8 in. nut
driver through the opening, and unscrew the
pressure
adjustment nut (T) just until the sprayer
stops
running.
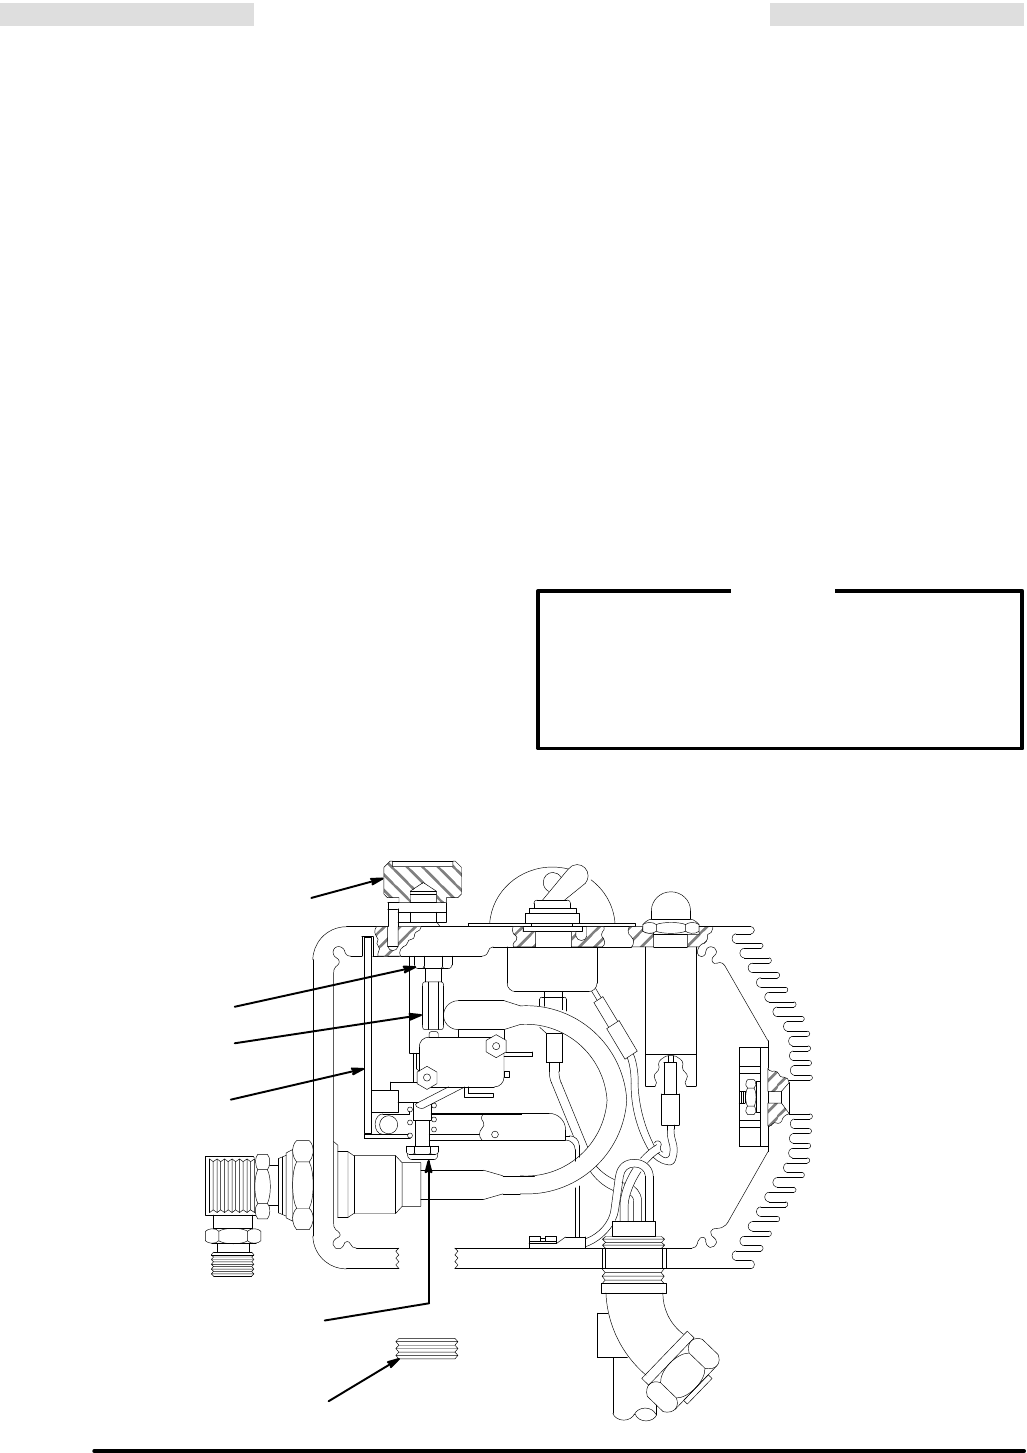
Adjust the Overpressurization Switch
8. With the spray gun triggered,
slowly
turn the pres-
sure control knob clockwise just until the sprayer
starts.
Prime the pump and hose.
9. Slowly turn the pressure control knob to the maxi-
mum
setting. While watching the red light
on the cir
-
cuit board and the pressure gauge, turn the nut (T)
slowly
to increase pressure until the red light goes
out and the gauge reads between 3400 –3800 psi
(238
– 266 bar).
If the red light does not go out by 3800 psi
(266
bar),
loosen the nut (P) and adjust the stud
(Q)
until the light goes out.
If
the red light goes out before 3400 psi (238
bar), loosen the nut (P) and adjust the stud (Q)
until
the light goes out between 3400 – 3800 psi
(238
– 266 bar).
10. T
ighten the nut (P) if it was loosened in Step 9.
11. Trigger
the gun to relieve pressure. Release the
trig
-
ger and engage the safety latch. Repeat Step 9 to
verify
your results.
12.
Install the pressure control cover
.
Maximum Working Pressure Adjustment
13. Turn the sprayer OFF. Disengage the gun safety
latch.
T
rigger the gun into a grounded waste contain
-
er until pressure is relieved. Engage the gun safety
latch.
14. Use
the 3/8 in. nut driver to turn the pressure adjust
-
ment
nut (T) counterclockwise one full turn.
15. With the pressure control knob at the
minimum
set-
ting,
turn the sprayer ON.
16.
Slowly
turn the pressure control
knob (B) clockwise
to the maximum setting and hold it there. Use a 3/8
in.
nut
driver or socket wrench to slowly turn the pres
-
sure adjustment nut (T) clockwise until the gauge
reads
EXACTL
Y 2750 psi (195 bar).
17. Turn the pressure control knob to the minimum set-
ting.
Release the gun safety latch and trigger the
gun
into
a grounded waste container until
pressure is re
-
lieved.
Engage the gun safety
latch. Slowly increase
the pressure to verify that the maximum working
pressure
is set at 2750 psi (195 bar).
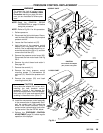
To
prevent pump corrosion,
flush the water out of
the
pump,
hose and gun with mineral spirits. Be sure to
close
the drain valve,
first. Use the lowest pressure
necessary to flush. Relieve pressure. Leave the
mineral
spirits in the pump to protect it
until you are
ready
to spray again.
CAUTION
18. Install
the plug (15) in the bottom of the pressure con
-
trol. Remove the gauge assembly and reinstall the
plug.
Flush out the water with mineral spirits.
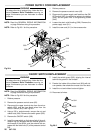
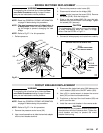
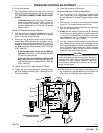
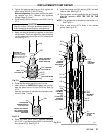
Fig 31–1
Q
P
B
72
INSERT
WRENCH HERE
T
O ADJUST NUT (T)
15
01243