


Repair
20 3A0149E
Repair
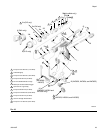
Repair Kits
NOTE:
• Seal Repair Kit 249422 is available. For best results,
use all the new parts in the kit. Kit parts are marked
with an asterisk, for example (7*).
• Plastic Seat Repair Kit 249424 and Carbide Seat
Repair Kit 249456 are available and can be used
with both Model G15 guns and Model G40 guns. For
best results, use all new parts in the kit. Kit parts are
marked with a symbol in the Parts list, for example
(5c†).
• Plastic Seat Kit 249424 is intended for low pressure
usage.
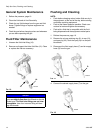
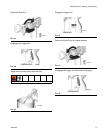
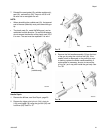
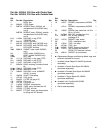
Fan Valve Replacement
1. Relieve the pressure, page 10.
2. Unscrew the fan valve packing nut (A) from the back
of the gun body (1). Slide the fan valve assembly (4)
out of the gun body. See F
IG. 34.
3. Before reinstalling, turn the pattern adjustment valve
(C) of the replacement fan valve assembly (4) com-
pletely counterclockwise to prevent damage to the
seat (5c). Install the replacement fan valve assem-
bly into the gun body (1). Screw the packing nut (A)
into the gun body and torque to 90 in-lb (10.5 N•m).
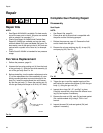
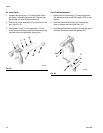
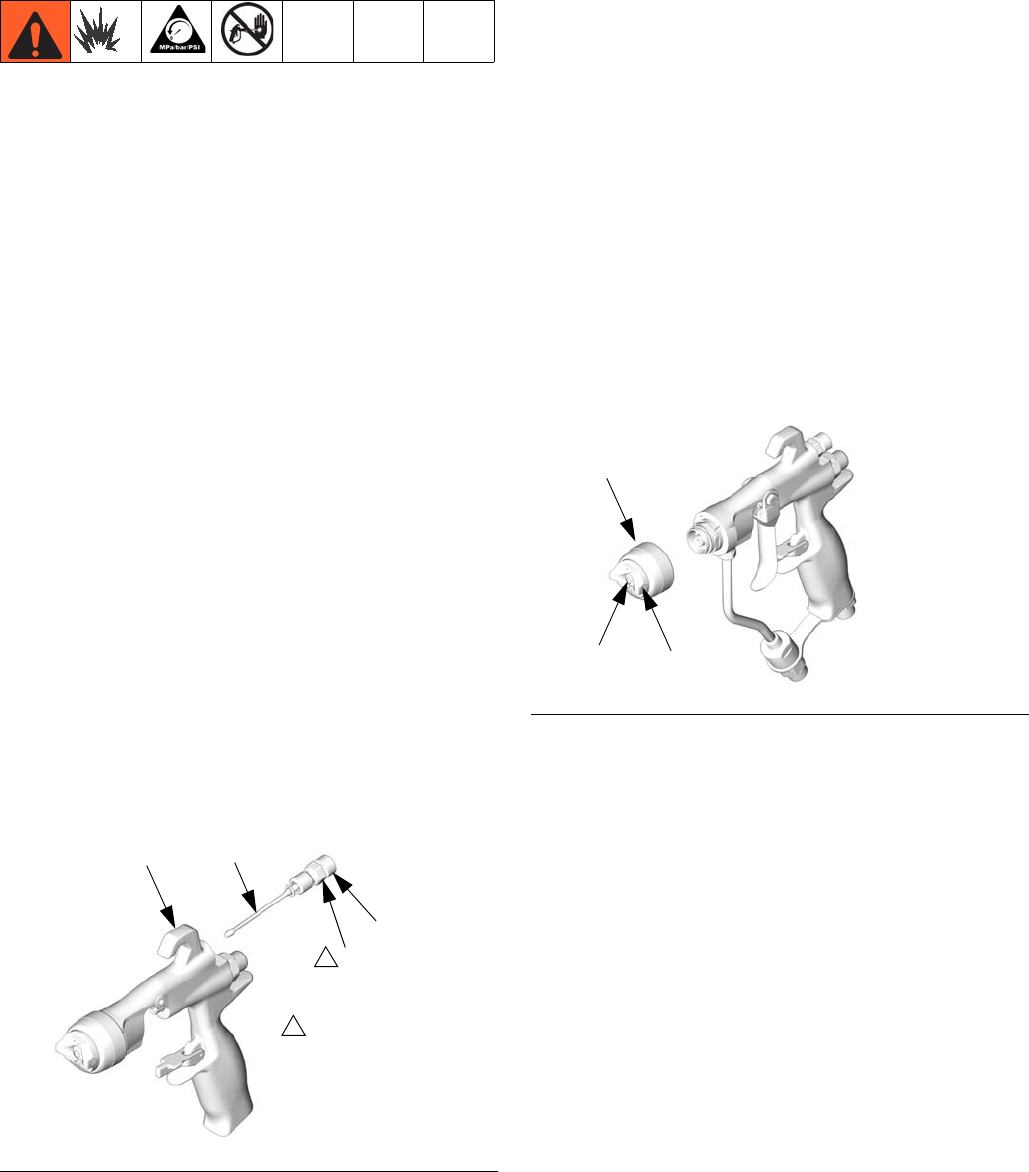
Complete Gun Packing Repair
Disassembly
Seat Repair
NOTE:
• See Repair Kits, page 20.
• Clean parts with a solvent that is compatible with
the parts and the fluid being sprayed.
1. Relieve the pressure, page 10. Remove the fluid
and air hoses from the gun.
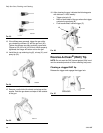
2. Remove the air cap retaining ring (6), air cap (21),
and spray tip (33). See F
IG. 35.
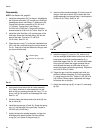
3. Trigger the gun to pull the needle housing off the
seat while you unscrew the diffuser (5) from the gun
body (1), using the gun tool (30).
4. Inspect the o-rings (5e*, 5f*, and 5g*) in place.
Carefully remove the o-rings from the diffuser hous-
ing (5a) and replace if necessary.
5. Remove the seat nut (5d), seat (5c) and seat gasket
(5b, carbide models only) using a 7/32 in. hex
wrench.
6. Inspect the seat (5c) and seat gasket (5b) and
replace if necessary.
FIG. 34
TI6576A
A
C
1
4
1
Torque to 90 in-lb
(10.5 N•m).
1
FIG. 35
TI6568A
21
33
6