


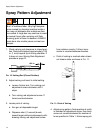

Repair
22 311320G
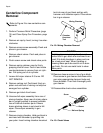
Centerline Component
Removal
1. Perform Pressure Relief Procedure (page
13) and Clean Spray Gun Procedure, page
18.
2. Remove air cap by hand, turning it counter-
clockwise.
3. Remove screen screw assembly. Flush and
place in gun cleaner.
4. Remove check valves. Flush and place in
gun cleaner.
5. Flush screen screw and check valve ports.
6. Remove spring retainer case by firmly
grasping knob of case. Push in and rotate
counterclockwise to remove from air cylin-
der. Pull spring out of air cylinder.
7. Loosen felt wiper retainer 2-3 turns. DO
NOT REMOVE.
8. Remove valving rod. Push back firmly on
piston rod until end of valving rod stop bar
emerges from cylinder.
9. Remove gun block from frame.
10.Unscrew felt wiper assembly from rear of
mixing chamber. Keep rear of mixing cham-
ber in upright position to prevent possible
loss of internal chamber parts. Ensure
brass retaining sleeve is not stuck to felt
wiper. Place wiper assembly in gun
cleaner.
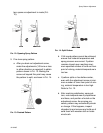
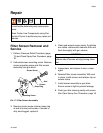
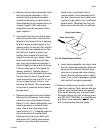
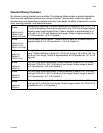
11.Remove mixing chamber. Hold gun block in
one hand with chamber tip pointing into
your palm. Insert mixing chamber knockout
tool into rear of gun block and tap with
hammer until chamber ejects. Place cham-
ber in gun cleaner.
FIG. 22: Mixing Chamber Removal
12.Remove closure screw in top of gun block.
Place screw in gun cleaner and clean entire
gun using appropriate cleanout tools and
brass brushes. Then flush thoroughly with
gun cleaner.
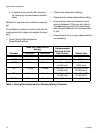
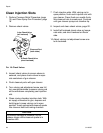
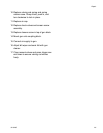
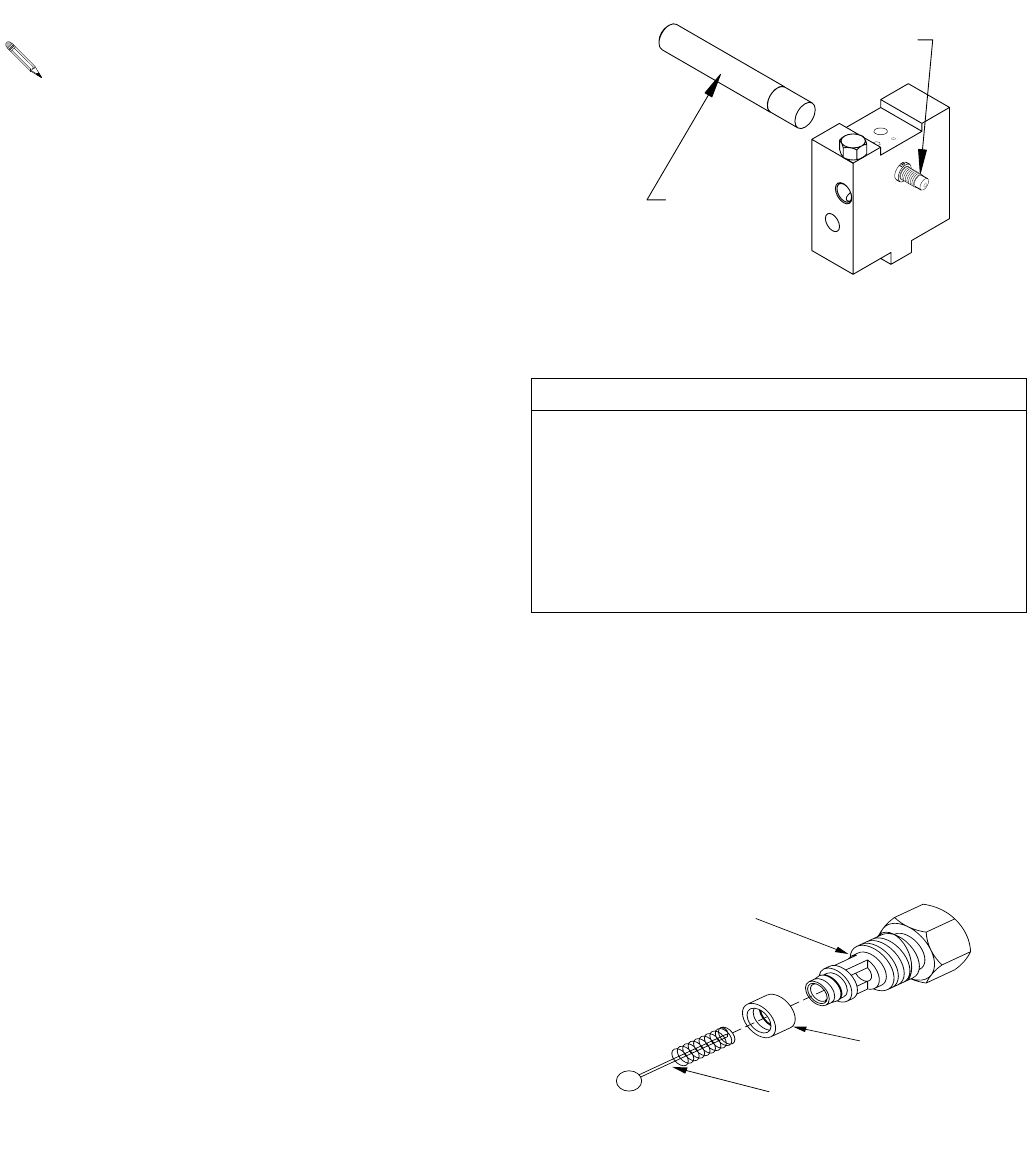
13.Disassemble check valve assemblies.
FIG. 23: Check Valves
Refer to Figure 2 to view centerline com-
ponents.
CAUTION
Matching tapers on mixing chamber and
center hole in gun block are machined to an
exact fit to hold chambers in place and cre-
ate a leak-proof seal. When handling or
cleaning these parts be careful not to dam-
age finish. Do not use metal tools to clean
these parts.
Mixing Chamber
Chamber
Knockout
Tool
Screw
Sleeve
Ball and Spring