


Service
313869B 25
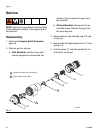
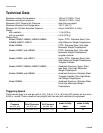
6. Use a 1/16 hex wrench to loosen the fluid
needle set screw (7a). Remove the needle
(6) from the piston (7).
7. Check the fluid needle (6) for damage or
excessive wear. Replace the needle if nec-
essary.
8. Use the 10 mm hex nut driver to remove
the fluid packing nut (2).
9. Use the 10 mm wrench to remove the
nozzle (4).
Reassembly
1. Lightly grease the new nozzle (4), which
includes o-ring (3). Use the 10 mm wrench
to install the nozzle. Torque to 155-165 in-lb
(18-19 N•m).
2. Install the new air cap assembly (5,
includes air cap, o-ring, washer, and align-
ment pin) and the retaining ring (21).
NOTE: Be sure to move the alignment pin if
you want a horizontal spray pattern. See Posi-
tion Air Cap, page 16.
3. Use the 10 mm hex nut driver to install new
fluid packing nut (2, includes o-ring).
Torque to 80 in-lb (9.0 N•m).
4. Insert the new needle (6) in the piston (7).
Apply medium-strength thread sealant to
the setscrew (7a). Use the 1/16 hex wrench
to torque the setscrew to 4.5 to 5.5 in-lb
(0.5 to 0.6 N•m).
5. Grease the needle shaft and piston o-ring.
Push the needle/piston assembly into the
gun as far as possible. Insert spring (10).
6. Turn counterclockwise to fully open the fluid
adjustment knob (11). Install the knob
hand-tight.
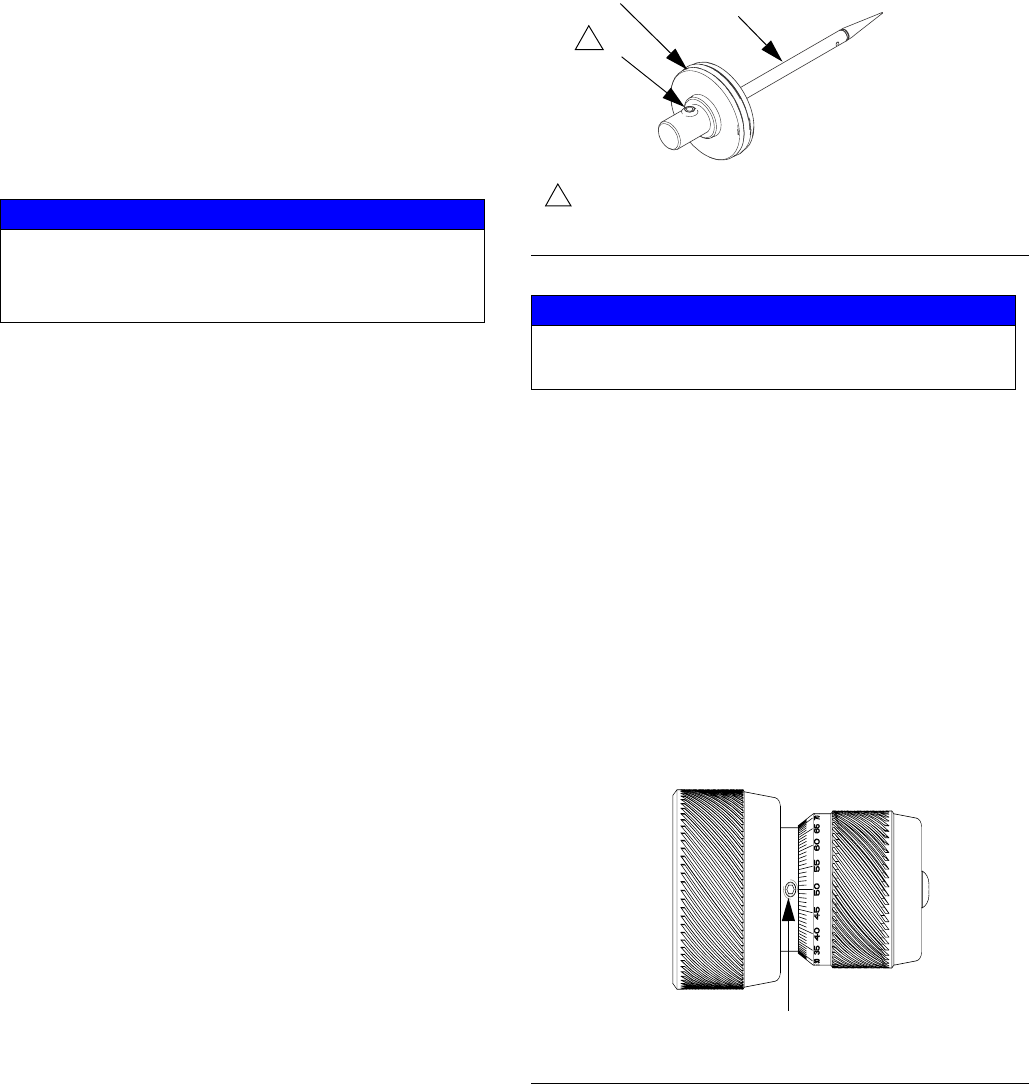
NOTE: If you have an ultra-precision fluid
adjustment knob, loosen the set screw to
adjust the position of the hash markings for
convenient reading.
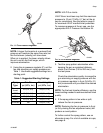
NOTICE
The needle and tip are permanently
bonded. To prevent damage to the needle,
do not try to separate.
FIG. 18
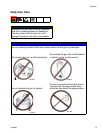
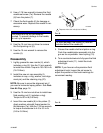
NOTICE
To avoid damage, the nozzle (4) must be
installed before the needle (6).
FIG. 19
7a
6
7
Torque to 4.5 to 5.5 in-lb (0.5 to 0.6 N•m).
1
1
ti14944a
ti14947a
Set screw