


- 6 -
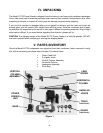
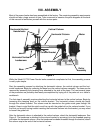
VIII. ASSEMBLY
Most of the power feeder has been assembled at the factory. The remaining assembly requirements
should not take a large amount of time. Take a moment to examine the parts diagrams at the back
of this manual to familiarize yourself with the various parts.
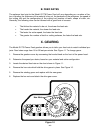
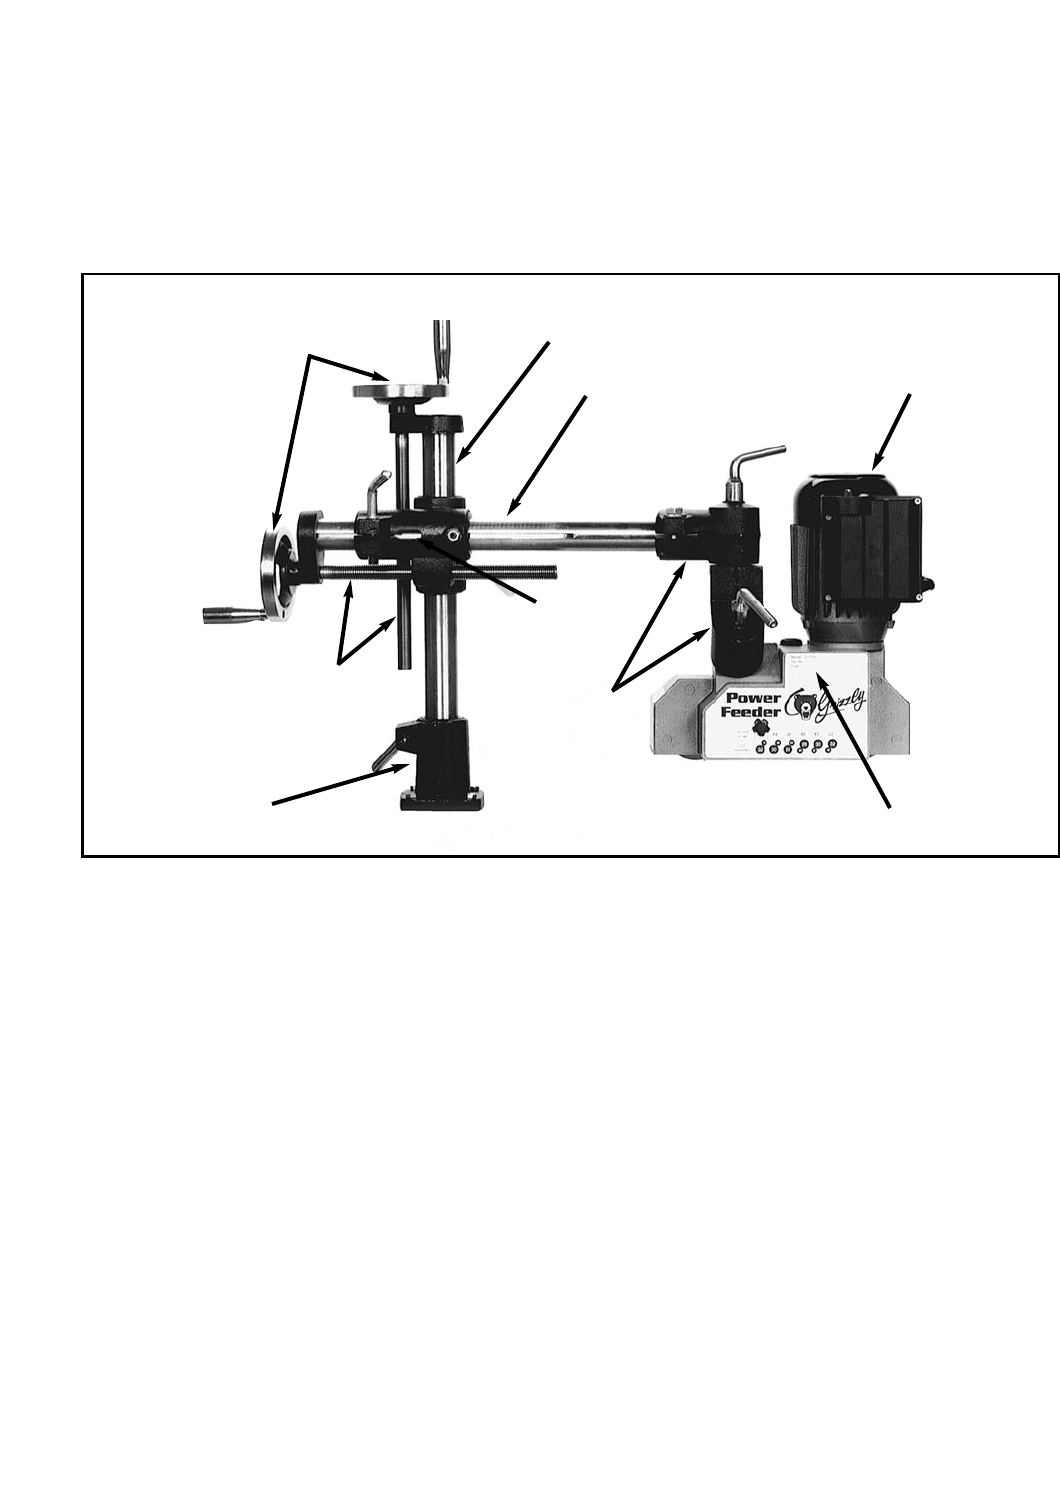
Base
Vertical Column
Roller
Assembly
Angle Brackets
Horizontal Column
Horizontal/Vertical
Handwheels
Motor
Horizontal/Vertical
Leadscrews
While the Model G1778 Power Feeder looks somewhat complicated at first, the assembly process
is really quite simple.
Start the assembly process by attaching the horizontal column, the vertical column and the hori-
zontal leadscrew. Begin by removing the base from the vertical column assembly. The base can be
removed by loosening the clamping lever attached to the side of the base. The next several steps
of the procedure are probably most easily accomplished by laying all of the parts out on a table or
workbench.
The first step of assembly requires attaching the horizontal column to the vertical column. Begin by
loosening the clamping lever on the column bracket. The horizontal column should slip easily
through the column bracket. The column must be inserted so the guide notch goes through the
bracket. Keep in mind that the notch must line up with the guide bolt on the column bracket. If you
find that you are still having trouble inserting the horizontal column into the bracket, you may need
to loosen the guide bolt.
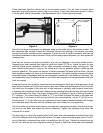
After the horizontal column is attached to the vertical column, attach the horizontal leadscrew. See
Figure 3. The leadscrew is attached to the column bracket by screwing it into the threaded opening
just below the horizontal column. After the leadscrew has been threaded through the bracket, attach
the column cap to the end of the horizontal column.
Figure 2
Column Bracket