


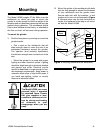


H3368 Grinder/Sander Combo -17-
The 2" sanding belt on the Model H3368 works
great for non-ferrous metals and wood products.
A wide variety of belts are also available for many
types of materials and stages of finishing.
Sanding
The sanding belt will remove large amounts
of material quickly, including your skin. DO
NOT touch the sanding belt and always
position your hands so they will not slip into
the belt or get caught in the belt.
6. Remove your workpiece regularly to check
the progress the sander has made.
Remember—you can always remove more
material but you cannot add it!
7. When you are finished sanding, move the red
switch to the OFF position. DO NOT continue
grinding and DO NOT manually stop the
sanding belt with your workpiece!
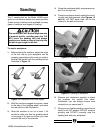
Figure 15. Sanding a workpiece.
Figure 16. Sanding a workpiece.
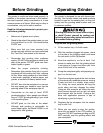
Figure 14. Examples of tool rest angles.
To sand a workpiece:
1. Before starting the machine, adjust the angle
of the tool rest so your workpiece can be
properly supported and the area you wish to
sand will be parallel with the sanding belt as
illustrated in Figure 14.
4. Grasp the workpiece tightly and properly sup-
port it on the tool rest.
5. Press the workpiece evenly against the sand-
ing belt with light pressure (see Figures 15
and 16). DO NOT press hard—let the the
rotation of the belt do the work
2. With the machine plugged into power, stand
to the side of the grinding wheel, and move
the red switch to the ON position.
3. Allow the machine to run for at least 1 full
minute to make sure that the grinding wheel
is not going to fly apart and injure you, then
move to the front of the machine.