


Model H8125 9.6V Mini Grinder Kit-12-
5. Slide the outer flex shaft up the inner
spindle and thread it firmly onto the
grinder.
6. Loosen the collet nut on the working
end of the flex shaft.
7. Insert a least
1
⁄2" of the desired bit into
the collet of the flex shaft.
Note: The flex shaft can be used with
the
1
⁄8" or the
1
⁄4" collet.
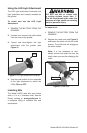
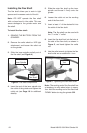
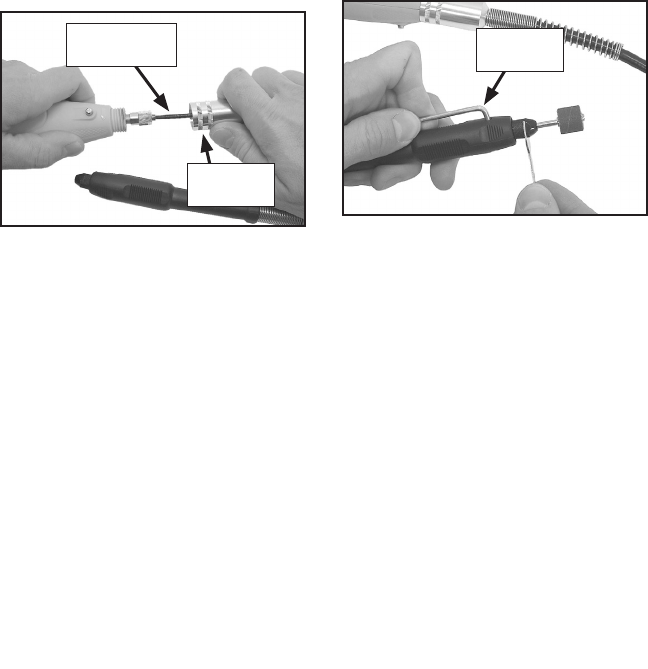
8. Insert the flex shaft tool into the hole at
the side of the flex shaft, as shown in
Figure 5, and hand tighten the collet
nut.
9. Use the collet wrench to tighten the flex
shaft collet nut an additional
1
⁄3 turn.
Figure 5. Tightening the flex shaft collet.
Note: The working end of the flex shaft has
a tendency to whip about when in opera
-
tion. Hold the working end of the flex shaft
FIRMLY before turning the grinder ON.
Installing the Flex Shaft
The flex shaft allows you to work in tight
spaces and increases control of the bit.
Note: DO NOT operate the flex shaft
with a sharp bend in the cable. This can
cause damage to the grinder motor and
flex shaft.
To install the flex shaft:
1. REMOVE THE BATTERY FROM THE
GRINDER!
2. Remove the collet shield or LED light
attachment, and loosen the collet nut
on the grinder.
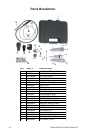
3. Slide the inner spindle partially out of
the flex shaft (see Figure 4).
4. Insert the end of the inner spindle into
the collet of the grinder and tighten the
collet nut (see Page 10 for additional
details).
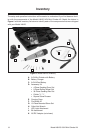
Flex Shaft
Inner Spindle
Figure 4. Flex shaft components.
Outer
Flex Shaft
Flex Shaft
Tool