


SKU 93351 For technical questions, please call 1-800-444-3353. Page 14
INSPECTION, MAINTENANCE, AND CLEANING
1. WARNING! Make sure the ON/OFF Knob (86) of the Air Compressor is
in its “OFF” position and the unit is unplugged from its electrical outlet before
performing any inspection, maintenance, or cleaning procedures.
2. Before each use, inspect the general condition of the Air Compressor. Check for
loose screws, misalignment or binding of moving parts, cracked or broken parts,
damage electrical wiring, loose air fittings, and any other condition that may affect
the safe operation of the Compressor. If abnormal noise or vibration occurs, have
the problem corrected before further use. Do not use damaged equipment.
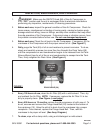
3. Before each use, Check the oil level in the Air Compressor. If necessary, fill the
crankcase of the Compressor with the proper amount of oil. (See Figure F.)
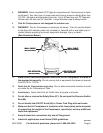
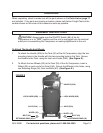
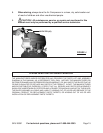
4. Daily, purge the Tank (50) of all air and moisture to prevent corrosion. To do so,
slowly and carefully unscrew (no more than four threads) the Drain Valve (59)
until the compressed air and condensation begins to be released from the Tank.
Allow sufficient time for all of the air and condensation to escape from the Tank.
Then, firmly retighten the Drain Valve. (See Figure I.)
BOTTOM
OF TANK
(50)
DRAIN VALVE (59)
FIGURE I
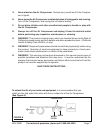
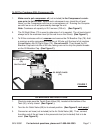
5. Every 100 hours of use, clean the Air Filter (85) with a mild solvent. Then, dry
and reattach the Air Filter. NOTE: If necessary, replace the Air Filter if it is too
dirty to properly clean. (See Figure J, next page.)
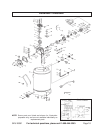
6. Every 500 hours or 12 months, replace the old compressor oil with new oil. To
do so, unscrew and remove the Flange Head Bolt (20) located at the bottom of
the crankcase (15). Allow the old oil to drain from the crankcase into a proper
receptacle. Once drained, replace the Flange Head Bolt. Then, refill the
crankcase to its proper oil level. (See Assy. Diagram.)
7. To clean, wipe with a damp cloth, using a mild detergent or mild solvent.
REV 05/06