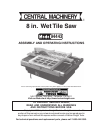
SKU 94443
For technical questions, please call 1-800-444-3353
Page 11
Maintenance
Draining the Water and Cleaning the Saw.
1) Unplug the tool. Move it to a location where it will be safe to drain the Water Tank (31), or position a
container under the Overflow Plug (53).
2) Open the access port on the cover right above the Overflow Plug. Pull the Overflow Plug (53) out of
the bottom of the Water Tank (31).
3) Open the Access Cover (41) and pour in approximately 2 quarts of clean water. Swish the clean water
throughout the Water Tank to clean it. Use a plastic scraper to dislodge any material deposited on the
bottom or sides of the tank. Allow the dirty water to run out of the opening left by removal of the
Overflow Plug. Repeat cleaning as necessary.
4) Using a clean damp rag, wipe off the top and sides of the tool. Clean out the Overfill Plug.
5) Replace the Overflow Plug in the bottom of the Water Tank. If the Support Rod (52) has been used,
replace it in its storage position under the Access Cover (41). Close all access covers on top of the
tool. Return the Sliding Table to its forward position, and move the Locking Switch (54) to the “Lock”
position. Return the Support Bar (50) to its forward position.
6) Wind up the Power Cord (10) and store the Saw in a safe place.
Troubleshooting
1) Does not make a straight cut:
a) Check blade to be sure it is on tight.
b) Be sure work piece is held firmly and squarely against fence on back edge of Sliding Table.
2) Motor does not work:
a) Check power source. Be sure Power Cord is plugged in and circuit is live.
b) Check condition of Power Cord.
c) Be sure Power Switch is functioning properly.
3) Tool vibrates excessively during operation:
a) Check to be sure Blade is properly installed and Locking Arbor Nut is tight.
b) Check to be sure blade is not damaged, chipped or warped.
4) Slow cutting or slow operation speed:
a) Stop work and allow the motor to cool off for at least 20 minutes.
b) Install a new blade and try again.


